
Introduction
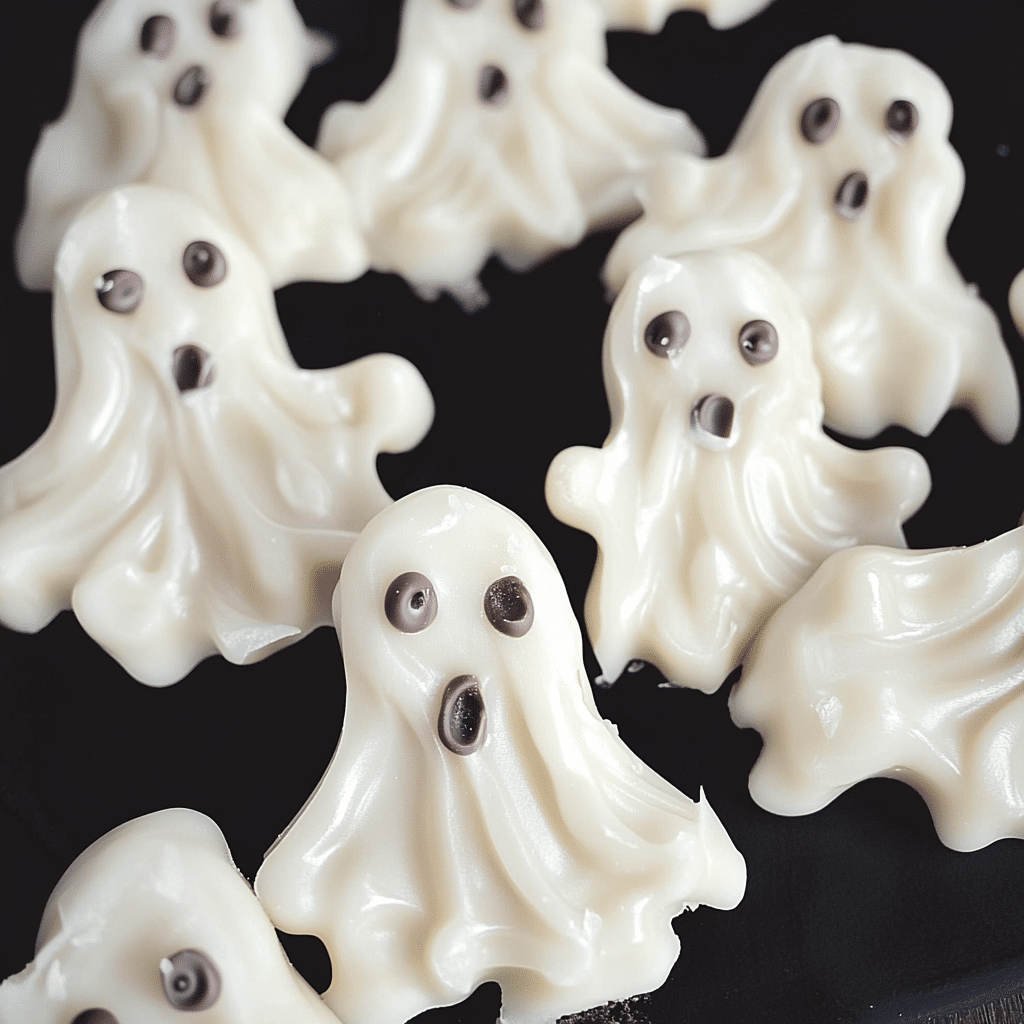
As Halloween approaches, the air fills with excitement and the promise of sweet treats! One of my favorite ways to celebrate this festive season is by making adorable white chocolate ghosts. These little guys are not only super cute but also incredibly easy to whip up. With just a few simple ingredients, you can create a delightful treat that’s perfect for parties, trick-or-treaters, or even just a fun afternoon activity with the kids.
I remember the first time I made these white chocolate ghosts with my niece. We melted the chocolate, dipped the marshmallows, and had a blast decorating them with edible eyes. It quickly became a tradition in our household, and now we look forward to making them every Halloween. They’ve become a staple in our celebrations, and I can’t help but smile when I think about how much joy these little treats have brought us over the years. They’re a sweet reminder that sometimes the simplest treats can bring the most joy!
What’s fantastic about these pretzel bites is not only their flavor but also how simple they are to make. With just a few ingredients and some easy steps, you can create a delightful snack that will impress your friends and family. Trust me, once you try these, they’ll be a go-to treat for all your fall festivities!
Why You’ll Love This Recipe
- Quick and Easy: These ghosts can be made in about 30 minutes with minimal effort. They’re perfect for last-minute gatherings or spontaneous sweet cravings.
- Kid-Friendly: Perfect for little hands to help with, making them a fun family activity. Kids love to get involved, whether it’s dipping, decorating, or simply enjoying the process of creating something fun.
- Adorable Presentation: They’re cute and spooky, making them a hit at any Halloween gathering. Just imagine a platter filled with these whimsical ghosts—your guests will be snapping photos before they even take a bite!
- Customizable: You can switch up the decorations to create different ghostly faces or even add other fun Halloween themes. Use different colored chocolates for variety, or try adding festive sprinkles to suit the occasion.
- Deliciously Sweet: Who doesn’t love the combination of fluffy marshmallows and creamy white chocolate? The smooth, sweet chocolate perfectly complements the light and airy marshmallow, creating a delightful contrast in texture.
Preparation Time and Servings
- Total Time: About 30 minutes
- Servings: Makes approximately 12-15 ghosts
- Nutrition Facts: Approximately 100 calories per ghost, 1g protein, 15g carbs.
Ingredients
Here’s what you’ll need to create your adorable white chocolate ghosts:
- 1 bag of large marshmallows: These serve as the base for your ghosts and give them their fluffy appearance. Choose fresh marshmallows for the best texture and taste.
- 1 cup of white chocolate chips: You’ll melt these to coat the marshmallows, creating a delicious, sweet exterior. You can also use white chocolate bars; just chop them into smaller pieces for melting.
- Edible black eyes: You can use candy eyes or mini chocolate chips for decorating the ghosts’ faces. These little details bring your ghosts to life!
- Black icing or chocolate (optional): For adding details like mouths or additional spooky expressions. Use a piping bag for precision, or a toothpick for fun designs.
Step-by-Step Instructions
Ready to create your ghostly treats? Here’s how to make them step-by-step:
- Prepare Your Workspace: Start by lining a baking sheet with parchment paper. This will prevent the ghosts from sticking and make cleanup easier. Having a clean and organized workspace makes the process smoother and more enjoyable.
- Melt the White Chocolate: In a microwave-safe bowl, heat the white chocolate chips in 30-second intervals, stirring in between until fully melted and smooth. Be careful not to overheat; it should be creamy and pourable. You can also melt the chocolate using a double boiler for a more controlled melting process.
- Dip the Marshmallows: Holding a marshmallow by the stick (or your fingers), dip it into the melted white chocolate, ensuring it’s completely coated. Allow any excess chocolate to drip off. A good trick is to gently twist the marshmallow as you lift it out of the chocolate for a smoother coating.
- Place on Parchment: Carefully place the coated marshmallow on the prepared baking sheet. Space them out so they don’t stick together while they set.
- Add Eyes: While the chocolate is still wet, place two edible eyes on each ghost. You can also use mini chocolate chips for this step. If you want a more expressive ghost, feel free to get creative with the placement!
- Create Mouths (Optional): If you’d like, use black icing or melted chocolate to add little mouths or additional facial features. Get creative—make them spooky or silly! You can even let the kids design their own ghost faces.
- Let Them Set: Allow the ghosts to sit at room temperature or in the refrigerator until the chocolate hardens. This should take about 15-20 minutes. While you wait, it’s a great time to clean up your workspace and prepare for the next batch!
- Serve and Enjoy: Once set, your adorable white chocolate ghosts are ready to be enjoyed! Serve them at your Halloween party, or package them up for a sweet gift. They make perfect treats for classroom parties, neighborhood gatherings, or even just a fun dessert at home.
How to Serve
These white chocolate ghosts are perfect for any Halloween occasion. Here are a few fun serving ideas:
- Halloween Treat Bags: Package them in clear bags with festive ribbons for a cute party favor. Kids will love receiving these sweet surprises!
- On a Dessert Table: Arrange them on a spooky-themed dessert table alongside other treats like cookies and cupcakes. Add some decorative elements like fake cobwebs or mini pumpkins to set the mood.
- With Hot Cocoa: Serve these ghosts with cups of hot cocoa for a delightful fall treat. They can even float on top of the cocoa for a whimsical touch!
Additional Tips
To make sure your white chocolate ghosts turn out perfectly, consider these helpful tips:
- Use Good Quality Chocolate: Choose high-quality white chocolate chips for the best flavor and melting consistency. Brands like Ghirardelli or Callebaut provide great results.
- Don’t Rush the Melting: Melt the chocolate slowly to prevent it from seizing. Stirring in between heating intervals helps maintain a smooth texture. If the chocolate starts to thicken, a small splash of vegetable oil can help loosen it up.
- Keep the Marshmallows Fresh: Make sure your marshmallows are fresh for the best texture. Older marshmallows can be hard and not as fluffy. If you can, buy marshmallows just before you plan to make the ghosts.
- Decorate While Wet: Add the edible eyes and other decorations while the chocolate is still melted to ensure they stick well. If you wait too long, the chocolate can harden, and the decorations won’t adhere properly.
- Store Properly: Store any leftovers in an airtight container at room temperature. They’ll stay fresh for a few days, though they’re likely to disappear much faster! You can also store them in the fridge if you prefer a chilled treat.
Recipe Variations
The beauty of these ghostly treats is their versatility! Here are some fun variations to try:
- Chocolate Coated Ghosts: Instead of white chocolate, use milk or dark chocolate for a different flavor profile. This twist adds a richer taste that chocolate lovers will appreciate.
- Colorful Ghosts: Add food coloring to the white chocolate for vibrant, colorful ghosts! You can create a rainbow of spooky spirits to brighten up your Halloween spread.
- Stuffed Marshmallows: Try stuffing the marshmallows with peanut butter or chocolate before dipping them for a surprise filling. This adds a delicious surprise element that will have everyone coming back for more.
- Halloween Sprinkles: Before the chocolate sets, sprinkle on Halloween-themed sprinkles for an extra festive touch. These tiny details make a big difference in presentation!
Serving Suggestions
To complement your white chocolate ghosts, consider these fun side treats and beverages:
- Crispy Rice Treats: Make a batch of crispy rice treats cut into spooky shapes for a fun dessert platter. You can even mold them into Halloween-themed shapes like pumpkins or bats.
- Halloween Punch: Serve with a spooky punch or sparkling cider for a festive drink pairing. Add gummy worms or floating fruit for extra flair.
- Pumpkin Flavored Snacks: Pair with pumpkin-flavored cookies or mini pumpkin muffins for a themed dessert spread. This creates a cozy, autumnal vibe that everyone will love.
Freezing and Storage
If you happen to have any ghosts left over (which is unlikely!), here’s how to store or freeze them:
- Storage: Keep your white chocolate ghosts in an airtight container at room temperature for up to 3 days. They make great snacks for the kids to grab after school.
- Freezing: You can freeze them for up to a month! Just place them in a single layer on a baking sheet to freeze before transferring them to a freezer-safe bag. When ready to enjoy, let them thaw at room temperature. They’re a fun treat to have on hand!
Special Equipment
You won’t need much equipment for this treat, but here are a couple of handy items that can help:
- Microwave-Safe Bowl: For melting your chocolate. If you prefer using a double boiler, that works too!
- **Parchment Paper**: To line your baking sheet and prevent sticking. It makes cleanup a breeze!
- Skewers or Lollipop Sticks: If you want to create a cute ghost-on-a-stick presentation. Kids especially love eating treats on a stick!
FAQ Section
Can I use regular chocolate instead of white chocolate?
Absolutely! Dark or milk chocolate will work just as well, giving you a different flavor. You can even combine different chocolates for a unique look!
What if my chocolate isn’t melting smoothly?
If your chocolate seizes or gets too thick, try adding a small amount of vegetable oil to help smooth it out. Stir it well to incorporate the oil.
How can I make these vegan?
Use vegan marshmallows and dairy-free white chocolate chips to make these treats suitable for a vegan diet. There are many delicious options available in stores now!
Can I make these ahead of time?
Yes! You can prepare them a day in advance and store them in an airtight container until you’re ready to serve. This is especially helpful for busy Halloween days.
What if I don’t have edible eyes?
You can use mini chocolate chips or even draw eyes with melted chocolate if you have a piping bag. Get creative with whatever you have on hand!
Conclusion
I can’t wait for you to try making these adorable white chocolate ghosts! They’re not only a fun and festive treat, but they also bring a smile to everyone’s face. Perfect for parties, cozy nights at home, or just a little Halloween cheer, these ghosts are sure to be a hit!
Once you’ve made them, I’d love to see your creations! Snap a photo and tag me on Instagram—I get so excited to see your spooky snacks. Happy Halloween, and enjoy every bite of these delightful treats! With every ghost you make, remember that the joy of creating and sharing these sweets is what truly makes this time of year special. Enjoy making memories with your loved ones, and happy haunting!
Print
Adorable White Chocolate Ghosts: A Spooky Treat for Halloween
- Total Time: 30 minutes
Ingredients
- 1 bag of large marshmallows: These serve as the base for your ghosts and give them their fluffy appearance. Choose fresh marshmallows for the best texture and taste.
- 1 cup of white chocolate chips: You’ll melt these to coat the marshmallows, creating a delicious, sweet exterior. You can also use white chocolate bars; just chop them into smaller pieces for melting.
- Edible black eyes: You can use candy eyes or mini chocolate chips for decorating the ghosts’ faces. These little details bring your ghosts to life!
- Black icing or chocolate (optional): For adding details like mouths or additional spooky expressions. Use a piping bag for precision, or a toothpick for fun designs.
Instructions
- Prepare Your Workspace: Start by lining a baking sheet with parchment paper. This will prevent the ghosts from sticking and make cleanup easier. Having a clean and organized workspace makes the process smoother and more enjoyable.
- Melt the White Chocolate: In a microwave-safe bowl, heat the white chocolate chips in 30-second intervals, stirring in between until fully melted and smooth. Be careful not to overheat; it should be creamy and pourable. You can also melt the chocolate using a double boiler for a more controlled melting process.
- Dip the Marshmallows: Holding a marshmallow by the stick (or your fingers), dip it into the melted white chocolate, ensuring it’s completely coated. Allow any excess chocolate to drip off. A good trick is to gently twist the marshmallow as you lift it out of the chocolate for a smoother coating.
- Place on Parchment: Carefully place the coated marshmallow on the prepared baking sheet. Space them out so they don’t stick together while they set.
- Add Eyes: While the chocolate is still wet, place two edible eyes on each ghost. You can also use mini chocolate chips for this step. If you want a more expressive ghost, feel free to get creative with the placement!
- Create Mouths (Optional): If you’d like, use black icing or melted chocolate to add little mouths or additional facial features. Get creative—make them spooky or silly! You can even let the kids design their own ghost faces.
- Let Them Set: Allow the ghosts to sit at room temperature or in the refrigerator until the chocolate hardens. This should take about 15-20 minutes. While you wait, it’s a great time to clean up your workspace and prepare for the next batch!
- Serve and Enjoy: Once set, your adorable white chocolate ghosts are ready to be enjoyed! Serve them at your Halloween party, or package them up for a sweet gift. They make perfect treats for classroom parties, neighborhood gatherings, or even just a fun dessert at home.
- Prep Time: 15 minutes
Nutrition
- Serving Size: Per Ghost
- Calories: 100 kcal
- Carbohydrates: 15g
- Protein: 1g


