
Introduction
There’s nothing quite like the aroma of a freshly baked apple pie wafting through your kitchen, especially during the Thanksgiving season. This timeless dessert is a staple that brings warmth and nostalgia to family gatherings. Imagine the joy on your guests’ faces when they take a bite of your perfectly spiced apple filling nestled in a flaky, buttery crust. This recipe for the Best Apple Pie will not only satisfy your sweet tooth but also create cherished memories around the table.
I discovered this classic recipe after years of experimenting with different variations, and it quickly became a family favorite. With its balance of sweet and tart flavors, this apple pie is the epitome of comfort food. Plus, it’s surprisingly easy to make! Whether you’re a seasoned baker or a novice, this pie will impress your friends and family alike. Let’s dive into why you’ll love this recipe and how to make it flawlessly!
Why You’ll Love This Recipe
- Simple Ingredients: With just a handful of ingredients, you can create a pie that tastes like it came from a bakery.
- Classic Flavor: The combination of sweet apples, warm spices, and a buttery crust is unbeatable.
- Customizable: You can easily adjust the sweetness or spice level to suit your taste preferences.
- Perfect for Any Occasion: While it’s a Thanksgiving staple, this pie is delicious year-round.
- Make-Ahead Friendly: You can prepare the pie in advance and bake it just before serving.
Preparation Time and Servings
- Total Time: 2 hours (30 minutes prep, 1 hour cooking, 30 minutes cooling)
- Servings: This recipe serves 8 people.
- Nutrition Facts: Calories per slice: 300, Protein: 2g, Carbs: 45g, Fat: 14g.
Ingredients
For the Pie Crust
- 2 ½ cups all-purpose flour: The base for a flaky crust.
- 1 cup unsalted butter, chilled and cubed: Provides richness and flakiness.
- 1 teaspoon salt: Enhances the flavor of the crust.
- 1 tablespoon sugar: Adds a touch of sweetness.
- 6–8 tablespoons ice water: Helps bind the dough together.
For the Apple Filling
- 6–8 cups apples, peeled, cored, and sliced (about 6-8 medium apples): A mix of Granny Smith and Honeycrisp works well for flavor and texture.
- ¾ cup sugar: Adjust according to your sweetness preference.
- 2 tablespoons all-purpose flour: Thickens the filling.
- 1 teaspoon cinnamon: Adds warmth and spice.
- ¼ teaspoon nutmeg: Enhances the flavor profile.
- 1 tablespoon lemon juice: Balances the sweetness and prevents browning.
- 1 tablespoon butter, cut into small pieces: To dot on top of the filling before baking.
Step-by-Step Instructions
STEP 1: CRUST
- Combine Dry Ingredients: In a large bowl, whisk together the flour, salt, and sugar.
- Cut in the Butter: Add the chilled, cubed butter to the flour mixture. Use a pastry cutter or your fingers to work the butter into the flour until it resembles coarse crumbs.
- Add Ice Water: Gradually add ice water, one tablespoon at a time, mixing gently with a fork until the dough comes together. Be careful not to overmix.
- Chill the Dough: Divide the dough in half, shape each half into a disk, wrap in plastic wrap, and refrigerate for at least 1 hour. This resting time is crucial as it allows the gluten to relax, leading to a more tender crust.
STEP 2: APPLE FILLING
- Slice the Apples: Peel, core, and slice the apples into thin wedges. Aim for uniform sizes for even cooking.
- Mix Filling Ingredients: In a large bowl, combine the sliced apples with sugar, flour, cinnamon, nutmeg, and lemon juice. Toss until the apples are evenly coated. Let it sit for about 15 minutes to allow the flavors to meld and the apples to release some juices.
STEP 3: ROLL OUT THE CRUST
- Prepare Your Work Surface: Lightly flour your work surface and rolling pin.
- Roll the Dough: Take one disk of dough from the refrigerator. Roll it out into a circle about 12 inches in diameter. It should be about 1/8 inch thick. Transfer the rolled-out dough to a 9-inch pie pan, pressing gently to fit.
- Trim the Edges: Leave a bit of overhang and trim the edges as needed, making sure to reserve some dough for the top crust.
STEP 4: FILL THE PIE
- Add the Apple Filling: Pour the prepared apple filling into the crust, making sure to distribute it evenly.
- Dot with Butter: Sprinkle the small pieces of butter over the filling. This will add richness and flavor as the pie bakes.
STEP 5: TOP CRUST
- Roll Out the Second Disk: Repeat the rolling process with the second disk of dough.
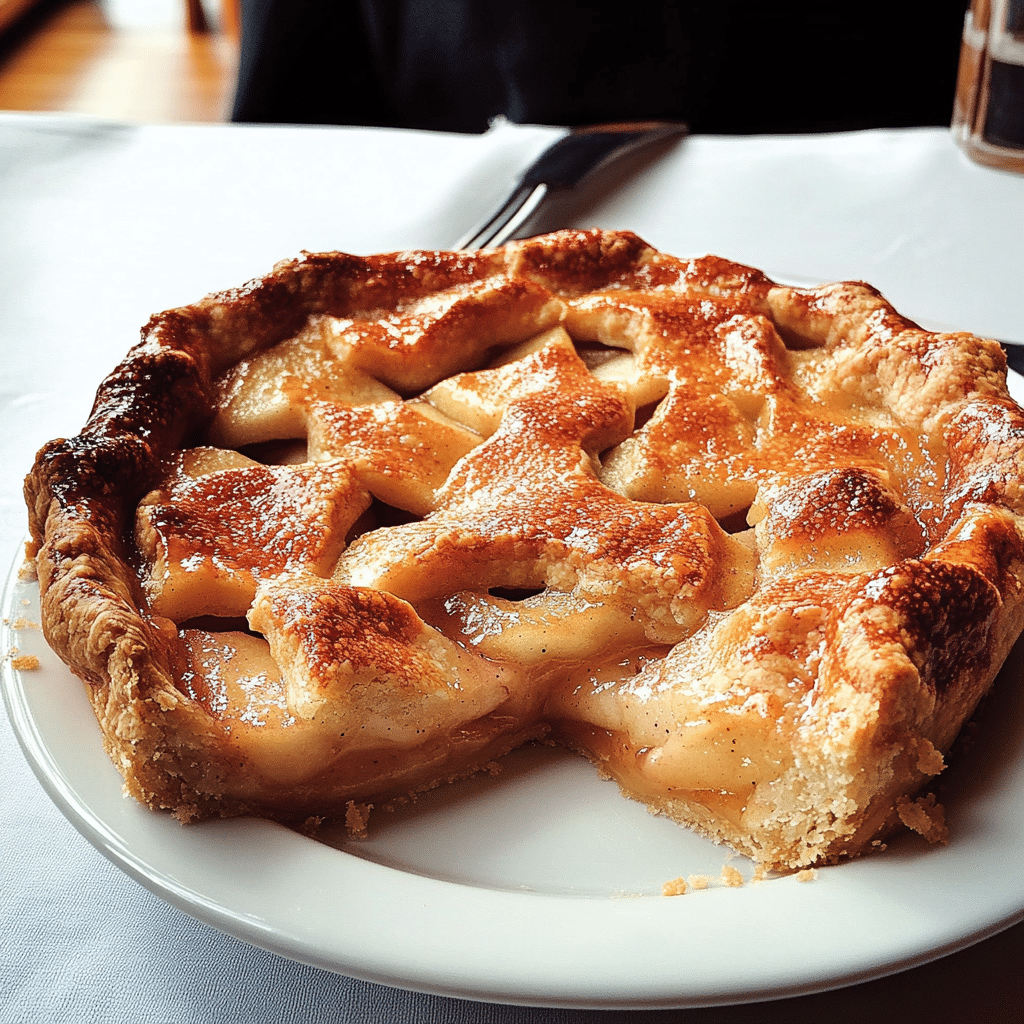
- Place Over the Filling: Carefully lay the second crust over the filled pie. If you’d like, cut slits in the top crust to create a lattice effect or simply leave it whole for a classic look.
- Seal the Edges: Press the edges of the top and bottom crusts together to seal. You can crimp the edges with a fork or pinch them for a decorative touch.
- Brush with Egg Wash: Optional, but recommended! Beat an egg and brush it over the top crust for a golden finish.
STEP 6: BAKE
- Preheat the Oven: Preheat your oven to 425°F (220°C).
- Bake the Pie: Place the pie in the preheated oven on the center rack. Bake for 15 minutes, then reduce the temperature to 350°F (175°C) and continue baking for another 30–35 minutes, or until the apples are tender and the crust is golden brown.
- Check for Doneness: If the edges of the crust start to brown too quickly, cover them with foil to prevent burning. The pie is done when the filling is bubbling through the slits and the crust is a beautiful golden brown.
STEP 7: COOL AND SERVE
- Cool the Pie: Once baked, remove the pie from the oven and let it cool for at least 30 minutes before slicing. This cooling time allows the filling to set, making it easier to slice and serve.
- Serve: Enjoy your pie warm, optionally with a scoop of vanilla ice cream or a dollop of whipped cream.
How to Serve
- A La Mode: Serve warm slices topped with vanilla ice cream for a comforting treat. The contrast of warm pie and cold ice cream is simply delightful.
- With Whipped Cream: A dollop of freshly whipped cream adds a light, airy finish that complements the pie’s rich flavors.
- Pair with Coffee or Tea: Enjoy a slice with your favorite hot beverage for a delightful dessert experience.
- Garnish with Caramel Sauce: Drizzling some caramel sauce over the top can add a lovely touch of sweetness.
Additional Tips
- Choose the Right Apples: Use a mix of sweet and tart apples for a balanced flavor. Granny Smith and Honeycrisp are excellent choices, but feel free to experiment with varieties like Fuji, Braeburn, or Golden Delicious.
- Don’t Skip the Lemon Juice: It helps maintain the apples’ color and adds brightness to the filling.
- Let the Filling Drain: If the filling is too watery after resting, drain excess liquid before adding it to the pie to prevent a soggy bottom.
- Make It Ahead: You can prepare the pie a day in advance and bake it the day you plan to serve it. It also tastes great the next day!
- Store Properly: Keep leftovers in an airtight container at room temperature for up to 2 days, or in the fridge for up to 5 days. Reheat slices in the oven for the best texture.
Recipe Variations
- Caramel Apple Pie: Drizzle caramel sauce over the apples before covering with the crust for an extra indulgent treat. You can even add chopped pecans for added texture and flavor.
- Spiced Apple Pie: Add a pinch of ginger or allspice for a warm, spiced flavor profile that elevates the classic recipe.
- Crispy Topping: Instead of a top crust, sprinkle a crumb topping made of oats, flour, butter, and brown sugar for a crunchy finish.
- Maple Apple Pie: Substitute half the sugar with maple syrup for a unique flavor twist that complements the apples beautifully.
- Bourbon Apple Pie: For adults, adding a splash of bourbon to the filling can enhance the depth of flavor.
- Nutty Apple Pie: Incorporate chopped nuts like walnuts or pecans into the filling for a delightful crunch.
Serving Suggestions
- Side Dishes: Pair with a cheese platter or nuts for a balanced dessert spread. Cheddar cheese is a classic pairing with apple pie.
- Beverage Pairing: Serve with cider, coffee, or a spiced chai for a cozy finish. A glass of sweet dessert wine also pairs beautifully.
- Family-Friendly: Kids love apple pie, making it a great dessert for family gatherings. Consider serving slices over buttered noodles for a playful twist.
Freezing and Storage
- Storage: Store leftovers in an airtight container at room temperature for up to 2 days, or in the refrigerator for up to 5 days.
- Freezing: Unbaked pies can be frozen for up to 3 months. Wrap tightly in plastic wrap and aluminum foil to prevent freezer burn.
- Reheating: To reheat, bake in a 350°F (175°C) oven for about 20 minutes, covered with foil to keep it moist. You can also microwave individual slices for a quick treat.
Special Equipment
- 9-Inch Pie Pan: Essential for baking the pie to perfection. A glass or ceramic pan is recommended for even baking.
- Pastry Cutter: Useful for cutting butter into the flour for a flaky crust. If you don’t have one, two forks or your fingers will work too.
- Rolling Pin: Necessary for rolling out the dough evenly. A marble rolling pin retains coolness, helping to keep the butter from melting.
- Sharp Knife: For peeling and slicing the apples. A mandoline can also help achieve uniform slices if you have one.
FAQ Section
Can I use pre-made pie crusts?
Yes, store-bought pie crusts can save time, and they work well if you’re short on time. Just ensure you follow the baking instructions on the package.
What apples are best for pie?
A mix of sweet and tart apples like Granny Smith, Honeycrisp, and Fuji gives the best flavor and texture. Aim for a balance of firmness and sweetness.
Can I make the filling ahead of time?
Absolutely! You can prepare the apple filling a day in advance and store it in the refrigerator until you’re ready to bake. This can help deepen the flavors.
How do I know when the pie is done?
The pie is done when the crust is golden brown and the filling is bubbling. A knife should easily pierce through the apples, indicating they are tender.
Can I add nuts to the filling?
Yes! Chopped walnuts or pecans can add a delightful crunch to the filling. Just be sure to adjust the sugar if you’re using sweetened nuts.
Conclusion
I hope you’re excited to try this Best Apple Pie recipe! It’s a dish that embodies the essence of Thanksgiving, bringing warmth and joy to your holiday celebrations. Whether for a special occasion or a cozy family dinner, this pie will surely impress.
Don’t forget to share your results! I can’t wait to see how your apple pie turns out—be sure to leave a comment or tag me on social media with your delicious creations. Happy baking!
Print
Best Apple Pie: A Thanksgiving Classic
- Total Time: 2 hours
Description
Experience the epitome of comfort with a slice of homemade apple pie, a dessert that evokes nostalgia and joy with every bite. Picture a perfectly baked, flaky crust cradling a generous filling of tart and sweet apples, infused with warm spices like cinnamon and nutmeg. As you take your first bite, the aroma of baked apples mingles with the buttery crust, creating a heavenly sensation that’s hard to resist. This beloved classic is more than just a dessert; it’s a celebration of cherished moments shared with family and friends. Whether served à la mode with a scoop of vanilla ice cream or enjoyed on its own, apple pie is the perfect ending to any meal. Treat yourself to this timeless delight, and let its comforting flavors transport you to simpler times, where love and laughter are served by the slice.
Ingredients
For the Pie Crust
- 2 ½ cups all-purpose flour: The base for a flaky crust.
- 1 cup unsalted butter, chilled and cubed: Provides richness and flakiness.
- 1 teaspoon salt: Enhances the flavor of the crust.
- 1 tablespoon sugar: Adds a touch of sweetness.
- 6–8 tablespoons ice water: Helps bind the dough together.
For the Apple Filling
- 6–8 cups apples, peeled, cored, and sliced (about 6–8 medium apples): A mix of Granny Smith and Honeycrisp works well for flavor and texture.
- ¾ cup sugar: Adjust according to your sweetness preference.
- 2 tablespoons all-purpose flour: Thickens the filling.
- 1 teaspoon cinnamon: Adds warmth and spice.
- ¼ teaspoon nutmeg: Enhances the flavor profile.
- 1 tablespoon lemon juice: Balances the sweetness and prevents browning.
- 1 tablespoon butter, cut into small pieces: To dot on top of the filling before baking.
Instructions
STEP 1: PREPARE THE PIE CRUST
- Combine Dry Ingredients: In a large bowl, whisk together the flour, salt, and sugar.
- Cut in the Butter: Add the chilled, cubed butter to the flour mixture. Use a pastry cutter or your fingers to work the butter into the flour until it resembles coarse crumbs.
- Add Ice Water: Gradually add ice water, one tablespoon at a time, mixing gently with a fork until the dough comes together. Be careful not to overmix.
- Chill the Dough: Divide the dough in half, shape each half into a disk, wrap in plastic wrap, and refrigerate for at least 1 hour. This resting time is crucial as it allows the gluten to relax, leading to a more tender crust.
STEP 2: PREPARE THE APPLE FILLING
- Slice the Apples: Peel, core, and slice the apples into thin wedges. Aim for uniform sizes for even cooking.
- Mix Filling Ingredients: In a large bowl, combine the sliced apples with sugar, flour, cinnamon, nutmeg, and lemon juice. Toss until the apples are evenly coated. Let it sit for about 15 minutes to allow the flavors to meld and the apples to release some juices.
STEP 3: ROLL OUT THE CRUST
- Prepare Your Work Surface: Lightly flour your work surface and rolling pin.
- Roll the Dough: Take one disk of dough from the refrigerator. Roll it out into a circle about 12 inches in diameter. It should be about 1/8 inch thick. Transfer the rolled-out dough to a 9-inch pie pan, pressing gently to fit.
- Trim the Edges: Leave a bit of overhang and trim the edges as needed, making sure to reserve some dough for the top crust.
STEP 4: FILL THE PIE
- Add the Apple Filling: Pour the prepared apple filling into the crust, making sure to distribute it evenly.
- Dot with Butter: Sprinkle the small pieces of butter over the filling. This will add richness and flavor as the pie bakes.
STEP 5: ADD THE TOP CRUST
- Roll Out the Second Disk: Repeat the rolling process with the second disk of dough.
- Place Over the Filling: Carefully lay the second crust over the filled pie. If you’d like, cut slits in the top crust to create a lattice effect or simply leave it whole for a classic look.
- Seal the Edges: Press the edges of the top and bottom crusts together to seal. You can crimp the edges with a fork or pinch them for a decorative touch.
- Brush with Egg Wash: Optional, but recommended! Beat an egg and brush it over the top crust for a golden finish.
STEP 6: BAKE
- Preheat the Oven: Preheat your oven to 425°F (220°C).
- Bake the Pie: Place the pie in the preheated oven on the center rack. Bake for 15 minutes, then reduce the temperature to 350°F (175°C) and continue baking for another 30–35 minutes, or until the apples are tender and the crust is golden brown.
- Check for Doneness: If the edges of the crust start to brown too quickly, cover them with foil to prevent burning. The pie is done when the filling is bubbling through the slits and the crust is a beautiful golden brown.
STEP 7: COOL AND SERVE
- Cool the Pie: Once baked, remove the pie from the oven and let it cool for at least 30 minutes before slicing. This cooling time allows the filling to set, making it easier to slice and serve.
- Serve: Enjoy your pie warm, optionally with a scoop of vanilla ice cream or a dollop of whipped cream.
- Prep Time: 30 minutes
- Cooking and Cooling Time: 1 hour for Cooking | 30 minutes for Cooling
Nutrition
- Calories: 300 kcal
- Fat: 14g
- Carbohydrates: 45g
- Protein: 2g


