
Introduction
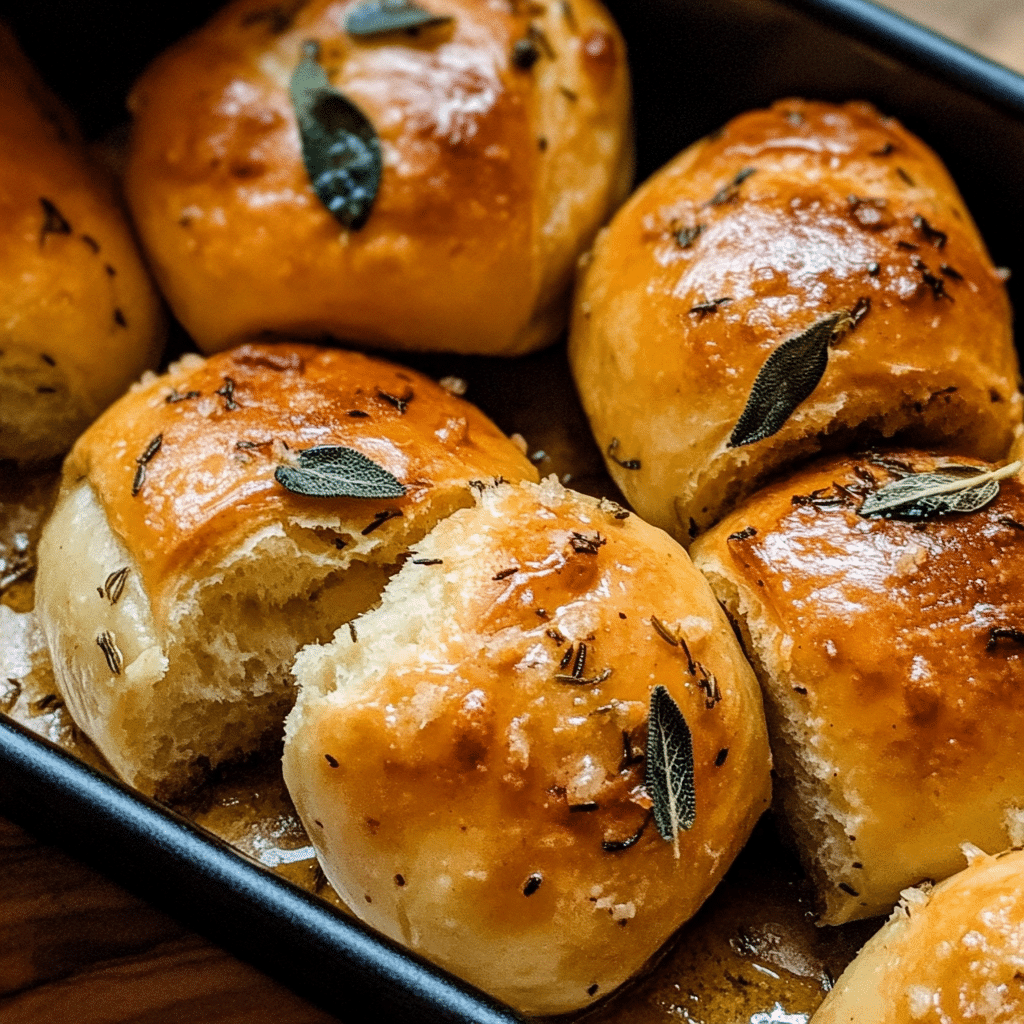
There’s something magical about the aroma of freshly baked bread wafting through your kitchen, especially when it’s enhanced by the rich, nutty flavor of brown butter and the earthy notes of sage. Brown butter sage dinner rolls are not just a side dish; they are a centerpiece that can elevate your Thanksgiving feast to a whole new level. Imagine the moment your guests tear into these warm, fluffy rolls, revealing a soft interior infused with the savory goodness of sage and the delightful depth of brown butter. It’s a culinary experience that will leave a lasting impression!
I first made these dinner rolls during a holiday gathering, and they quickly became a favorite. The combination of textures and flavors was a revelation. While they may seem indulgent, they’re surprisingly easy to prepare, making them perfect for both seasoned bakers and kitchen novices alike. Let’s delve into why you’ll love this recipe and how to create these irresistible rolls!
Why You’ll Love This Recipe
- Delicious Flavor: The nutty aroma of brown butter combined with fresh sage creates a unique taste that complements any holiday meal.
- Soft and Fluffy Texture: These rolls are incredibly light and airy, making them perfect for soaking up gravy or enjoying with butter.
- Easy to Make: With straightforward steps, even beginner bakers can successfully whip up a batch of these delicious rolls.
- Impressive Presentation: Golden-brown rolls are beautiful when plated, adding an elegant touch to your table.
- Perfect for Leftovers: These rolls are great for sandwiches or served with soup the next day, making them versatile beyond just the holiday meal.
Preparation Time and Servings
- Total Time: 2 hours (20 minutes prep, 1 hour rising, 25 minutes baking)
- Servings: This recipe yields about 12 dinner rolls.
- Nutrition Facts: Calories per roll: 180, Protein: 4g, Carbs: 25g, Fat: 8g.
Ingredients
Core Ingredients
- 4 cups all-purpose flour: The foundation of your rolls, providing structure and a tender crumb.
- 2 tablespoons sugar: Adds a touch of sweetness to balance the flavors.
- 2 ¼ teaspoons active dry yeast: Ensures your rolls rise beautifully.
- 1 teaspoon salt: Enhances the flavor of the rolls.
- 1 cup warm milk: Activates the yeast and adds moisture.
Brown Butter Sage Mixture
- ½ cup unsalted butter: Used for browning to develop a rich, nutty flavor.
- 6-8 fresh sage leaves: Infuses the butter with a wonderful, aromatic taste.
- 1 large egg: Binds the dough together and adds richness.
Step-by-Step Instructions
STEP 1: BROWN THE BUTTER
In a small saucepan, melt the unsalted butter over medium heat. Stir frequently until it turns golden brown and develops a nutty aroma, about 5-7 minutes. Remove from heat and add the sage leaves to the hot butter, allowing them to infuse their flavor as it cools. Set aside to cool slightly.
STEP 2: PREPARE THE YEAST
In a large mixing bowl, combine the warm milk, sugar, and active dry yeast. Let it sit for about 5-10 minutes until it becomes frothy. This step ensures that your yeast is active and ready to help your rolls rise.
STEP 3: MIX THE DOUGH
Once the yeast mixture is frothy, add the brown butter (along with the sage leaves, if desired), egg, salt, and 2 cups of flour. Stir until combined. Gradually add the remaining flour, one cup at a time, mixing until a soft dough forms. The dough should be slightly sticky but manageable.
STEP 4: KNEAD THE DOUGH
Transfer the dough to a lightly floured surface and knead for about 5-7 minutes, or until smooth and elastic. If the dough is too sticky, sprinkle a little more flour as needed. Kneading helps develop the gluten, resulting in fluffy rolls.
STEP 5: FIRST RISE
Place the kneaded dough in a greased bowl, cover it with a clean kitchen towel, and let it rise in a warm place until it doubles in size, about 1 hour. This is the time to let the dough work its magic!
STEP 6: SHAPE THE ROLLS
Once the dough has risen, punch it down to release the air. Turn it out onto a floured surface and divide it into 12 equal pieces. Shape each piece into a ball by rolling it between your hands. Place the rolls in a greased 9×13-inch baking dish, spacing them about an inch apart.
STEP 7: SECOND RISE
Cover the shaped rolls with the kitchen towel again and let them rise for another 30 minutes, or until they puff up and touch each other. This second rise ensures that your rolls will be light and fluffy.
STEP 8: PREHEAT THE OVEN
While the rolls are rising, preheat your oven to 375°F (190°C). A hot oven is essential for baking the rolls evenly.
STEP 9: BAKE
Once the rolls have completed their second rise, place the baking dish in the preheated oven. Bake for 20-25 minutes, or until the rolls are golden brown on top. They should sound hollow when tapped on the bottom.
STEP 10: COOL AND SERVE
Remove the rolls from the oven and let them cool in the baking dish for about 5-10 minutes. For an extra touch, brush the tops with melted butter. Serve warm, perhaps with additional sage butter or your favorite spreads.
How to Serve
Pair with Sides
These rolls are incredibly versatile and can be served alongside a variety of dishes. Pair them with your Thanksgiving turkey and gravy, or serve them with roasted vegetables and mashed potatoes. They also complement soups and stews beautifully.
Creative Toppings
Consider adding toppings to enhance your rolls. A sprinkle of sea salt, a drizzle of honey, or a smear of herbed butter can elevate their flavor profile. You might even consider infusing butter with garlic or other herbs to spread on top of the warm rolls.
Beverage Pairing
These rolls pair well with a wide range of beverages. A crisp white wine, such as Sauvignon Blanc, complements the savory flavors. For non-alcoholic options, consider serving sparkling water or a light cider.
Additional Tips
- Temperature Matters: Ensure your milk is warm, but not hot. Ideally, it should be around 110°F (43°C). Too hot can kill the yeast, while too cold will slow the rising process.
- Flour Measurement: Be careful not to add too much flour while kneading. Start with the recommended amount and add only as needed. This keeps your rolls soft and tender.
- Make Ahead: You can prepare the dough ahead of time and refrigerate it after the first rise. Shape the rolls, cover them, and let them rise for about 30 minutes before baking when you’re ready to serve.
- Use Fresh Sage: Fresh sage has a brighter flavor than dried. If using dried sage, reduce the amount to about 1-2 teaspoons, as it’s more concentrated.
- Brush with Butter: For an extra layer of flavor and sheen, brush the tops of the rolls with melted butter immediately after they come out of the oven.
Recipe Variations
Herb-Infused Rolls
In addition to sage, try adding other herbs such as thyme or rosemary for a more complex flavor profile. Simply chop the fresh herbs and mix them into the dough during the initial mixing stage.
Cheesy Rolls
For a decadent twist, add shredded cheese (like cheddar or parmesan) to the dough. This not only adds flavor but also creates a delightful gooey texture in the rolls.
Sweet Rolls
If you prefer a hint of sweetness, consider adding a tablespoon of honey or maple syrup to the dough. This pairs beautifully with the savory notes of the brown butter and sage.
Whole Wheat Option
Substitute half of the all-purpose flour with whole wheat flour for a heartier roll that has more fiber and nutrients. The texture will be slightly denser, but still delicious.
Serving Suggestions
Side Dishes
Brown butter sage dinner rolls are perfect alongside your traditional Thanksgiving sides like green bean casserole, cranberry sauce, and stuffing. Their fluffy texture makes them ideal for mopping up gravy and sauces.
Sandwiches
Leftover rolls can be transformed into delicious sandwiches. Slice them open and fill them with turkey, stuffing, and a dollop of cranberry sauce for a satisfying post-holiday meal.
Breakfast Treat
Transform leftover rolls into breakfast by toasting them and spreading with cream cheese or butter and jam. You can also make breakfast sandwiches with eggs and bacon for a hearty start to your day.
Freezing and Storage
Storage
Leftover rolls can be stored in an airtight container at room temperature for up to 2 days. If they last longer than that, they may dry out, so freezing is a better option for longer storage.
Freezing
To freeze the rolls, allow them to cool completely, then wrap them tightly in plastic wrap and place them in a freezer bag. They can be frozen for up to 3 months. To reheat, thaw in the refrigerator overnight and warm in the oven.
Reheating
Reheat frozen rolls in a 350°F (175°C) oven for about 10-15 minutes until warmed through. Alternatively, you can microwave them for about 20 seconds, but this may not achieve the same crispy exterior.
Special Equipment
- **Mixing Bowls
**: Use large bowls for mixing your dough and allowing it to rise.
- Whisk: Helpful for mixing dry ingredients and incorporating the yeast.
- Baking Dish: A 9×13-inch baking dish works well for the rolls.
- Pastry Brush: For brushing melted butter on the rolls after baking.
- Instant Read Thermometer: Useful for checking the temperature of the milk and ensuring it’s at the right warmth for yeast activation.
FAQ Section
Can I use instant yeast instead of active dry yeast?
Yes, you can substitute instant yeast for active dry yeast in this recipe. Simply mix it directly with the dry ingredients without the need for blooming it in warm milk.
What if I don’t have fresh sage?
You can use dried sage instead, but use about 1-2 teaspoons as it’s more concentrated in flavor. Alternatively, feel free to experiment with other herbs you enjoy.
How can I ensure my rolls are soft?
Avoid over-kneading the dough and ensure that you do not add too much flour. The rolls should be slightly sticky before the first rise, which contributes to their soft texture.
Can I make these rolls gluten-free?
Yes! You can use a gluten-free all-purpose flour blend to make these rolls. Just ensure the blend contains xanthan gum or a similar binder to help the rolls hold their shape.
Can I prepare the dough the night before?
Absolutely! Prepare the dough up to the first rise, then refrigerate it overnight. When you’re ready to bake, shape the rolls and let them rise before baking.
Conclusion
I hope you’re excited to try making brown butter sage dinner rolls! These rolls are more than just a side dish; they’re a celebration of flavors that add warmth and comfort to your Thanksgiving table. Whether you’re serving them at a festive gathering or enjoying them with a weeknight meal, they’re sure to impress.
Don’t forget to share your results! I can’t wait to see how your brown butter sage dinner rolls turn out—be sure to leave a comment or tag me on social media with your delicious creations. Enjoy your cooking and happy baking!
Print
Brown Butter Sage Dinner Rolls: A Thanksgiving Treat
- Total Time: 2 hours
Description
Delight your guests with the irresistible aroma of Brown Butter Sage Dinner Rolls, the ultimate accompaniment to your Thanksgiving feast. These rolls are crafted with rich, nutty brown butter and fresh sage, creating a flavor profile that is both comforting and sophisticated. Each roll is soft, fluffy, and golden brown, perfect for mopping up gravy or enjoying with a simple spread of butter. They’re surprisingly easy to make, so even novice bakers can impress at the holiday table. With their stunning appearance and delightful taste, these rolls will elevate your meal and leave a lasting impression. Make this Thanksgiving unforgettable by serving these delectable rolls—your family and friends will be talking about them long after the last bite!
Ingredients
Core Ingredients
- 4 cups all-purpose flour: The foundation of your rolls, providing structure and a tender crumb.
- 2 tablespoons sugar: Adds a touch of sweetness to balance the flavors.
- 2 ¼ teaspoons active dry yeast: Ensures your rolls rise beautifully.
- 1 teaspoon salt: Enhances the flavor of the rolls.
- 1 cup warm milk: Activates the yeast and adds moisture.
Brown Butter Sage Mixture
- ½ cup unsalted butter: Used for browning to develop a rich, nutty flavor.
- 6–8 fresh sage leaves: Infuses the butter with a wonderful, aromatic taste.
- 1 large egg: Binds the dough together and adds richness.
Instructions
STEP 1: BROWN THE BUTTER
In a small saucepan, melt the unsalted butter over medium heat. Stir frequently until it turns golden brown and develops a nutty aroma, about 5-7 minutes. Remove from heat and add the sage leaves to the hot butter, allowing them to infuse their flavor as it cools. Set aside to cool slightly.
STEP 2: PREPARE THE YEAST
In a large mixing bowl, combine the warm milk, sugar, and active dry yeast. Let it sit for about 5-10 minutes until it becomes frothy. This step ensures that your yeast is active and ready to help your rolls rise.
STEP 3: MIX THE DOUGH
Once the yeast mixture is frothy, add the brown butter (along with the sage leaves, if desired), egg, salt, and 2 cups of flour. Stir until combined. Gradually add the remaining flour, one cup at a time, mixing until a soft dough forms. The dough should be slightly sticky but manageable.
STEP 4: KNEAD THE DOUGH
Transfer the dough to a lightly floured surface and knead for about 5-7 minutes, or until smooth and elastic. If the dough is too sticky, sprinkle a little more flour as needed. Kneading helps develop the gluten, resulting in fluffy rolls.
STEP 5: FIRST RISE
Place the kneaded dough in a greased bowl, cover it with a clean kitchen towel, and let it rise in a warm place until it doubles in size, about 1 hour. This is the time to let the dough work its magic!
STEP 6: SHAPE THE ROLLS
Once the dough has risen, punch it down to release the air. Turn it out onto a floured surface and divide it into 12 equal pieces. Shape each piece into a ball by rolling it between your hands. Place the rolls in a greased 9×13-inch baking dish, spacing them about an inch apart.
STEP 7: SECOND RISE
Cover the shaped rolls with the kitchen towel again and let them rise for another 30 minutes, or until they puff up and touch each other. This second rise ensures that your rolls will be light and fluffy.
STEP 8: PREHEAT THE OVEN
While the rolls are rising, preheat your oven to 375°F (190°C). A hot oven is essential for baking the rolls evenly.
STEP 9: BAKE
Once the rolls have completed their second rise, place the baking dish in the preheated oven. Bake for 20-25 minutes, or until the rolls are golden brown on top. They should sound hollow when tapped on the bottom.
STEP 10: COOL AND SERVE
Remove the rolls from the oven and let them cool in the baking dish for about 5-10 minutes. For an extra touch, brush the tops with melted butter. Serve warm, perhaps with additional sage butter or your favorite spreads.
- Prep Time: 20 minutes
- Rising and Baking Time: 1 hour rising, 25 minutes baking
Nutrition
- Calories: 180 kcal
- Fat: 8g
- Carbohydrates: 25g
- Protein: 4g


