

Introduction
Buttered corn is a classic side dish that adds a touch of sweetness and richness to any meal, especially during Thanksgiving. Its sweet, succulent kernels paired with rich, creamy butter create a simple yet delicious complement to the holiday feast. Imagine the joy on your guests’ faces as they dig into a serving of perfectly cooked corn, glistening with butter and sprinkled with just the right amount of seasoning—it’s comfort food at its finest!
This dish is a staple in many households, and it has a way of bringing people together around the table. I discovered this recipe while searching for an easy way to add a pop of color and flavor to our holiday spread. It quickly became a family favorite! Not only is it easy to prepare, but it also allows for endless customization. Let’s dive into why you’ll love this buttery corn recipe and how to make it flawlessly!
Why You’ll Love This Recipe
- Simple to Make: With minimal ingredients and straightforward steps, this dish is approachable for cooks of all levels. It’s perfect for beginners and experienced chefs alike.
- Rich Flavor: The buttery, sweet flavor of the corn is irresistible and perfectly enhances your Thanksgiving spread. The combination of flavors is comforting and nostalgic.
- Customizable: You can easily add spices, herbs, or other ingredients to make it your own—think garlic, cheese, or even a hint of spice! This flexibility makes it a versatile dish.
- Beautiful Presentation: The vibrant yellow kernels make for a stunning addition to any plate. A sprinkle of fresh herbs can enhance its visual appeal even further.
- Versatile: Buttered corn pairs well with a variety of main dishes and can be served as a side for any occasion, not just Thanksgiving. It’s equally delightful at summer barbecues or family gatherings.
Preparation Time and Servings
- Total Time: 20 minutes (5 minutes prep, 15 minutes cooking)
- Servings: This recipe serves 4-6 people.
- Nutrition Facts: Calories per serving: 180, Protein: 4g, Carbs: 20g, Fat: 9g.
Ingredients
To create this delightful buttery corn, you’ll need:
- 4 cups fresh corn kernels: You can use corn off the cob or frozen corn for convenience. Fresh corn will provide a sweeter flavor.
- 1/2 cup unsalted butter: The star of this dish, contributing rich flavor. You can adjust the quantity based on your preference.
- Salt and pepper to taste: Essential for seasoning, these two simple ingredients can elevate the dish significantly.
- Optional: Fresh herbs (like parsley or chives), a pinch of cayenne pepper, or a sprinkle of Parmesan cheese for added flavor. Feel free to get creative with your additions!
Step-by-Step Instructions
STEP 1: PREPARE THE CORN
If using fresh corn, start by shucking the corn and removing the kernels from the cob. A sharp knife works best for this task. Hold the ear of corn upright and slice downward to release the kernels. You should get about 4 cups from 4-6 ears of corn, depending on their size.
If using frozen corn, simply measure out the required amount and let it thaw. Frozen corn is convenient and can be a great time-saver, especially during the busy holiday season.
STEP 2: MELT THE BUTTER
In a large skillet, melt the butter over medium heat. This will help create a luscious sauce for your corn. As the butter melts, it will start to bubble and become fragrant, creating a mouthwatering aroma in your kitchen.
STEP 3: ADD THE CORN
Once the butter is melted and bubbly, add the corn kernels to the skillet. Stir to coat the corn evenly with the butter. The butter will not only flavor the corn but also help to keep it moist during cooking.
STEP 4: SEASON
Season the corn with salt and pepper to taste. If you’re using any optional ingredients, such as garlic powder or cayenne pepper, sprinkle them in now for an extra kick. Remember, seasoning is key to bringing out the natural sweetness of the corn.
STEP 5: COOK
Cook the corn for about 8-10 minutes, stirring occasionally. You want the corn to be tender but still retain a slight crunch. If using frozen corn, you may need to cook it a few minutes longer to ensure it’s heated through. Taste the corn as it cooks; you can always adjust the seasoning to your liking.
STEP 6: GARNISH AND SERVE
Once the corn is cooked to your liking, remove it from the heat. If desired, toss in fresh herbs for a burst of color and flavor. Fresh parsley or chives can add brightness to the dish. Serve warm, and watch it disappear from the table!
How to Serve
- Pair with Main Dishes: Buttery corn is an excellent side for roast turkey, ham, or even grilled meats. Its sweetness balances well with savory dishes, making it a perfect companion on your holiday plate.
- Top with Cheese: For a decadent twist, sprinkle grated Parmesan cheese over the top just before serving. The cheese melts slightly into the warm corn, creating a delightful combination.
- Drizzle with Sauce: A light drizzle of balsamic reduction can add a sweet tang that complements the sweetness of the corn. Alternatively, a splash of lemon juice can brighten the flavors even more.
- Serve in Individual Portions: Consider serving the corn in small ramekins or individual bowls for an elegant touch at your holiday dinner. This adds a personal feel to the meal.
Additional Tips
- Use Fresh Corn When Possible: Fresh corn is sweeter and more flavorful than frozen, making a noticeable difference in this dish. When in season, look for corn with bright green husks and plump kernels.
- Keep it Warm: If you’re preparing this dish ahead of time, keep it warm in a covered dish until you’re ready to serve. You can place it in a low oven (around 200°F) to maintain its temperature.
- Add Texture: For some crunch, consider adding toasted nuts, such as pecans or almonds, or breadcrumbs on top before serving. This not only enhances the flavor but also adds an interesting texture.
- Make it Colorful: Mix in diced red bell peppers or green onions for added color and flavor. The sweetness of the bell peppers pairs wonderfully with the corn.
- Adjust the Seasoning: Taste as you go! Everyone has different preferences when it comes to seasoning. Feel free to experiment with different spices or herbs until you find the perfect balance.
Recipe Variations
- Spicy Buttered Corn: Add diced jalapeños or a pinch of chili powder for a kick. This variation can cater to those who enjoy a bit of heat in their dishes.
- Herbed Corn: Use fresh thyme, basil, or cilantro to introduce different flavors. Fresh herbs can elevate the dish and add an aromatic touch.
- Cheesy Corn: Mix in cream cheese or shredded cheddar for a creamy, cheesy variation. This creates a rich and satisfying side dish that everyone will love.
- Sweet Corn: Add a tablespoon of honey or maple syrup for a sweet contrast to the salty butter. This twist works particularly well with fresh corn during the summer months.
- Vegan Option: Substitute plant-based butter for a dairy-free version without sacrificing flavor. This allows everyone to enjoy the dish, regardless of dietary restrictions.
Serving Suggestions
- Side Dishes: Pair with roasted Brussels sprouts, mashed potatoes, or a light green salad for a balanced meal. The combination of flavors and textures will create a well-rounded dining experience.
- Beverage Pairing: A crisp white wine, such as Chardonnay or Sauvignon Blanc, complements the richness of the corn beautifully. If you prefer non-alcoholic options, sparkling water with a slice of lemon or a refreshing iced tea also works well.
- Kid-Friendly: Kids will love the sweet flavor, making it a great addition to family meals. Consider serving the corn in fun shapes or with cute utensils to make it more appealing to younger diners.
Freezing and Storage
- Storage: Leftover buttery corn can be stored in an airtight container in the fridge for up to 3 days. When reheating, you may want to add a little extra butter to revive the flavors.
- Freezing: If you have more corn than you can eat, consider freezing it. Place it in a freezer-safe bag and remove as much air as possible. It can be frozen for up to 3 months. This is a great way to preserve fresh corn for future meals.
- Reheating: To reheat, warm it in a skillet over medium heat or in the microwave until heated through. If using the microwave, cover it with a damp paper towel to keep it moist.
Special Equipment
- Skillet: A large skillet is essential for cooking the corn evenly and allowing it to soak up the butter. A non-stick skillet can make the cooking process even easier.
- Sharp Knife: If using fresh corn, a good knife will help you quickly and cleanly remove the kernels from the cob. A serrated knife works particularly well for this task.
- Measuring Cups: Accurate measurements ensure that the proportions of butter and corn are just right for a perfect dish.
- Spatula or Wooden Spoon: You’ll need something to stir the corn while it cooks, ensuring even heating and flavor distribution.
FAQ Section
Can I use canned corn instead of fresh?
Yes, you can use canned corn for convenience. Just drain and rinse it before adding it to the skillet. Reduce cooking time to 3-5 minutes, as canned corn is already cooked.
What can I add for more flavor?
Consider adding spices like garlic powder, smoked paprika, or fresh herbs for extra depth of flavor. You can also experiment with different types of cheese for a unique twist.
Can I prepare this ahead of time?
You can prepare the corn a few hours ahead of time and keep it warm in a covered dish. Just be sure to give it a stir before serving to redistribute the butter.
Is this dish gluten-free?
Yes, buttered corn is naturally gluten-free, making it suitable for those with gluten sensitivities. Always check your additional ingredients to ensure they’re gluten-free as well.
How do I know when the corn is done?
Corn is done when it’s tender yet still has a slight crunch. Taste a kernel to check! Overcooking can make it mushy, so keep an eye on it.
Can I make this dish with frozen corn?
Absolutely! Frozen corn is a convenient option, and it can be just as delicious. Just ensure you cook it longer than fresh corn to heat it thoroughly.
Conclusion
I hope you’re excited to try this buttery corn recipe! It’s a dish that brings warmth, flavor, and a touch of nostalgia to your Thanksgiving table, making every bite a delightful experience. Whether it’s a special occasion or a simple weeknight dinner, this buttery corn is sure to impress.
Don’t forget to share your results! I can’t wait to see how it turns out for you—be sure to leave a comment or tag me on social media with your delicious creations. Enjoy your cooking!
Print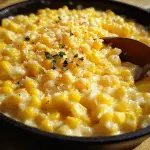
Buttery Corn: A Thanksgiving Delight
- Total Time: 20 minutes
Description
Transform your meals with the simple elegance of buttered corn! This classic side dish elevates sweet corn to new heights, with rich, creamy butter enhancing its natural flavors. Quick to prepare and incredibly versatile, buttered corn is the perfect accompaniment to any dish—from holiday feasts to weeknight dinners. A sprinkle of spices or fresh herbs can take it from ordinary to extraordinary. Don’t miss out on this must-have side that will have your guests raving and asking for the recipe!
Ingredients
- 4 cups fresh corn kernels: You can use corn off the cob or frozen corn for convenience. Fresh corn will provide a sweeter flavor.
- 1/2 cup unsalted butter: The star of this dish, contributing rich flavor. You can adjust the quantity based on your preference.
- Salt and pepper to taste: Essential for seasoning, these two simple ingredients can elevate the dish significantly.
- Optional: Fresh herbs (like parsley or chives), a pinch of cayenne pepper, or a sprinkle of Parmesan cheese for added flavor. Feel free to get creative with your additions!
Instructions
STEP 1: PREPARE THE CORN
If using fresh corn, start by shucking the corn and removing the kernels from the cob. A sharp knife works best for this task. Hold the ear of corn upright and slice downward to release the kernels. You should get about 4 cups from 4-6 ears of corn, depending on their size.
If using frozen corn, simply measure out the required amount and let it thaw. Frozen corn is convenient and can be a great time-saver, especially during the busy holiday season.
STEP 2: MELT THE BUTTER
In a large skillet, melt the butter over medium heat. This will help create a luscious sauce for your corn. As the butter melts, it will start to bubble and become fragrant, creating a mouthwatering aroma in your kitchen.
STEP 3: ADD THE CORN
Once the butter is melted and bubbly, add the corn kernels to the skillet. Stir to coat the corn evenly with the butter. The butter will not only flavor the corn but also help to keep it moist during cooking.
STEP 4: SEASON
Season the corn with salt and pepper to taste. If you’re using any optional ingredients, such as garlic powder or cayenne pepper, sprinkle them in now for an extra kick. Remember, seasoning is key to bringing out the natural sweetness of the corn.
STEP 5: COOK
Cook the corn for about 8-10 minutes, stirring occasionally. You want the corn to be tender but still retain a slight crunch. If using frozen corn, you may need to cook it a few minutes longer to ensure it’s heated through. Taste the corn as it cooks; you can always adjust the seasoning to your liking.
STEP 6: GARNISH AND SERVE
Once the corn is cooked to your liking, remove it from the heat. If desired, toss in fresh herbs for a burst of color and flavor. Fresh parsley or chives can add brightness to the dish. Serve warm, and watch it disappear from the table!
- Prep Time: 5 minutes
- Cook Time: 15 minutes
Nutrition
- Calories: 180 kcal
- Fat: 9g
- Carbohydrates: 20g
- Protein: 4g


