
Introduction
Charleston cheese dip is a rich, creamy, and utterly delicious appetizer that captures the essence of Southern hospitality. Originating from the charming coastal city of Charleston, South Carolina, this dip combines a medley of cheeses, spices, and savory ingredients, making it perfect for gatherings, game days, or simply as a snack while enjoying a cozy evening at home. Its irresistible flavor and creamy texture make it a standout dish that will have everyone coming back for more. In this article, we’ll explore the history, variations, and serving suggestions that make Charleston cheese dip a beloved choice for any occasion.
The History of Charleston Cheese Dip
Charleston, known for its rich culinary heritage, has given rise to many iconic dishes. The cheese dip is no exception. It is believed to have originated in the South, where cheese dishes have long been a staple due to the region’s agricultural abundance and dairy production. The combination of creamy cheeses with spices reflects the Southern tradition of crafting comforting, flavorful foods. Over the years, Charleston cheese dip has gained popularity beyond the region, becoming a favorite at gatherings across the United States.
In essence, Charleston cheese dip embodies the spirit of Southern cooking—simple yet bursting with flavor. It’s often associated with social gatherings, family reunions, and tailgating events, where sharing delicious food is at the heart of the celebration.
Ingredient List
Here’s what you’ll need to make a mouthwatering Charleston cheese dip:
- Cream cheese: 8 ounces, softened
- Sharp cheddar cheese: 2 cups, grated
- Monterey Jack cheese: 1 cup, grated
- Mayonnaise: 1/2 cup
- Garlic powder: 1 teaspoon
- Onion powder: 1 teaspoon
- Cayenne pepper: 1/4 teaspoon (adjust to taste)
- Worcestershire sauce: 1 tablespoon
- Hot sauce: 1 tablespoon (optional)
- Green onions: 1/4 cup, chopped (for garnish)
- Fresh parsley: 1/4 cup, chopped (for garnish)
- Salt and pepper: to taste
Serve with:
- Tortilla chips
- Pita chips
- Crackers
- Vegetable sticks
Preparation Steps
Step 1: Preheat the Oven
Start by preheating your oven to 350°F (175°C) to prepare for baking the cheese dip. This step is crucial for achieving that bubbly, golden perfection.
Step 2: Mix the Cheese Base
In a large mixing bowl, combine the softened cream cheese, grated sharp cheddar cheese, and grated Monterey Jack cheese. Using a hand mixer or a wooden spoon, blend until the mixture is smooth and creamy. The combination of cheeses creates a rich flavor profile that is both savory and satisfying. If you prefer a chunkier dip, you can reserve some of the cheddar to sprinkle on top before baking.
Step 3: Add the Flavor Enhancers
Next, add the mayonnaise, garlic powder, onion powder, cayenne pepper, Worcestershire sauce, and hot sauce (if using) to the cheese mixture. Stir until all the ingredients are well combined. The mayonnaise adds creaminess, while the spices and sauces infuse the dip with layers of flavor. This step is where you can get creative—feel free to adjust the spices according to your taste preferences.
Step 4: Season to Taste
Taste the mixture and season with salt and pepper as needed. This is a crucial step, as the right seasoning can elevate the flavors and make your cheese dip truly irresistible. If you’re feeling adventurous, consider adding a dash of smoked paprika or some freshly chopped herbs to the mix for an extra kick.
Step 5: Transfer to Baking Dish
Transfer the cheese mixture to a greased baking dish or oven-safe skillet, spreading it evenly. This ensures that the dip heats through evenly and gets that desirable bubbly, golden top. If you like a bit of texture, you can sprinkle some crushed tortilla chips or breadcrumbs on top before baking.
Step 6: Bake the Cheese Dip
Place the baking dish in the preheated oven and bake for 25-30 minutes, or until the dip is hot and bubbly, and the top is lightly golden. Keep an eye on it towards the end to prevent over-browning. The aroma will be irresistible, drawing everyone to the kitchen in anticipation.
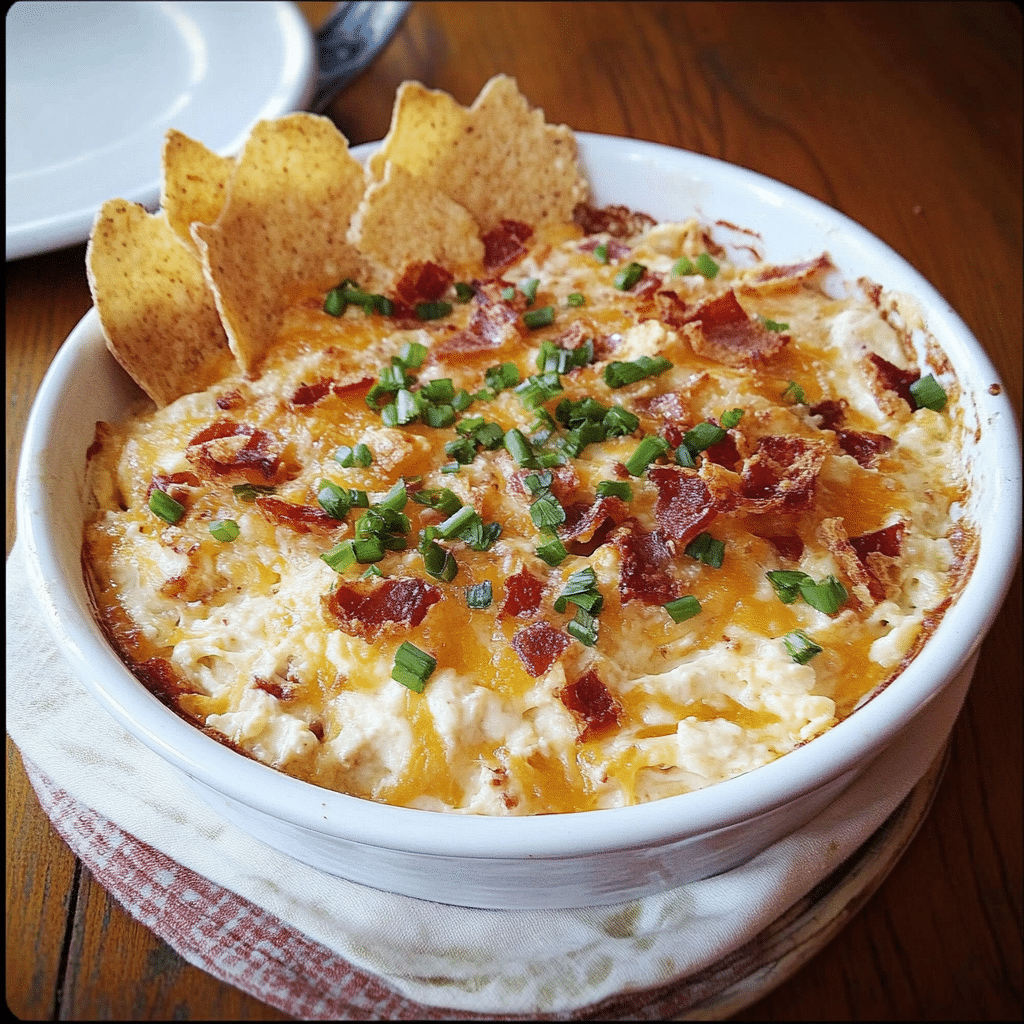
Step 7: Garnish and Serve
Once the dip is baked, remove it from the oven and let it cool for a few minutes. Garnish with chopped green onions and fresh parsley for a pop of color and freshness. Serve the dip warm with your choice of tortilla chips, pita chips, crackers, or vegetable sticks. The contrast between the warm, creamy dip and the crispy dippers is absolutely delightful.
Cooking Notes
- Cheese Variety: Feel free to experiment with different cheese combinations, such as pepper jack for extra heat or gouda for a smokier flavor. Mixing in some cream or goat cheese can also create a delightful creaminess.
- Add-Ins: Consider adding cooked and crumbled bacon, sautéed spinach, or even artichoke hearts for a delicious twist. Each addition will bring its unique flavor and texture to the dip.
Serving Suggestions
For Game Day
This dip is a perfect addition to your game day spread. Pair it with other finger foods like buffalo wings, sliders, and a variety of chips. Don’t forget the drinks—cold beer or a fruity punch will perfectly complement the cheese dip.
At a Casual Gathering
For a more relaxed setting, serve the cheese dip alongside a charcuterie board filled with an assortment of cheeses, cured meats, olives, and nuts. This creates a festive atmosphere and encourages guests to mingle and try different flavors.
With a Meal
If you’re looking to make it a part of a larger meal, serve the cheese dip as an appetizer before a hearty main course, such as barbecue ribs or grilled chicken. Its rich flavors will whet the appetite and set the stage for a delicious meal.
Tips
- Make Ahead: This dip can be prepared a day in advance. Simply assemble it, cover it, and refrigerate until you’re ready to bake. This is a great time-saver, especially when hosting a gathering.
- Storage: Store any leftovers in an airtight container in the refrigerator for up to 3 days. Reheat in the oven or microwave before serving, but be mindful to heat it gently to retain its creamy texture.
Cooking Time
- Preparation: 15 minutes
- Cooking: 30 minutes
Nutritional Information
- Calories: Approximately 320 kcal per serving
- Protein: 15 g per serving
- Carbohydrates: 8 g per serving
- Fat: 28 g per serving
Storage Advice
- Cooling: Allow the dip to cool to room temperature before storing.
- Refrigeration: Store in an airtight container in the refrigerator. When you’re ready to enjoy it again, reheat it gently.
- Freezing: Cheese dip can be frozen for up to 3 months. Thaw in the refrigerator before reheating. While freezing may change the texture slightly, the flavors will remain intact.
Vegan Alternative Recipe
If you’re looking to make a vegan version of this delightful cheese dip, here’s how:
- Plant-Based Cream Cheese: Use a vegan cream cheese alternative.
- Dairy-Free Cheese: Substitute with a combination of vegan cheeses, ensuring they melt well.
- Mayonnaise Substitute: Use a plant-based mayonnaise to keep it vegan.
Follow the same preparation steps, adjusting the baking time as necessary to achieve the desired consistency.
Vegetarian Alternative Recipe
For a vegetarian version:
- Cheese Selection: Use vegetarian-friendly cheeses and mayonnaise.
- Spices: Maintain the same flavor profile for a delicious vegetarian dip.
Feel free to add in some finely chopped vegetables like bell peppers or jalapeños to enhance the dip’s texture and flavor.
Kid-Friendly Recipe
Make it appealing for kids with these adjustments:
- Milder Flavor: Reduce the cayenne pepper and omit hot sauce for a milder version. Kids often prefer less spicy flavors.
- Fun Dippers: Serve with a variety of fun dippers like carrot sticks, cucumber slices, and breadsticks. You can even get creative with cookie cutters to make fun shapes.
Encouraging kids to help in the kitchen can make them more excited about trying new foods!
Serving Size and Yield
This recipe serves approximately 8-10 people. You can easily scale up or down depending on your gathering size. If you’re preparing for a large crowd, consider doubling the recipe and using multiple baking dishes.
Additional Cooking Tips
- Browning the Top: For an extra crispy top, broil the dip for the last 2-3 minutes of cooking. Just watch it closely to prevent burning; a little golden color adds visual appeal and texture.
- Flavor Infusion: Letting the dip sit for a few minutes after baking allows the flavors to meld even more, making it taste even better when served.
Healthier Version
For a healthier take on this delicious dip:
- Low-Fat Cheese: Opt for low-fat cream cheese and reduced-fat cheese varieties.
- Less Mayonnaise: Reduce the amount of mayonnaise or substitute with Greek yogurt for a healthier alternative, which adds protein and creaminess without extra calories.
Cultural Variations
Charleston cheese dip reflects Southern culinary traditions, but variations can be found in different regions:
- Buffalo Chicken Dip: A popular twist that incorporates shredded chicken and buffalo sauce for a spicy kick. This version is perfect for those who love the heat and the flavor of buffalo wings.
- Queso Dip: A Mexican-inspired version that uses melted cheese, green chilies, and spices for a different flavor profile. You can enhance it further by adding cooked chorizo or black beans.
Seasonal Adaptations
- Spring Addition: Incorporate fresh herbs like basil or chives for a springtime freshness. The bright flavors of these herbs can elevate the dish significantly.
- Fall Twist: Add pumpkin puree or roasted butternut squash for a seasonal flavor variation. This not only adds a unique taste but also a vibrant color to the dish.
Side Dish Recommendations
When planning a meal around the cheese dip, consider these pairings:
- Chips Galore: Serve with a variety of chips, such as tortilla, pita, and potato chips. Each type offers a unique texture that complements the creamy dip.
- Vegetable Platter: A colorful array of vegetable sticks adds a refreshing crunch to balance the richness of the dip. Carrot, celery, and bell pepper sticks are great options.
Hosting a Cheese Dip Party
Turn your cheese dip into a fun gathering by hosting a dip party. Here’s how:
- Theme: Choose a cheese dip theme and encourage guests to bring their favorite dips. This not only showcases a variety of flavors but also engages your guests.
- Tasting Station: Set up a tasting station with different types of cheese dips and dippers. Provide small cups for guests to sample different combinations.
- Games and Music: Incorporate games and lively music to create a festive atmosphere. Perhaps even a “Best Dip” contest among guests!
Building a Balanced Menu
When planning your meal around the cheese dip, consider complementary dishes:
- Appetizer Pairing: Start with a light soup or salad to contrast the richness of the dip. A refreshing garden salad or a tangy tomato soup would be great choices.
- Dessert: Finish off with a light dessert, such as sorbet or fruit salad, to cleanse the palate. This creates a well-rounded dining experience.
The Joy of Cooking Cheese Dip
Cooking Charleston cheese dip is more than just a recipe; it’s an opportunity to connect with family and friends. The process of mixing, baking, and sharing this delightful dish fosters a sense of community and joy. As the aroma fills your kitchen, anticipate the smiles and satisfied expressions from those you share it with.
The beauty of this dish lies in its versatility; it can be adapted to suit any palate, making it a universal favorite. The laughter and conversation that accompany this dip are the true essence of its charm.
FAQs
- Can I make this dip in advance?
Yes! Assemble the dip ahead of time, refrigerate, and bake it just before serving. This saves time and allows you to enjoy your gathering without the stress of last-minute cooking. - Can I use different cheeses?
Absolutely! Feel free to experiment with your favorite cheese combinations. Each cheese brings its unique flavor and melting quality. - How can I make it spicier?
Increase the cayenne pepper or add diced jalapeños for extra heat. Adjusting the spice level to suit your crowd can make the dip even more enjoyable. - Can I serve it cold?
While it’s best served warm, you can enjoy it cold as a spread. It works well as a cold dip, particularly with crackers and veggies. - How do I know when it’s done?
The dip is ready when it’s hot and bubbly with a lightly golden top. The edges should be visibly hot, and a slight browning on top indicates perfect baking. - Can I freeze leftover dip?
Yes! Store in a freezer-safe container and reheat before serving. Freezing may change the texture slightly, but the flavors will remain intact.
Conclusion
Charleston cheese dip is a celebration of flavor, warmth, and togetherness. Its creamy texture and rich taste make it a delightful appetizer for any occasion. Whether you’re hosting a gathering, watching a game, or enjoying a quiet night in, this dip is sure to impress and satisfy.
So gather your ingredients, invite some friends over, and indulge in the creamy, cheesy goodness that is Charleston cheese dip. Try this recipe, share it with loved ones, and savor every delicious bite. Bon appétit!
Print
Charleston Cheese Dip: A Creamy Southern Delight
- Total Time: 45 minutes
Description
Indulge in the creamy goodness of Charleston Cheese Dip, a Southern classic that combines the rich flavors of sharp cheddar, cream cheese, and tangy spices. This decadent dip is further elevated with the addition of sautéed onions and a hint of spice, making it irresistibly flavorful. Perfect for sharing at parties or enjoying during a cozy night in, serve it warm with crispy tortilla chips or fresh veggies. Each scoop is a delightful blend of cheesy richness and zesty goodness, making Charleston Cheese Dip a must-have for any gathering!
Ingredients
- Cream cheese: 8 ounces, softened
- Sharp cheddar cheese: 2 cups, grated
- Monterey Jack cheese: 1 cup, grated
- Mayonnaise: 1/2 cup
- Garlic powder: 1 teaspoon
- Onion powder: 1 teaspoon
- Cayenne pepper: 1/4 teaspoon (adjust to taste)
- Worcestershire sauce: 1 tablespoon
- Hot sauce: 1 tablespoon (optional)
- Green onions: 1/4 cup, chopped (for garnish)
- Fresh parsley: 1/4 cup, chopped (for garnish)
- Salt and pepper: to taste
Serve with:
- Tortilla chips
- Pita chips
- Crackers
- Vegetable sticks
Instructions
Step 1: Preheat the Oven
Start by preheating your oven to 350°F (175°C) to prepare for baking the cheese dip. This step is crucial for achieving that bubbly, golden perfection.
Step 2: Mix the Cheese Base
In a large mixing bowl, combine the softened cream cheese, grated sharp cheddar cheese, and grated Monterey Jack cheese. Using a hand mixer or a wooden spoon, blend until the mixture is smooth and creamy. The combination of cheeses creates a rich flavor profile that is both savory and satisfying. If you prefer a chunkier dip, you can reserve some of the cheddar to sprinkle on top before baking.
Step 3: Add the Flavor Enhancers
Next, add the mayonnaise, garlic powder, onion powder, cayenne pepper, Worcestershire sauce, and hot sauce (if using) to the cheese mixture. Stir until all the ingredients are well combined. The mayonnaise adds creaminess, while the spices and sauces infuse the dip with layers of flavor. This step is where you can get creative—feel free to adjust the spices according to your taste preferences.
Step 4: Season to Taste
Taste the mixture and season with salt and pepper as needed. This is a crucial step, as the right seasoning can elevate the flavors and make your cheese dip truly irresistible. If you’re feeling adventurous, consider adding a dash of smoked paprika or some freshly chopped herbs to the mix for an extra kick.
Step 5: Transfer to Baking Dish
Transfer the cheese mixture to a greased baking dish or oven-safe skillet, spreading it evenly. This ensures that the dip heats through evenly and gets that desirable bubbly, golden top. If you like a bit of texture, you can sprinkle some crushed tortilla chips or breadcrumbs on top before baking.
Step 6: Bake the Cheese Dip
Place the baking dish in the preheated oven and bake for 25-30 minutes, or until the dip is hot and bubbly, and the top is lightly golden. Keep an eye on it towards the end to prevent over-browning. The aroma will be irresistible, drawing everyone to the kitchen in anticipation.
Step 7: Garnish and Serve
Once the dip is baked, remove it from the oven and let it cool for a few minutes. Garnish with chopped green onions and fresh parsley for a pop of color and freshness. Serve the dip warm with your choice of tortilla chips, pita chips, crackers, or vegetable sticks. The contrast between the warm, creamy dip and the crispy dippers is absolutely delightful.
- Prep Time: 15 minutes
- Cook Time: 30 minutes
Nutrition
- Calories: 320 kcal
- Fat: 28g
- Carbohydrates: 8g
- Protein: 15g


