
Introduction
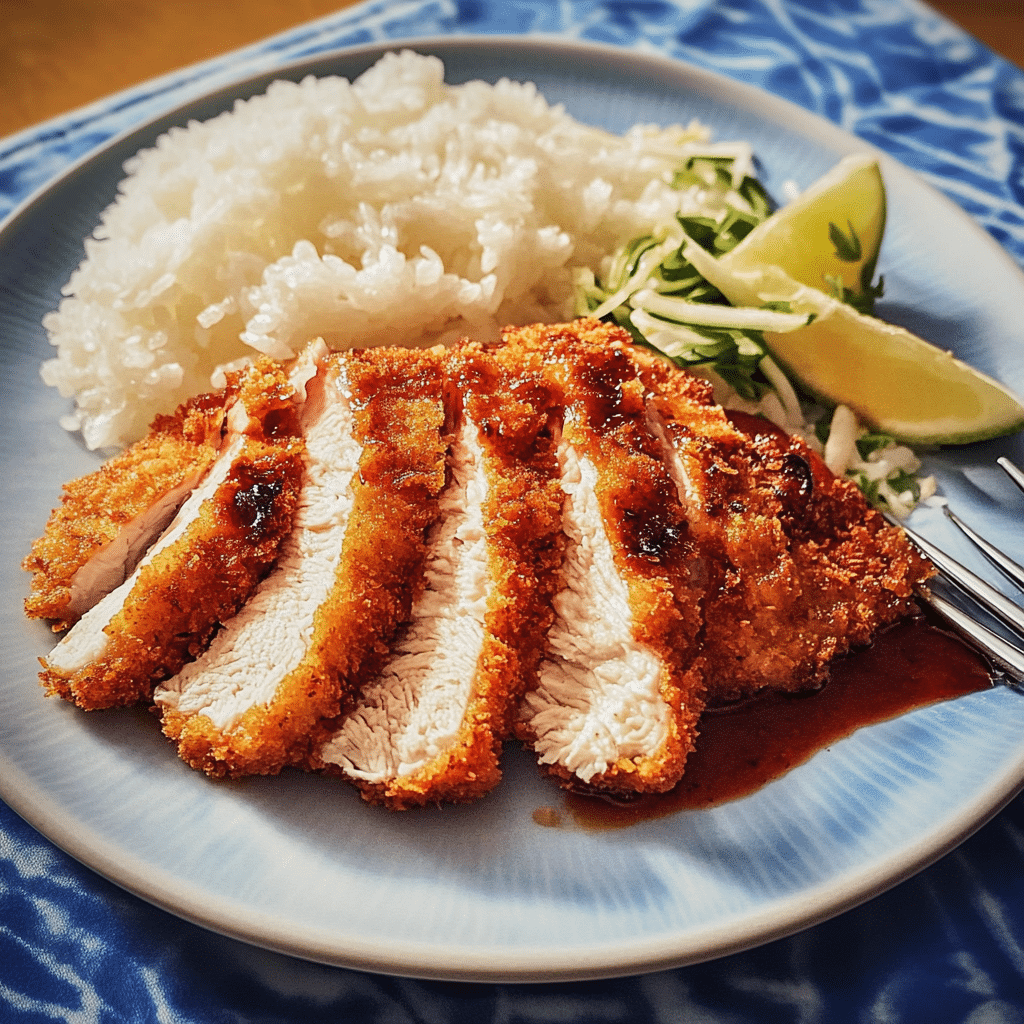
Imagine a crispy, golden-brown chicken cutlet served with a tangy dipping sauce and a side of fluffy rice. Enter Chicken Katsu, a beloved Japanese dish that has made its way into the hearts and stomachs of food lovers around the world. This dish features tender chicken breasts coated in panko breadcrumbs, creating a delightful crunch with every bite. Perfect for casual dinners or special occasions, Chicken Katsu brings a touch of Japanese cuisine to your table in an approachable and delicious way.
I discovered Chicken Katsu during a culinary exploration of Asian cuisine, and it quickly became a family favorite. The combination of textures—the crunchy exterior and juicy chicken inside—combined with the umami of the dipping sauce, makes for a delightful dining experience. Whether served as a main course or in a bento box, this dish is versatile and sure to please.
Let’s dive into the world of Chicken Katsu, exploring why you’ll love this recipe and how to make it effortlessly at home!
Why You’ll Love This Recipe
- Crispy and Delicious: The panko breadcrumbs provide an irresistible crunch that elevates the simple chicken cutlet.
- Easy to Make: With straightforward steps and minimal ingredients, Chicken Katsu is accessible for cooks of all skill levels.
- Customizable: You can easily adjust the seasoning or serve it with your favorite sides for a personalized touch.
- Impressive Presentation: The golden-brown cutlets look stunning when plated, making it an eye-catching dish for any gathering.
- Great for Meal Prep: Chicken Katsu can be made ahead of time and reheated, making it a practical choice for busy weeknights.
Preparation Time and Servings
- Total Time: 40 minutes (15 minutes prep, 25 minutes cooking)
- Servings: This recipe serves 4 people.
- Nutrition Facts: Calories per serving: 500, Protein: 35g, Carbs: 45g, Fat: 25g.
Ingredients
- 4 boneless, skinless chicken breasts: The base of your dish, providing a tender and juicy protein.
- 1 cup panko breadcrumbs: These Japanese-style breadcrumbs give the chicken its signature crunch.
- ½ cup all-purpose flour: For dredging the chicken, helping the egg adhere to the surface.
- 2 large eggs: Used for binding the breadcrumbs to the chicken.
- Salt and pepper: Essential for seasoning.
- Vegetable oil: For frying, ensuring a crispy texture.
- Ton katsu sauce: A sweet and tangy sauce for dipping, available in stores or easily made at home.
- Optional: Shredded cabbage: For a fresh crunch and garnish.
Step-by-Step Instructions
STEP 1: PREPARE THE CHICKEN
Start by placing the chicken breasts between two sheets of plastic wrap or parchment paper. Using a meat mallet or rolling pin, gently pound the chicken to an even thickness, about ½ inch. This ensures the chicken cooks evenly and remains tender. Season both sides of the chicken with salt and pepper.
STEP 2: SET UP A BREADING STATION
In three shallow bowls, set up your breading station. In the first bowl, add the flour; in the second bowl, whisk the eggs; and in the third bowl, place the panko breadcrumbs. This setup makes it easy to coat the chicken.
STEP 3: BREAD THE CHICKEN
Dredge each chicken breast in the flour, shaking off any excess. Next, dip it into the beaten eggs, allowing any excess to drip off. Finally, coat the chicken in the panko breadcrumbs, pressing gently to ensure an even coating. Repeat for all the chicken breasts.
STEP 4: HEAT THE OIL
In a large skillet, pour enough vegetable oil to cover the bottom, about ¼ inch deep. Heat the oil over medium-high heat until it shimmers. To test if the oil is ready, you can drop in a few breadcrumbs; if they sizzle, it’s time to cook.
STEP 5: FRY THE CHICKEN
Carefully add the breaded chicken to the hot oil, working in batches if necessary to avoid overcrowding the pan. Fry the chicken for about 4-5 minutes on each side, or until golden brown and cooked through (internal temperature should reach 165°F/75°C). Adjust the heat as needed to maintain a steady frying temperature.
STEP 6: DRAIN AND REST
Once cooked, transfer the chicken to a plate lined with paper towels to drain excess oil. Let it rest for a few minutes to retain its juiciness.
STEP 7: SLICE AND SERVE
Using a sharp knife, slice the chicken katsu into strips for easy serving. Arrange the slices on a plate and serve with tonkatsu sauce on the side for dipping. For added crunch and color, garnish with shredded cabbage.
How to Serve
- Traditional Style: Serve with a side of steamed rice and miso soup for a complete Japanese meal.
- Bento Box: Pack sliced Chicken Katsu in a bento box with rice, pickled vegetables, and fruit for a delicious lunch.
- Garnish: Add a sprinkle of sesame seeds or sliced green onions for an extra touch of flavor and visual appeal.
Additional Tips
- Use Fresh Ingredients: Fresh chicken and quality panko breadcrumbs will enhance the dish’s overall flavor.
- Don’t Rush the Cooking: Allow the chicken to cook without flipping too soon for a perfect golden crust.
- Check Oil Temperature: If the oil is too hot, the breadcrumbs will burn before the chicken cooks through. If it’s too cool, the chicken will absorb excess oil and become greasy.
- Rest the Chicken: Letting the chicken rest after frying helps keep it juicy and tender.
- Experiment with Sauces: Try serving with different sauces like spicy mayo or sweet chili sauce for a twist.
Recipe Variations
- Pork Katsu: Substitute chicken with pork cutlets for a traditional pork katsu experience.
- Vegetable Katsu: Use thick slices of eggplant, zucchini, or sweet potato for a delicious vegetarian option.
- Spicy Katsu: Add a pinch of cayenne pepper or paprika to the panko for a spicy kick.
- Curry Katsu: Serve with curry sauce poured over the chicken for a hearty twist.
Serving Suggestions
- Side Dishes: Pair with steamed rice, miso soup, or a fresh salad for a balanced meal.
- Beverage Pairing: Serve with green tea or a light beer to complement the dish’s flavors.
- Kid-Friendly: Kids will love the crispy chicken served with a side of rice and their favorite dipping sauce.
Freezing and Storage
- Storage: Leftover Chicken Katsu can be stored in an airtight container in the fridge for up to 3 days.
- Freezing: To freeze, place the cooled, cooked chicken in a single layer in a freezer-safe bag or container. It can be frozen for up to 3 months.
- Reheating: To reheat, bake in the oven at 375°F (190°C) for about 10-15 minutes until heated through, or re-fry in a pan to restore crispiness.
Special Equipment
- Large Skillet: Essential for frying the chicken.
- Meat Mallet: For tenderizing and flattening the chicken.
- Shallow Bowls: For the breading station.
FAQ Section
Can I use chicken thighs instead of breasts?
Absolutely! Chicken thighs will provide a juicier result, but ensure they are boneless and skinless for even cooking.
What can I use instead of panko breadcrumbs?
Regular breadcrumbs can be used, but they won’t provide the same level of crunch. If you have plain breadcrumbs, consider mixing them with a bit of cornstarch for extra crispiness.
Can I prepare this ahead of time?
You can bread the chicken in advance and store it in the fridge until ready to fry. However, it’s best to fry just before serving for maximum crispiness.
How do I know when the chicken is done?
Use a meat thermometer to check the internal temperature; it should reach 165°F (75°C).
Can I add spices to the breading?
Yes! Feel free to experiment with different spices in the flour or panko mixture for added flavor.
The Cultural Significance of Katsu
Katsu is not just a delicious dish; it also holds cultural significance in Japan. Originating from European-style cutlets, katsu has been embraced by Japanese cuisine as a comfort food staple. It’s often served in bento boxes, at home for family meals, or in casual dining establishments. Understanding the cultural context can deepen your appreciation for the dish and its place in culinary traditions.
Nutritional Benefits of Chicken
Chicken is a fantastic source of lean protein, making it a popular choice for health-conscious eaters. It is rich in essential vitamins and minerals, such as B vitamins, phosphorus, and selenium. Incorporating chicken into your diet can support muscle growth, aid in weight management, and contribute to overall health. Pairing it with vegetables, like the optional shredded cabbage in Chicken Katsu, enhances the nutritional value, making for a well-rounded meal.
Creative Side Dish Ideas
To elevate your Chicken Katsu experience, consider these creative side dish ideas:
- Japanese Potato Salad: Creamy and tangy, this dish complements the crispy chicken beautifully.
- Edamame: Lightly salted edamame makes for a healthy and satisfying side.
- Seaweed Salad: A refreshing seaweed salad can add a unique flavor and texture contrast.
Conclusion
I hope you’re excited to try this Chicken Katsu recipe! It’s a dish that brings joy and flavor to your dining table, making every bite a delightful experience. Whether for a special occasion or a casual family dinner, Chicken Katsu is sure to impress.
As you prepare this dish, remember to enjoy the process and the moments shared with family and friends. Cooking is not just about the food; it’s about creating connections and memories that last a lifetime.
Don’t forget to share your results! I can’t wait to see how it turns out for you—be sure to leave a comment or tag me on social media with your delicious creations. Enjoy your cooking, and may your meals be filled with joy and flavor!
Print
Chicken Katsu: A Flavorful Delight
- Total Time: 40 minutes
Description
Experience the irresistible crunch of Chicken Katsu, a beloved Japanese classic that will elevate your dinner table! Picture tender chicken breasts coated in a crispy panko breadcrumb crust, fried to a golden brown, and served with a rich, savory tonkatsu sauce. This dish is a delightful combination of textures—crispy on the outside, juicy on the inside—creating a satisfying eating experience that’s both comforting and exciting. Pair it with steamed rice and a side of fresh cabbage slaw for a complete meal that’s both delicious and visually stunning. Chicken Katsu is not just a dish; it’s a celebration of flavor that will transport you to the streets of Japan with every delicious bite!
Ingredients
- 4 boneless, skinless chicken breasts: The base of your dish, providing a tender and juicy protein.
- 1 cup panko breadcrumbs: These Japanese-style breadcrumbs give the chicken its signature crunch.
- ½ cup all-purpose flour: For dredging the chicken, helping the egg adhere to the surface.
- 2 large eggs: Used for binding the breadcrumbs to the chicken.
- Salt and pepper: Essential for seasoning.
- Vegetable oil: For frying, ensuring a crispy texture.
- Ton katsu sauce: A sweet and tangy sauce for dipping, available in stores or easily made at home.
- Optional: Shredded cabbage: For a fresh crunch and garnish.
Instructions
STEP 1: PREPARE THE CHICKEN
Start by placing the chicken breasts between two sheets of plastic wrap or parchment paper. Using a meat mallet or rolling pin, gently pound the chicken to an even thickness, about ½ inch. This ensures the chicken cooks evenly and remains tender. Season both sides of the chicken with salt and pepper.
STEP 2: SET UP A BREADING STATION
In three shallow bowls, set up your breading station. In the first bowl, add the flour; in the second bowl, whisk the eggs; and in the third bowl, place the panko breadcrumbs. This setup makes it easy to coat the chicken.
STEP 3: BREAD THE CHICKEN
Dredge each chicken breast in the flour, shaking off any excess. Next, dip it into the beaten eggs, allowing any excess to drip off. Finally, coat the chicken in the panko breadcrumbs, pressing gently to ensure an even coating. Repeat for all the chicken breasts.
STEP 4: HEAT THE OIL
In a large skillet, pour enough vegetable oil to cover the bottom, about ¼ inch deep. Heat the oil over medium-high heat until it shimmers. To test if the oil is ready, you can drop in a few breadcrumbs; if they sizzle, it’s time to cook.
STEP 5: FRY THE CHICKEN
Carefully add the breaded chicken to the hot oil, working in batches if necessary to avoid overcrowding the pan. Fry the chicken for about 4-5 minutes on each side, or until golden brown and cooked through (internal temperature should reach 165°F/75°C). Adjust the heat as needed to maintain a steady frying temperature.
STEP 6: DRAIN AND REST
Once cooked, transfer the chicken to a plate lined with paper towels to drain excess oil. Let it rest for a few minutes to retain its juiciness.
STEP 7: SLICE AND SERVE
Using a sharp knife, slice the chicken katsu into strips for easy serving. Arrange the slices on a plate and serve with tonkatsu sauce on the side for dipping. For added crunch and color, garnish with shredded cabbage.
- Prep Time: 15 minutes
- Cook Time: 25 minutes
Nutrition
- Calories: 500 kcal
- Fat: 25g
- Carbohydrates: 45g
- Protein: 35g


