
Introduction
The holidays are the perfect time to indulge in festive, sweet treats, and Christmas Cherry Bars are the ideal dessert for your seasonal celebrations. These vibrant, cherry-filled bars bring together the perfect combination of tart cherries, buttery sweetness, and a chewy, soft texture, all topped with a golden, slightly crisp crust. They’re a delightful addition to any holiday dessert spread and will surely be a hit at your next family gathering, holiday party, or cookie exchange.
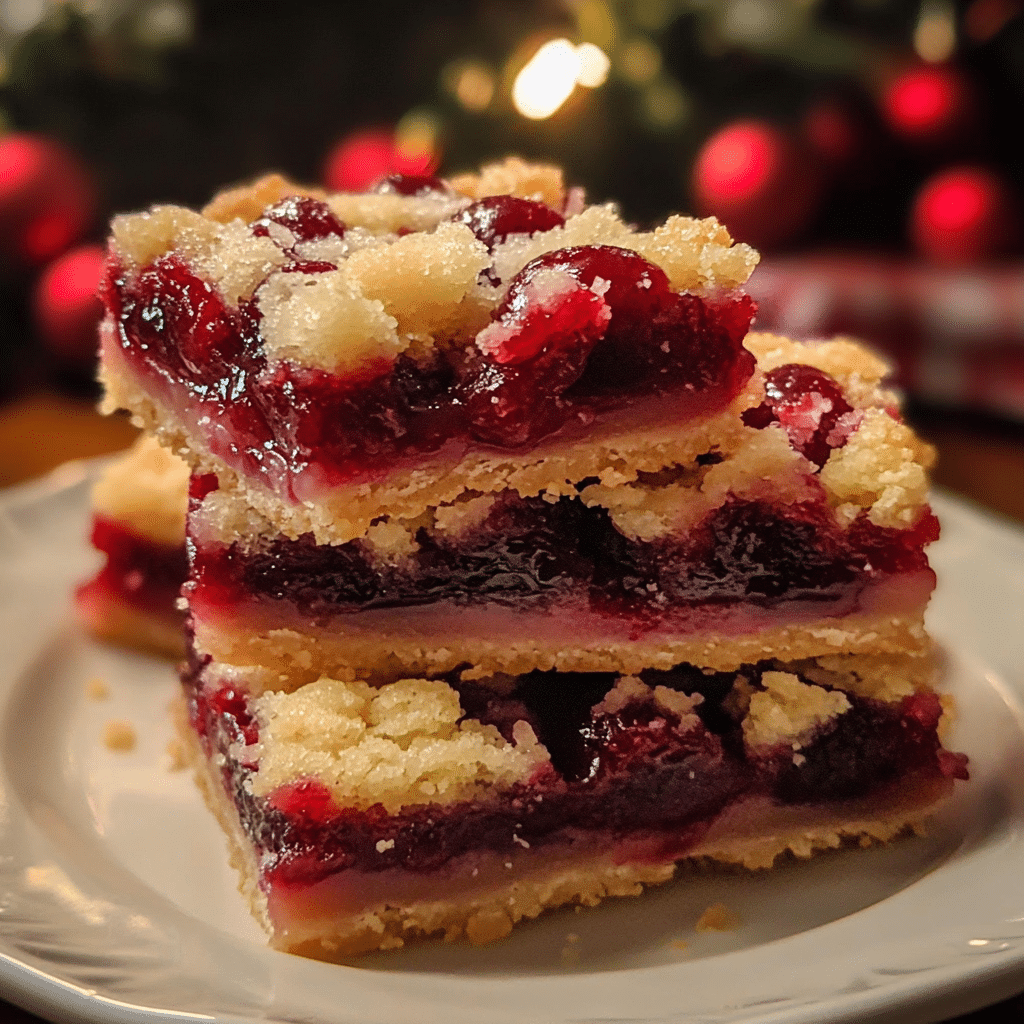
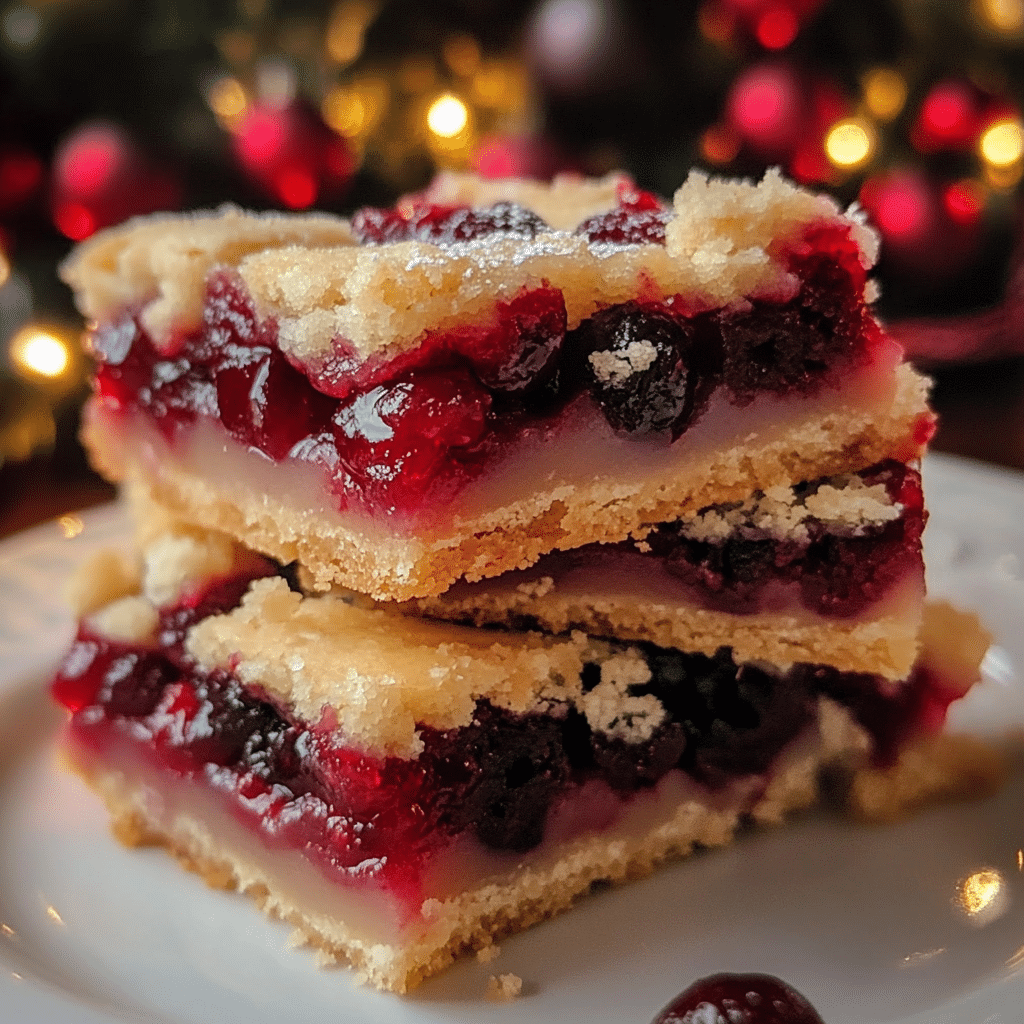
What makes these cherry bars so special is not just their rich, sweet flavor, but also their striking appearance. The bold red of the cherries contrasts beautifully with the buttery yellow crust, making them not only delicious but also visually appealing. Whether you’re baking them for Christmas, a special holiday dinner, or just as a treat to enjoy with your loved ones, these bars are guaranteed to bring festive cheer to any occasion.
In this article, we’ll take a deep dive into why Christmas Cherry Bars are a must-try holiday treat, provide a step-by-step guide for making them, and share tips for personalizing this classic dessert to suit your tastes. With a little preparation and a dash of holiday spirit, you’ll have a batch of mouthwatering cherry bars that are perfect for the season.
Why You’ll Love This Recipe
- Perfect for the Holidays: The bright red cherries and buttery golden crust make this a show-stopping dessert that’s ideal for holiday gatherings.
- Easy to Make: With simple ingredients and easy-to-follow steps, these cherry bars come together quickly, making them perfect for busy holiday baking.
- Chewy and Buttery: The base is a deliciously soft and chewy cookie-like layer that pairs wonderfully with the tartness of the cherries.
- Great for Sharing: Since this recipe makes a large batch, it’s perfect for sharing at potlucks, cookie exchanges, or family events.
- Customizable: You can adjust the recipe to your liking by adding your favorite nuts, switching to a different fruit, or changing up the flavors in the base layer.
Preparation Time and Servings
- Total Time: 1 hour 20 minutes (20 minutes for prep, 50 minutes for baking, 10 minutes for cooling)
- Servings: This recipe makes about 24 bars, depending on how you slice them.
- Nutrition Facts (per serving): Calories: 210, Protein: 2g, Carbs: 30g, Fat: 10g.
Ingredients
For the Cherry Filling:
- 2 cups fresh or frozen cherries (or 1 can of cherry pie filling): You can use sweet or tart cherries, depending on your preference. Fresh or frozen cherries will need to be pitted, while canned cherry pie filling is already prepared.
- 1/2 cup granulated sugar: To sweeten the filling and balance the tartness of the cherries.
- 2 tablespoons cornstarch: Helps thicken the cherry filling to create a nice, jammy consistency.
- 1/2 teaspoon vanilla extract: For added flavor and sweetness.
- 1 tablespoon lemon juice: Adds a touch of acidity to balance the sweetness and enhance the cherry flavor.
Crust:
- 2 cups all-purpose flour: The base of the crust, providing structure and texture.
- 1 cup unsalted butter (softened): The key to the buttery, crumbly texture of the crust.
- 1 cup granulated sugar: Sweetens the crust and balances the flavor of the cherries.
- 2 large eggs: Adds richness and helps bind the ingredients together.
- 1 teaspoon vanilla extract: Enhances the flavor of the crust.
- 1/2 teaspoon baking powder: Helps the crust rise slightly while baking, making it light and fluffy.
- 1/4 teaspoon salt: Balances the sweetness of the crust.
For the Topping:
- 1/2 cup powdered sugar: For a sweet finish that adds a delicate sweetness on top of the bars.
- 1 tablespoon milk: To thin the powdered sugar into a smooth glaze that drizzles easily.
- 1/4 teaspoon almond extract (optional): Adds a subtle nutty flavor that complements the cherry filling.
First Step: PREPARE THE CHERRY FILLING
- Prepare the Cherries: If you’re using fresh or frozen cherries, start by pitting them. If using frozen cherries, make sure to thaw them before use. If you’re using canned cherry pie filling, you can skip this step and move on to the next.
- Cook the Filling: In a medium saucepan, combine the cherries, granulated sugar, cornstarch, vanilla extract, and lemon juice. Stir the mixture over medium heat until it begins to thicken, which should take about 5-7 minutes. Once the mixture has thickened to a jammy consistency, remove it from the heat and set it aside to cool while you prepare the crust.
Second Step: MAKE THE CRUST
- Prepare the Oven: Preheat your oven to 350°F (175°C) and grease a 9×13-inch baking dish with butter or nonstick cooking spray.
- Cream the Butter and Sugar: In a large mixing bowl, use an electric mixer to cream together the softened butter and granulated sugar until light and fluffy, about 3-5 minutes. This process will help create a soft and buttery crust.
- Add the Eggs and Vanilla: Add the eggs, one at a time, and beat well after each addition. Then add the vanilla extract and mix until incorporated.
- Combine the Dry Ingredients: In a separate bowl, whisk together the flour, baking powder, and salt. Gradually add the dry ingredients to the wet ingredients, mixing until just combined. The dough will be thick and slightly crumbly.
Third Step: ASSEMBLE THE BARS
- Press the Dough into the Pan: Take about 2/3 of the dough mixture and press it evenly into the bottom of the prepared 9×13-inch baking dish. Use your fingers or the back of a spoon to press the dough into an even layer, making sure it covers the entire bottom.
- Add the Cherry Filling: Once the cherry filling has cooled slightly, spread it evenly over the crust layer. Be sure to cover the entire surface with the cherries for an even distribution of flavor.
- Add the Topping: Take the remaining dough and crumble it over the top of the cherry filling. This will form a crumbly topping that creates a beautiful contrast with the cherry filling below. Don’t worry about covering the entire surface, as the topping will spread slightly during baking.
Fourth Step: BAKE THE CHERRY BARS
- Bake the Bars: Place the baking dish in the preheated oven and bake for about 45-50 minutes, or until the top is golden brown and the filling is bubbling. Keep an eye on the bars during the last 10 minutes of baking to ensure the crust doesn’t over-brown.
- Cool the Bars: Once baked, remove the bars from the oven and let them cool in the pan for at least 10 minutes. This allows the filling to set and makes it easier to cut the bars into squares. After cooling, transfer the bars to the refrigerator to chill for an hour or more for easier slicing.
Fifth Step: DRIZZLE WITH GLAZE AND SERVE
- Prepare the Glaze: While the bars are cooling, prepare the glaze by whisking together powdered sugar, milk, and almond extract (if using) in a small bowl. The glaze should have a smooth, pourable consistency.
- Drizzle the Glaze: Once the bars have cooled and set, drizzle the glaze over the top of the bars. You can either drizzle it over the whole pan or cut the bars into squares and drizzle individual pieces.
- Serve: Cut the bars into squares and serve. They can be enjoyed at room temperature or chilled for an extra refreshing treat.
How to Serve Christmas Cherry Bars
Christmas Cherry Bars are a wonderfully versatile dessert that pairs perfectly with various other treats and beverages. Here are some ideas for serving and enjoying them:
1. Holiday Dessert Spread
These cherry bars are perfect for holiday gatherings and dessert tables. Serve them alongside other Christmas classics like gingerbread cookies, sugar cookies, and peppermint bark for a festive treat spread that will wow your guests.
2. With a Hot Beverage
Pair these cherry bars with a hot cup of coffee, tea, or hot cocoa. The sweetness of the bars pairs beautifully with the warmth of a comforting drink, making for a cozy, festive treat on a chilly winter evening.
3. Packaged for Gifting
These bars make an excellent holiday gift! Simply package them in a festive tin or box and share them with friends, neighbors, or colleagues. The bright red cherries make them look extra festive, and the homemade touch will be appreciated.
4. With Ice Cream
For an extra indulgent treat, serve the cherry bars with a scoop of vanilla ice cream or whipped cream. The creamy ice cream pairs wonderfully with the sweet, tart cherries and buttery crust.
Recipe Variations
While Christmas Cherry Bars are perfect as written, there are several ways you can modify the recipe to suit your personal taste or dietary preferences:
1. Use Different Fruit
If you’re not a fan of cherries, you can swap them out for other fruits like raspberries, strawberries, or blueberries. You can also use a combination of fruits to create a unique, colorful filling.
2. Add Nuts
For extra crunch, add chopped walnuts, pecans, or almonds to the topping or crust. The nuts will add a lovely contrast to the soft, chewy texture of the bars.
3. Make It Gluten-Free
To make these cherry bars gluten-free, simply swap the all-purpose flour for a gluten-free flour blend. Make sure to use certified gluten-free oats if you choose to add oats to the crust.
Tips for Perfect Christmas Cherry Bars
- Use Fresh or Frozen Cherries: For the best flavor and texture, use fresh or frozen cherries. If using fresh cherries, make sure to pit them before use.
- Don’t Overbake: Keep an eye on the bars while baking to ensure they don’t overbake and dry out. The top should be golden brown, and the filling should be bubbling.
- Cool Completely Before Slicing: Let the bars cool completely before slicing them to ensure clean cuts and prevent the filling from running.
- Make Ahead: These cherry bars can be made ahead of time and stored in the refrigerator for up to 3 days. You can also freeze them for up to 3 months, making them a great make-ahead dessert for the holidays.
Christmas Cherry Bars: A Festive, Sweet Treat for the Holidays
- Total Time: 1 hour 20 minutes
Description
Christmas Cherry Bars are a festive and colorful dessert that’s perfect for holiday gatherings. These buttery, slightly tangy bars are made with a shortbread-like base, topped with a sweet cherry filling, and finished with a delicate, crumbly streusel topping. The cherries add a burst of bright red color and a sweet-tart flavor that balances the rich, buttery crust. Often infused with a touch of almond extract for extra depth, these bars are both visually stunning and irresistibly delicious. They’re easy to make in a sheet pan, making them ideal for holiday parties, cookie exchanges, or gifting to friends and family.
Ingredients
For the Cherry Filling:
- 2 cups fresh or frozen cherries (or 1 can of cherry pie filling): You can use sweet or tart cherries, depending on your preference. Fresh or frozen cherries will need to be pitted, while canned cherry pie filling is already prepared.
- 1/2 cup granulated sugar: To sweeten the filling and balance the tartness of the cherries.
- 2 tablespoons cornstarch: Helps thicken the cherry filling to create a nice, jammy consistency.
- 1/2 teaspoon vanilla extract: For added flavor and sweetness.
- 1 tablespoon lemon juice: Adds a touch of acidity to balance the sweetness and enhance the cherry flavor.
For the Crust:
- 2 cups all-purpose flour: The base of the crust, providing structure and texture.
- 1 cup unsalted butter (softened): The key to the buttery, crumbly texture of the crust.
- 1 cup granulated sugar: Sweetens the crust and balances the flavor of the cherries.
- 2 large eggs: Adds richness and helps bind the ingredients together.
- 1 teaspoon vanilla extract: Enhances the flavor of the crust.
- 1/2 teaspoon baking powder: Helps the crust rise slightly while baking, making it light and fluffy.
- 1/4 teaspoon salt: Balances the sweetness of the crust.
For the Topping:
- 1/2 cup powdered sugar: For a sweet finish that adds a delicate sweetness on top of the bars.
- 1 tablespoon milk: To thin the powdered sugar into a smooth glaze that drizzles easily.
- 1/4 teaspoon almond extract (optional): Adds a subtle nutty flavor that complements the cherry filling.
Instructions
First Step: PREPARE THE CHERRY FILLING
- Prepare the Cherries: If you’re using fresh or frozen cherries, start by pitting them. If using frozen cherries, make sure to thaw them before use. If you’re using canned cherry pie filling, you can skip this step and move on to the next.
- Cook the Filling: In a medium saucepan, combine the cherries, granulated sugar, cornstarch, vanilla extract, and lemon juice. Stir the mixture over medium heat until it begins to thicken, which should take about 5-7 minutes. Once the mixture has thickened to a jammy consistency, remove it from the heat and set it aside to cool while you prepare the crust.
Second Step: MAKE THE CRUST
- Prepare the Oven: Preheat your oven to 350°F (175°C) and grease a 9×13-inch baking dish with butter or nonstick cooking spray.
- Cream the Butter and Sugar: In a large mixing bowl, use an electric mixer to cream together the softened butter and granulated sugar until light and fluffy, about 3-5 minutes. This process will help create a soft and buttery crust.
- Add the Eggs and Vanilla: Add the eggs, one at a time, and beat well after each addition. Then add the vanilla extract and mix until incorporated.
- Combine the Dry Ingredients: In a separate bowl, whisk together the flour, baking powder, and salt. Gradually add the dry ingredients to the wet ingredients, mixing until just combined. The dough will be thick and slightly crumbly.
Third Step: ASSEMBLE THE BARS
- Press the Dough into the Pan: Take about 2/3 of the dough mixture and press it evenly into the bottom of the prepared 9×13-inch baking dish. Use your fingers or the back of a spoon to press the dough into an even layer, making sure it covers the entire bottom.
- Add the Cherry Filling: Once the cherry filling has cooled slightly, spread it evenly over the crust layer. Be sure to cover the entire surface with the cherries for an even distribution of flavor.
- Add the Topping: Take the remaining dough and crumble it over the top of the cherry filling. This will form a crumbly topping that creates a beautiful contrast with the cherry filling below. Don’t worry about covering the entire surface, as the topping will spread slightly during baking.
Fourth Step: BAKE THE CHERRY BARS
- Bake the Bars: Place the baking dish in the preheated oven and bake for about 45-50 minutes, or until the top is golden brown and the filling is bubbling. Keep an eye on the bars during the last 10 minutes of baking to ensure the crust doesn’t over-brown.
- Cool the Bars: Once baked, remove the bars from the oven and let them cool in the pan for at least 10 minutes. This allows the filling to set and makes it easier to cut the bars into squares. After cooling, transfer the bars to the refrigerator to chill for an hour or more for easier slicing.
Fifth Step: DRIZZLE WITH GLAZE AND SERVE
- Prepare the Glaze: While the bars are cooling, prepare the glaze by whisking together powdered sugar, milk, and almond extract (if using) in a small bowl. The glaze should have a smooth, pourable consistency.
- Drizzle the Glaze: Once the bars have cooled and set, drizzle the glaze over the top of the bars. You can either drizzle it over the whole pan or cut the bars into squares and drizzle individual pieces.
- Serve: Cut the bars into squares and serve. They can be enjoyed at room temperature or chilled for an extra refreshing treat.
- Prep Time: 20 minutes
- Baking and Cooling Time: 0 minutes for baking, 10 minutes for cooling
Nutrition
- Calories: 210 kcal
- Fat: 10g
- Carbohydrates: 30g
- Protein: 2g
Conclusion
Christmas Cherry Bars are a must-have treat for your holiday celebrations. With their vibrant color, rich flavor, and buttery, crumbly crust, these bars will be the star of your dessert table. They’re easy to make, highly customizable, and perfect for sharing with loved ones. Whether you’re hosting a holiday gathering, participating in a cookie exchange, or simply looking for a festive dessert to enjoy with your family, these cherry bars will add the perfect touch of sweetness to your holiday season. Try them today and make your holidays a little sweeter!


