
Introduction
Roasting a Cornish hen is an experience that transcends mere cooking; it’s a culinary celebration. Imagine the scene: a festive table adorned with golden, crispy-skinned hens, each glistening under a glaze of cider and maple syrup, sending warm, inviting aromas wafting through your kitchen. This dish not only promises a visual feast but also captures the essence of fall, making it an ideal centerpiece for Thanksgiving or any special gathering.
The first time I prepared this recipe was during a small family gathering. The moment I pulled the hens from the oven, their golden hue and tantalizing aroma drew everyone in. My family, curious and eager, gathered around, ready to dig in. The delightful sweetness of the cider combined with the rich maple syrup created a flavor profile that perfectly complemented the savory notes of the tender hen meat. This dish quickly became a cherished addition to our holiday meals, sparking joy and filling our hearts—and stomachs—with warmth.
What I love most about this recipe is its simplicity and versatility. Even those new to the kitchen can navigate the steps with ease, while seasoned chefs will appreciate the opportunity to experiment with flavors. Each Cornish hen serves as a personal portion, eliminating the hassle of slicing and serving, making it a charming choice for both intimate dinners and large family gatherings. Let’s delve deeper into why this recipe deserves a spot on your table and how to make it the ultimate highlight of your culinary repertoire.
Why You’ll Love This Recipe
- Easy to Prepare: With just a handful of ingredients and straightforward steps, this recipe is perfect for busy holiday cooking. No complicated techniques or long prep times here!
- Perfectly Sized: Each Cornish hen is an ideal single serving, making it a delightful option for dinner parties or family gatherings. Guests can enjoy their own beautifully roasted hen without the need for slicing.
- Sweet and Savory: The cider and maple syrup create a balanced flavor profile that enhances the natural richness of the hen. This harmonious combination is sure to please diverse palates.
- Impressive Presentation: Roasting the hens results in a gorgeous golden color that’s visually stunning on any table, guaranteed to impress your guests and elevate your meal.
- Versatile Pairing: This dish complements a wide array of sides, from creamy mashed potatoes to seasonal roasted vegetables, making it a versatile addition to any Thanksgiving spread.
Preparation Time and Servings
- Total Time: 1 hour (15 minutes prep, 45 minutes cooking)
- Servings: This recipe serves 4 people.
- Nutrition Facts: Calories per serving: 400, Protein: 30g, Carbs: 25g, Fat: 20g.
Ingredients
- 4 Cornish hens (about 1-1.5 pounds each)
- 1 cup apple cider
- ¼ cup pure maple syrup
- 2 tablespoons olive oil
- 1 tablespoon fresh thyme leaves
- Salt and pepper to taste
- Optional: Sliced apples and onions for roasting alongside the hens
Step-by-Step Instructions
Step 1: Prepare the Chicken
Begin by preheating your oven to 425°F (220°C). This high heat is key to achieving that beautifully crispy skin. Rinse the hens under cold water and pat them dry with paper towels. This step is crucial for creating that crispy exterior. Season the cavity of each hen generously with salt and pepper to enhance flavor.
Step 2: Make the Cider Maple Glaze
In a small bowl, whisk together the apple cider, maple syrup, olive oil, and thyme. This glaze will infuse the hens with incredible flavor. Don’t forget to reserve a little glaze to brush on the hens during the last few minutes of roasting for an extra touch of sweetness!
Step 3: Arrange in a Baking Dish
Place the hens breast-side up in a roasting pan. If you’d like, scatter sliced apples and onions around them to add flavor and a hint of sweetness. Brush the glaze generously over each hen, ensuring they’re well coated for maximum flavor.
Step 4: Roast the Hens
Roast in the preheated oven for about 30-35 minutes, basting with the remaining glaze halfway through. The hens are done when the juices run clear and the internal temperature reaches 165°F (75°C). Don’t worry if the skin looks a little dark; that caramelization is what brings out the rich flavors.
Step 5: Rest and Serve
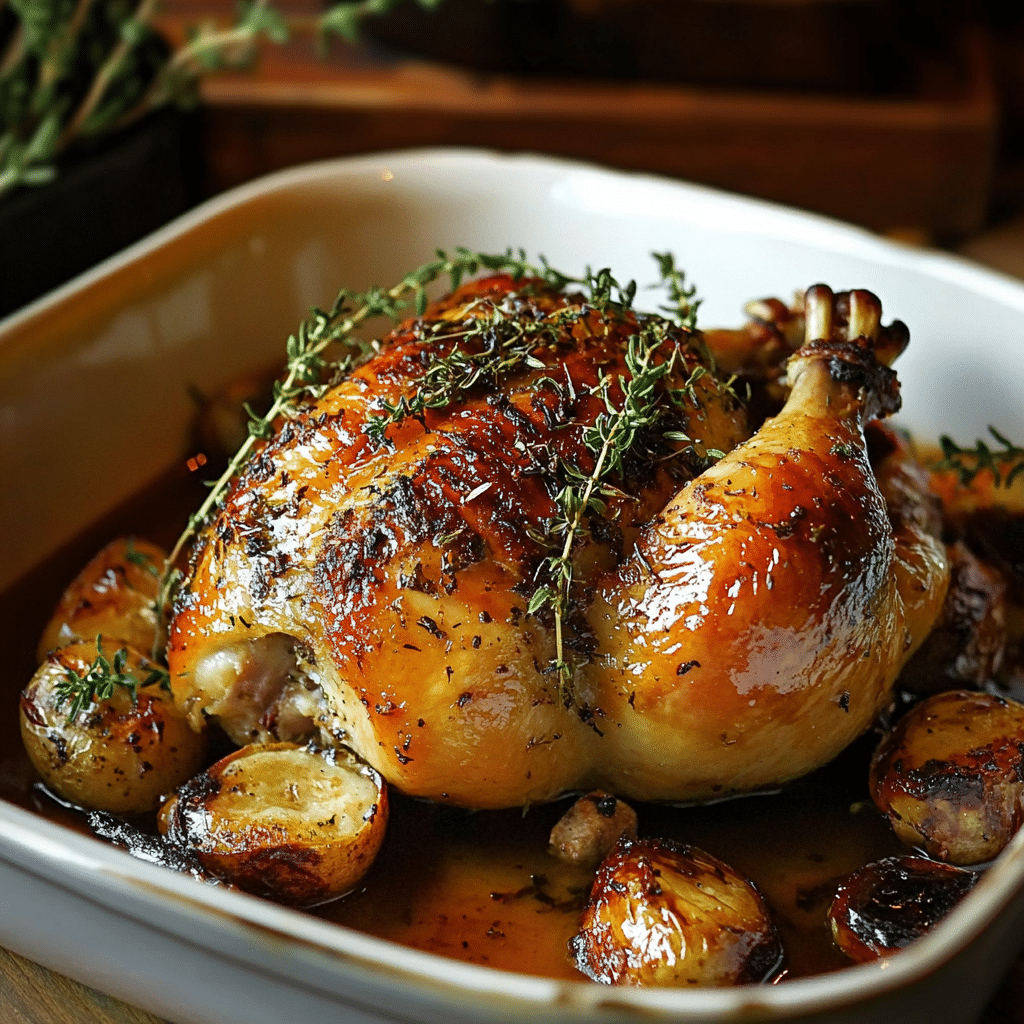
Once cooked, remove the hens from the oven and let them rest for about 10 minutes. This resting period allows the juices to redistribute, ensuring succulent meat. Serve the hens on a platter, garnished with fresh thyme and any roasted apples or onions for a stunning display.
How to Serve
- Pair with Sides: Serve the hens alongside creamy mashed potatoes, roasted Brussels sprouts, or a festive cranberry salad for a complete and balanced meal.
- Drizzle with Extra Glaze: A little drizzle of the reserved cider maple glaze over the hens adds an extra layer of flavor and visual appeal.
- Wine Pairing: A light-bodied white wine, such as Chardonnay, beautifully complements the sweetness of the dish, enhancing the dining experience.
Additional Tips
- Thaw Properly: If using frozen Cornish hens, ensure they are completely thawed in the fridge before cooking. This guarantees even cooking and optimal texture.
- Use a Meat Thermometer: This is the best way to ensure your hens are perfectly cooked without drying out. Aim for an internal temperature of 165°F (75°C) at the thickest part of the breast.
- Baste for Extra Flavor: Basting the hens halfway through roasting helps keep them moist and adds flavor from the glaze.
- Customize the Glaze: Feel free to add herbs like rosemary or sage to the glaze for an extra layer of flavor. Experimenting with spices can create a unique twist on the classic recipe.
- Make it Ahead: You can prep the hens and glaze a few hours in advance. Just cover and refrigerate until you’re ready to roast!
Recipe Variations
- Add Spices: Try incorporating a pinch of cinnamon or nutmeg into the glaze for a warm, festive touch.
- Stuff the Hens: For added flavor, stuff the cavity with aromatics like garlic cloves, lemon slices, or fresh herbs before roasting.
- Change the Fruit: Substitute apple cider with pear cider for a different flavor profile. You can also add slices of pear alongside the hens for an extra hint of sweetness.
- Gluten-Free Option: This recipe is naturally gluten-free, making it a great choice for those with dietary restrictions.
- Sweet Potatoes: Roast sweet potatoes alongside the hens for a delicious side that complements the flavors perfectly.
Serving Suggestions
- Side Dishes: Pair the hens with roasted carrots, green beans, or a fresh garden salad to balance the richness of the dish.
- Bread Pairing: Serve with crusty bread or dinner rolls for a complete dining experience, perfect for soaking up any extra glaze.
- For Kids: Consider serving smaller portions or removing the meat from the bone for younger diners to enjoy easily.
Freezing and Storage
- Storage: Leftover Cornish hens can be stored in an airtight container in the fridge for up to 3 days. They reheat beautifully and retain their flavor.
- Freezing: If you have leftovers, you can freeze the cooked hens. Wrap them tightly in plastic wrap and then foil to prevent freezer burn. They’ll last up to 3 months.
- Reheating: To reheat, place in a preheated oven at 350°F (175°C) for about 15-20 minutes, covered with foil to keep them moist.
- Defrosting: If frozen, thaw overnight in the refrigerator before reheating for the best results.
Special Equipment
- Roasting Pan: A good-quality roasting pan ensures even cooking and browning.
- Basting Brush: This is helpful for applying the glaze and keeping the hens moist during cooking.
- Meat Thermometer: Essential for checking doneness without cutting into the meat.
FAQ Section
- Can I use frozen Cornish hens?
Yes, just ensure they are fully thawed before cooking for even results. - What if I don’t have apple cider?
You can substitute with apple juice or even a mix of white wine and water for a different flavor. - Can I prepare this ahead of time?
Absolutely! Prep the hens and glaze a few hours in advance, then refrigerate until ready to roast. - How do I know when the hens are done?
Use a meat thermometer; the internal temperature should reach 165°F (75°C). - Can I roast other vegetables with the hens?
Yes! Feel free to add root vegetables or Brussels sprouts for a complete meal.
Conclusion
I hope you’re as excited to try this Cider Maple Oven Roasted Cornish Hen as I am! This dish brings warmth and joy to your Thanksgiving table, filling the air with delightful aromas and creating wonderful memories. It’s not just about the meal; it’s about gathering with loved ones, sharing stories, and celebrating the moment. Whether it’s Thanksgiving or any special occasion, I’m confident this dish will impress your guests and become a cherished tradition in your home.
As you enjoy this culinary experience, remember that cooking is an art that invites creativity and connection. Don’t forget to share your experience! I can’t wait to hear how it turns out for you—be sure to leave a comment or tag me on social media with your delicious creations. Happy cooking, and may your table always be filled with love, laughter, and the joy of togetherness!
Print
Cider Maple Oven Roasted Cornish Hen: A Thanksgiving Treat
- Total Time: 1 hour
Ingredients
- 4 Cornish hens (about 1–1.5 pounds each): The star of the dish, providing tender, juicy meat.
- 1 cup apple cider: Adds a sweet, fruity flavor that complements the maple.
- ¼ cup pure maple syrup: For that rich sweetness and caramelization during roasting.
- 2 tablespoons olive oil: Helps achieve that crispy, golden skin.
- 1 tablespoon fresh thyme leaves: Provides an aromatic touch that enhances the flavor.
- Salt and pepper to taste: Essential for seasoning the hens.
- Optional: Sliced apples and onions for roasting alongside the hens.
Instructions
STEP 1: PREPARE THE CHICKEN
Begin by preheating your oven to 425°F (220°C). This high heat will help create that beautifully crispy skin.
Rinse the hens under cold water and pat them dry with paper towels. This step is crucial for achieving crispy skin. Season the cavity of each hen with salt and pepper.
STEP 2: MAKE THE CIDER MAPLE GLAZE
In a small bowl, whisk together the apple cider, maple syrup, olive oil, and thyme. This glaze will infuse the hens with incredible flavor. Reserve a little glaze to brush on the hens during the last few minutes of roasting for extra sweetness!
STEP 3: ARRANGE IN A BAKING DISH
Place the hens breast-side up in a roasting pan. If using, scatter sliced apples and onions around them for added flavor and sweetness. Brush the glaze generously over each hen, ensuring they’re well coated.
STEP 4: ROAST THE HENS
Roast in the preheated oven for about 30-35 minutes, basting with the remaining glaze halfway through. The hens are done when the juices run clear and the internal temperature reaches 165°F (75°C). Don’t worry if the skin looks a little dark; that caramelization adds flavor!
STEP 5: REST AND SERVE
Once cooked, remove the hens from the oven and let them rest for about 10 minutes before serving. This allows the juices to redistribute, ensuring juicy meat. Serve the hens on a platter, garnished with fresh thyme and any roasted apples or onions for a beautiful display.
- Prep Time: 15 minutes
- Cook Time: 45 minutes
Nutrition
- Calories: 400 kcal
- Fat: 20g
- Carbohydrates: 25g
- Protein: 20g


