Description
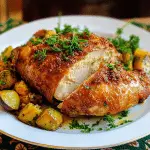
A golden, crispy breaded chicken breast filled with a rich, garlicky butter and herbs. This elegant dish is both tender and flavorful, offering a perfect blend of crispy exterior and melt-in-your-mouth filling.
Ingredients
For the Chicken Kiev:
- 4 boneless, skinless chicken breasts
- 1 cup all-purpose flour (for dredging)
- 2 large eggs, beaten
- 1 ½ cups breadcrumbs (preferably panko for extra crunch)
- Salt and freshly ground black pepper, to taste
- Vegetable oil (for frying)
For the Herb Butter Filling:
- ½ cup unsalted butter, softened
- 2 tablespoons fresh parsley, finely chopped
- 2 tablespoons fresh dill, finely chopped (optional, but highly recommended)
- 2 cloves garlic, minced
- 1 teaspoon lemon zest
- 1 tablespoon lemon juice
- Salt and freshly ground black pepper, to taste
Instructions
1. Prepare the Herb Butter Filling
Start by making the herbed butter that will be the star of this dish. In a medium-sized mixing bowl, combine the softened butter, chopped parsley, dill (if using), minced garlic, lemon zest, and lemon juice. Season with salt and pepper to taste. Use a fork or a spoon to mix everything together until the butter is smooth and the herbs and garlic are evenly distributed.
Once the butter mixture is well combined, place it on a piece of plastic wrap or parchment paper. Roll the butter into a log shape, ensuring that it is compact and firm. Chill the herb butter in the refrigerator for at least 30 minutes, or until it has hardened. This makes it easier to stuff into the chicken breasts later.
2. Prepare the Chicken Breasts
While the herb butter is chilling, prepare the chicken breasts. If necessary, use a sharp knife to carefully cut a pocket into each chicken breast. The pocket should be deep enough to hold a generous portion of the herb butter, but be careful not to cut all the way through. You want to create a pouch where the butter will melt inside the chicken while it cooks.
Once the chicken breasts are prepared, season them with salt and pepper on both sides. This ensures that the chicken itself is well-seasoned before frying.
3. Stuff the Chicken Breasts with Herb Butter
After the herb butter has chilled and firmed up, cut the butter log into four equal portions, one for each chicken breast. Carefully stuff each chicken breast with a portion of the chilled herb butter, ensuring the butter is tucked neatly inside the pocket. Use toothpicks to secure the opening of the chicken if necessary. This will help prevent the butter from leaking out while cooking.
Once the chicken breasts are stuffed, set them aside to prepare for dredging and frying.
4. Dredge the Chicken Breasts
Now it’s time to coat the chicken breasts with breadcrumbs. Set up a dredging station with three shallow bowls: one for flour, one for beaten eggs, and one for breadcrumbs. Lightly season the flour with a pinch of salt and pepper. Dredge each stuffed chicken breast in the flour, ensuring it is fully coated. Next, dip the floured chicken into the beaten eggs, making sure it is evenly covered. Finally, coat the chicken with breadcrumbs, pressing down gently to ensure an even coating.
Repeat this process with each chicken breast. The breadcrumbs will form a crispy, golden exterior once fried, giving you the perfect texture contrast with the tender, buttery inside.
5. Fry the Chicken Kiev
Heat a generous amount of vegetable oil in a large skillet over medium-high heat. The oil should be hot enough that the chicken sizzles when added but not so hot that it burns the breadcrumbs. Once the oil is ready, carefully add the breaded chicken breasts to the pan, making sure not to overcrowd the skillet. You may need to cook the chicken in batches.
Fry the chicken for about 5-6 minutes on each side, or until the breadcrumbs are golden brown and crispy. Use tongs to turn the chicken, being careful not to let the butter leak out of the pockets. Once the chicken is golden brown on both sides, reduce the heat to medium and continue cooking the chicken for an additional 5-7 minutes, allowing the chicken to cook through without burning the breadcrumbs.
Check the internal temperature of the chicken using a meat thermometer. It should read 165°F (74°C) to ensure it is fully cooked. If the chicken is golden but not fully cooked inside, you can transfer it to a preheated oven at 350°F (175°C) for 5-10 minutes to finish cooking.
6. Drain and Serve the Chicken Kiev
Once the chicken is fully cooked, remove it from the skillet and place it on a plate lined with paper towels to drain any excess oil. This helps keep the coating crispy.
Serve the Chicken Kiev immediately while it is still hot, ensuring that the herb butter melts out when cut into. You can remove the toothpicks before serving, and garnish the chicken with a few sprigs of fresh parsley or dill for an elegant touch.
- Prep Time: 30 minutes
- Cook Time: 25-30 minutes
Nutrition
- Calories: 400-500 kcal
- Fat: 25-30g
- Carbohydrates: 15-20g
- Protein: 35-40g
