
Introduction
As Halloween approaches, the air fills with a sense of excitement and a hint of spookiness. While costumes and candy are essential parts of the season, the culinary creations often steal the spotlight. Imagine bite-sized pastries, creatively shaped like coffins, filled with delicious fillings and glazed to perfection. These Coffin-Shaped Pop-Tarts are a delightful twist on the classic treat, perfect for parties, family gatherings, or a fun afternoon activity.
I was inspired to create these after seeing a spooky display at a local bakery that showcased Halloween-themed pastries. The idea of making a homemade version that was both delicious and visually fun was too tempting to resist! Not only do these Pop-Tarts make a fantastic seasonal treat, but they also provide a wonderful opportunity to involve the kids in the kitchen, sparking creativity and laughter along the way.
So, whether you’re hosting a Halloween party, looking for a unique dessert, or just want to enjoy a spooky snack, these Coffin-Shaped Pop-Tarts are sure to impress. Let’s get started on this fun, festive recipe!
Why You’ll Love This Recipe
- Easy to Make: With simple ingredients and clear instructions, you’ll whip up a batch of these coffin-shaped delights without any hassle. Even if you’re a beginner baker, you’ll feel like a pro!
- Creative Fun: Shaping the dough into coffins and choosing fillings allows for endless creativity. Kids will love helping out with the decorating!
- Deliciously Versatile: You can fill these pastries with your favorite jams, chocolate, or even custards. The options are limitless, catering to every taste preference.
- Perfect for Sharing: These treats make a fantastic centerpiece for Halloween gatherings and are sure to be a hit with guests of all ages. Their unique shape will spark conversations and smiles!
Picture sinking your teeth into a flaky, buttery pastry filled with sweet goodness, all while embracing the spirit of Halloween. It’s a treat that combines fun and flavor in every bite!
Preparation Time and Servings
- Total Time: 1 hour (includes baking and cooling)
- Servings: Makes about 12 Coffin-Shaped Pop-Tarts
- Nutrition Facts:
- Calories per serving: 200
- Protein: 2g
- Carbs: 28g
Ingredients
Here’s what you’ll need to create these spooky delights:
For the Dough
- 2 1/2 cups all-purpose flour: The foundation for our flaky pastry.
- 1/2 teaspoon salt: Enhances the flavor of the dough.
- 1/4 cup granulated sugar: Adds a touch of sweetness to the crust.
- 1 cup unsalted butter, chilled and cubed: This is essential for that flaky texture. Use vegan butter if you need a dairy-free option.
- 6-8 tablespoons cold water: Helps bind the dough together.
For the Filling
- 1 cup fruit preserves or jam: Choose your favorite flavor—strawberry, raspberry, or blueberry work great. For chocolate lovers, you can use Nutella or chocolate ganache.
- Optional: A sprinkle of cinnamon or vanilla extract for added flavor.
For the Glaze
- 1 cup powdered sugar: For sweetness and to create a glossy finish.
- 2-3 tablespoons milk or almond milk: To achieve the desired consistency for the glaze.
- Food coloring (optional): Use black or purple to enhance the Halloween theme.
- Sprinkles or edible glitter: For that festive touch!
Step-by-Step Instructions
Making the Dough
- Mix Dry Ingredients: In a large mixing bowl, whisk together the flour, salt, and sugar. This ensures even distribution of all the dry ingredients.
- Cut in the Butter: Add the chilled, cubed butter to the flour mixture. Using a pastry cutter or your fingers, work the butter into the flour until the mixture resembles coarse crumbs. This step is crucial for achieving a flaky texture.
- Add Cold Water: Gradually add the cold water, one tablespoon at a time, mixing until the dough comes together. You want it to be moist but not sticky.
- Chill the Dough: Form the dough into a disk, wrap it in plastic wrap, and refrigerate for at least 30 minutes. This helps the butter solidify and makes rolling easier.
Assembling the Coffin-Shaped Pop-Tarts
- Preheat the Oven: Preheat your oven to 350°F (175°C) to ensure it’s hot when the Pop-Tarts go in.
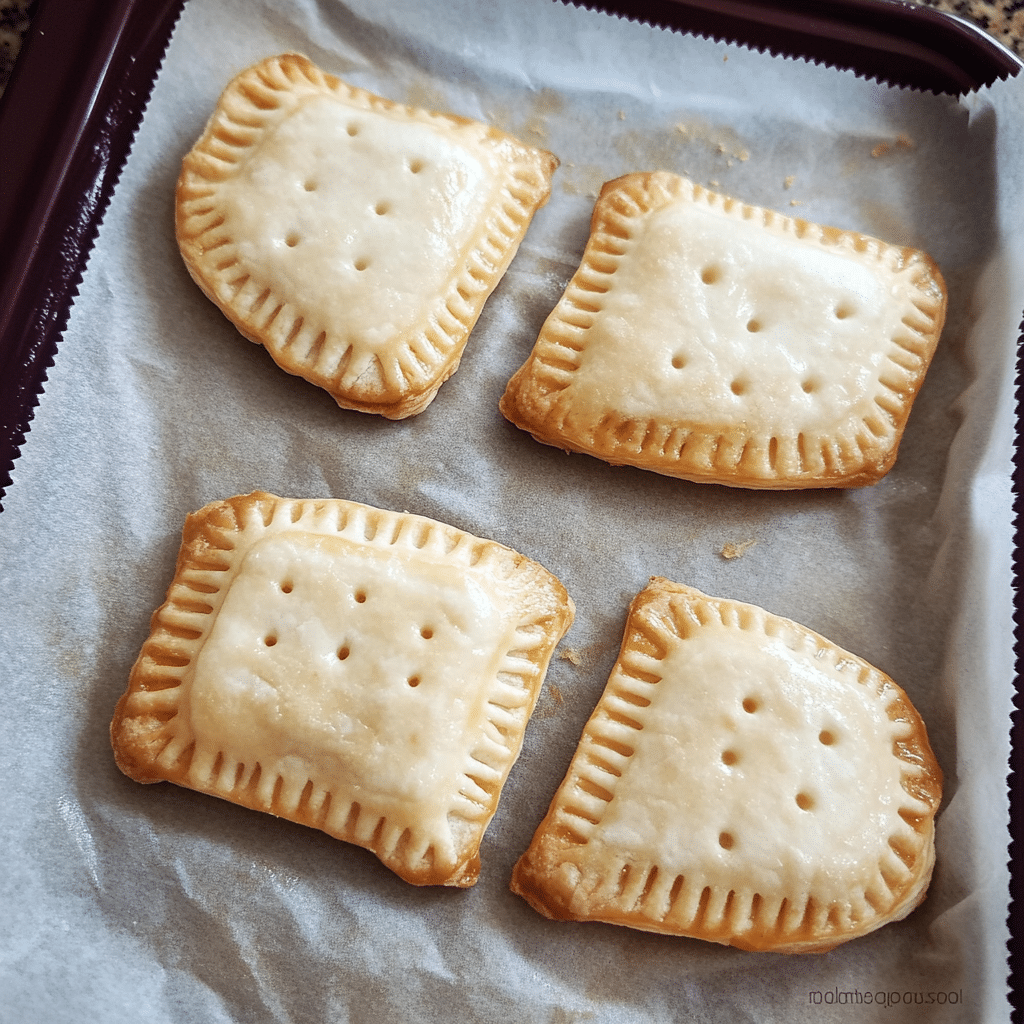
- Roll Out the Dough: On a lightly floured surface, roll out the chilled dough to about 1/8-inch thickness. Use a coffin-shaped cookie cutter (or a template) to cut out shapes. You should have two pieces for each Pop-Tart.
- Add the Filling: Place half of the cutouts on a baking sheet lined with parchment paper. Spoon about a tablespoon of your chosen filling onto the center of each dough piece, leaving a border around the edges.
- Seal the Pop-Tarts: Place the remaining cutouts on top of the filled pieces. Gently press down around the edges to seal, and use a fork to crimp the edges for an extra decorative touch.
- Make Air Vents: Use a sharp knife to cut small slits in the top of each Pop-Tart. This allows steam to escape while baking.
Baking
- Bake: Place the baking sheet in the preheated oven and bake for 20-25 minutes, or until the pastries are golden brown. The aroma will fill your kitchen, making it hard to wait!
- Cool the Pop-Tarts: Remove from the oven and let them cool on a wire rack for about 10 minutes before glazing.
Making the Glaze
- Prepare the Glaze: In a bowl, whisk together the powdered sugar and milk until smooth. If desired, add food coloring to create a spooky hue.
- Glaze the Pop-Tarts: Once the Pop-Tarts have cooled, drizzle the glaze over the top. You can also dip them for a thicker coating.
- Add Sprinkles: While the glaze is still wet, sprinkle on some Halloween-themed sprinkles or edible glitter for a festive touch.
How to Serve
These Coffin-Shaped Pop-Tarts are perfect for:
- Halloween Breakfast: Start your spooky day with a fun breakfast treat that kids will love.
- Party Treats: Set them out on a platter at your Halloween party and watch guests rave about your creativity!
- Halloween Movie Night: Pair them with your favorite scary films for a deliciously themed snack.
Additional Tips
- Make Ahead: You can prepare the dough and filling a day in advance to save time on the day you plan to serve them.
- Storage: Store leftover Pop-Tarts in an airtight container at room temperature for up to 3 days. For longer storage, you can refrigerate them.
- Experiment with Fillings: Feel free to try different fillings! Pumpkin puree with spices, peanut butter, or even a savory cheese filling for a unique twist.
- Customize Shapes: If you don’t have a coffin cutter, you can use other Halloween-themed shapes like bats or ghosts to mix things up!
- Join the Fun: Invite friends or family to join in the decorating process. It’s a great way to bond and create memories while having fun in the kitchen.
Recipe Variations
Customize these Coffin-Shaped Pop-Tarts to suit your taste or dietary needs:
- Gluten-Free Option: Use a gluten-free flour blend to make the dough gluten-free. Just be sure to follow the package instructions for the best results.
- Vegan Option: Substitute the butter with a vegan alternative and use a plant-based milk for the glaze.
- Different Flavors: Try fillings like caramel, cream cheese frosting, or even savory options like cheese and herbs for a unique twist.
Serving Suggestions
To complement your spooky spread, consider these ideas:
- Themed Drinks: Serve with fun, themed drinks like a blackcurrant soda or pumpkin spice lattes to create a cohesive Halloween vibe.
- Decorative Displays: Arrange the Pop-Tarts on a spooky platter, adorned with fake cobwebs and mini pumpkins to enhance the Halloween spirit.
- Kid-Friendly Options: Pair these treats with fun Halloween-themed snacks like fruit “witches’ brooms” (pretzel sticks with cheese) or veggie “monster eyes” (olives on cucumber slices).
Freezing and Storage
Storage: Keep any leftover Pop-Tarts in an airtight container at room temperature for up to 3 days. They taste great at room temperature or warmed slightly in the microwave.
Freezing: You can also freeze unglazed Pop-Tarts. Just wrap them individually in plastic wrap, then place them in a freezer-safe bag. They can be frozen for up to 2 months. Thaw them at room temperature and glaze when ready to serve.
Special Equipment
- Coffin-Shaped Cookie Cutter: Essential for achieving the spooky shape. If you can’t find one, you can also make a stencil out of cardboard to trace around.
- Parchment Paper: Great for lining your baking sheet to prevent sticking and make cleanup easier.
- Rolling Pin: For rolling out the dough evenly to the desired thickness.
FAQ Section
Can I use store-bought pastry dough?
Absolutely! If you’re short on time, feel free to use store-bought pie
crust or puff pastry for an easier option.
What other shapes can I make?
You can use any Halloween-themed cookie cutter, such as bats, pumpkins, or ghosts. The fun is in the creativity!
Can I make these without filling?
Yes! You can bake the dough as is for a flaky pastry and serve them with a side of icing for dipping.
How can I make the glaze thicker?
To thicken your glaze, simply add more powdered sugar until you reach your desired consistency.
Can I decorate these in advance?
For best results, decorate just before serving to maintain the freshness of the glaze and sprinkles.
Conclusion
I can’t wait for you to try these Coffin-Shaped Pop-Tarts! They’re not just a treat; they’re an experience that brings fun and creativity to the kitchen. Gather your loved ones, roll out the dough, and let your imagination run wild as you create these delightful Halloween pastries.
I’d love to see your spooky creations! Don’t forget to snap a photo and tag me on social media. Happy Halloween, and happy baking! With every bite of these Coffin-Shaped Pop-Tarts, you’re sure to bring a little bit of magic and a lot of sweetness to this spooky season. Enjoy the festivities!
Print
Coffin-Shaped Pop-Tarts
- Total Time: 1 hour
Ingredients
For the Dough
- 2 1/2 cups all-purpose flour: The foundation for our flaky pastry.
- 1/2 teaspoon salt: Enhances the flavor of the dough.
- 1/4 cup granulated sugar: Adds a touch of sweetness to the crust.
- 1 cup unsalted butter, chilled and cubed: This is essential for that flaky texture. Use vegan butter if you need a dairy-free option.
- 6–8 tablespoons cold water: Helps bind the dough together.
For the Filling
- 1 cup fruit preserves or jam: Choose your favorite flavor—strawberry, raspberry, or blueberry work great. For chocolate lovers, you can use Nutella or chocolate ganache.
- Optional: A sprinkle of cinnamon or vanilla extract for added flavor.
For the Glaze
- 1 cup powdered sugar: For sweetness and to create a glossy finish.
- 2–3 tablespoons milk or almond milk: To achieve the desired consistency for the glaze.
- Food coloring (optional): Use black or purple to enhance the Halloween theme.
- Sprinkles or edible glitter: For that festive touch!
Instructions
Making the Dough
- Mix Dry Ingredients: In a large mixing bowl, whisk together the flour, salt, and sugar. This ensures even distribution of all the dry ingredients.
- Cut in the Butter: Add the chilled, cubed butter to the flour mixture. Using a pastry cutter or your fingers, work the butter into the flour until the mixture resembles coarse crumbs. This step is crucial for achieving a flaky texture.
- Add Cold Water: Gradually add the cold water, one tablespoon at a time, mixing until the dough comes together. You want it to be moist but not sticky.
- Chill the Dough: Form the dough into a disk, wrap it in plastic wrap, and refrigerate for at least 30 minutes. This helps the butter solidify and makes rolling easier.
Assembling the Coffin-Shaped Pop-Tarts
- Preheat the Oven: Preheat your oven to 350°F (175°C) to ensure it’s hot when the Pop-Tarts go in.
- Roll Out the Dough: On a lightly floured surface, roll out the chilled dough to about 1/8-inch thickness. Use a coffin-shaped cookie cutter (or a template) to cut out shapes. You should have two pieces for each Pop-Tart.
- Add the Filling: Place half of the cutouts on a baking sheet lined with parchment paper. Spoon about a tablespoon of your chosen filling onto the center of each dough piece, leaving a border around the edges.
- Seal the Pop-Tarts: Place the remaining cutouts on top of the filled pieces. Gently press down around the edges to seal, and use a fork to crimp the edges for an extra decorative touch.
- Make Air Vents: Use a sharp knife to cut small slits in the top of each Pop-Tart. This allows steam to escape while baking.
Baking
- Bake: Place the baking sheet in the preheated oven and bake for 20-25 minutes, or until the pastries are golden brown. The aroma will fill your kitchen, making it hard to wait!
- Cool the Pop-Tarts: Remove from the oven and let them cool on a wire rack for about 10 minutes before glazing.
Making the Glaze
- Prepare the Glaze: In a bowl, whisk together the powdered sugar and milk until smooth. If desired, add food coloring to create a spooky hue.
- Glaze the Pop-Tarts: Once the Pop-Tarts have cooled, drizzle the glaze over the top. You can also dip them for a thicker coating.
- Add Sprinkles: While the glaze is still wet, sprinkle on some Halloween-themed sprinkles or edible glitter for a festive touch.
- Prep Time: 30 minutes
- Baking Time: 30 Minutes
Nutrition
- Serving Size: 12 Coffin-Shaped Pop-Tarts
- Calories: 200 kcal
- Carbohydrates: 28g
- Protein: 2g


