
Introduction
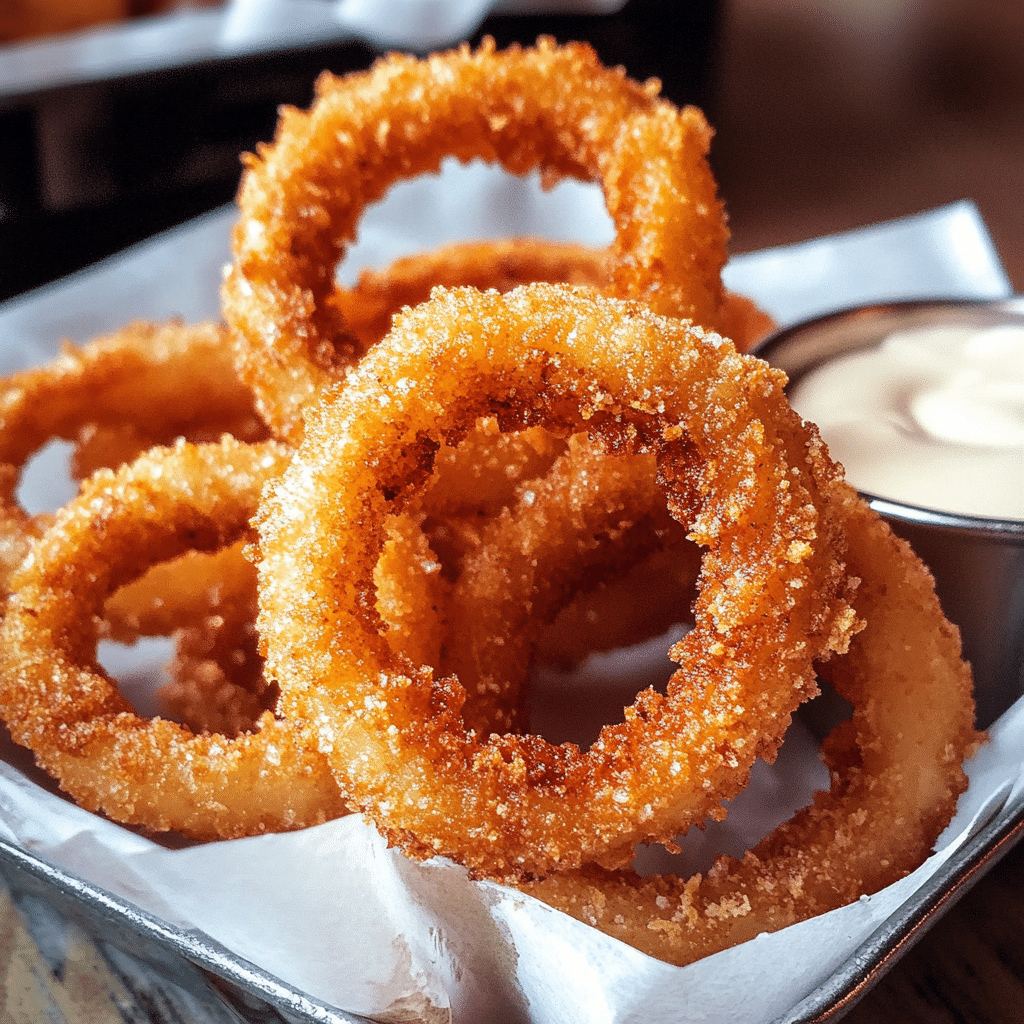
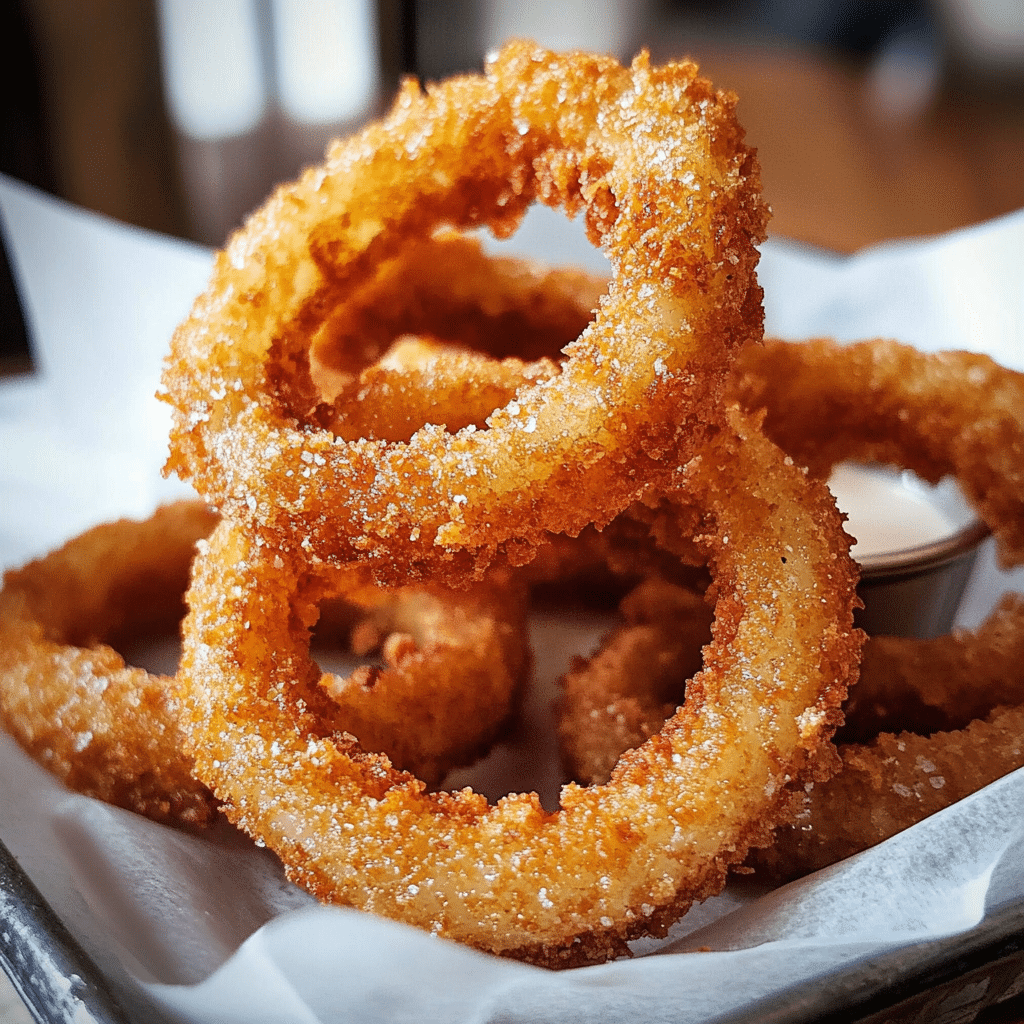
Crispy Onion Rings are a beloved comfort food that combines the sweet, tender flavor of onions with a perfectly crunchy, golden-brown batter. Whether served as a side dish, snack, or appetizer, onion rings are universally adored for their irresistible crunch and savory taste. The light, crispy coating contrasts beautifully with the soft onion inside, creating a delightful bite in every piece.
Making homemade onion rings from scratch is surprisingly easy, and they turn out far superior to those bought frozen or at a fast food joint. With a few simple ingredients and a straightforward process, you can enjoy restaurant-quality crispy onion rings in the comfort of your own home. This guide will walk you through each step of making perfect onion rings, from selecting the right onions to achieving the perfect batter and frying technique.
Why You’ll Love Crispy Onion Rings
- Irresistible Crunch: The crispy, golden coating of the onion rings creates a satisfying crunch with every bite. The contrast between the crispy batter and the soft, sweet onion is simply divine.
- Versatile: Onion rings are a versatile side dish that can complement virtually any meal. They are great with burgers, fried chicken, or served on their own as a snack. You can also serve them as a starter or appetizer for any party or gathering.
- Homemade Goodness: Making onion rings from scratch ensures that they are made fresh with the best ingredients, avoiding any preservatives or artificial flavors found in store-bought versions.
- Customizable: You can adjust the seasonings and batter to match your taste. Whether you like them extra crispy, spicy, or with a hint of sweetness, there are endless ways to customize your onion rings.
- Fun to Make: The process of dipping and frying onion rings can be quite fun and rewarding, making it a great activity to share with friends or family. Plus, you get to enjoy the delicious results!
Preparation and Cooking Time
- Total Time: 40-45 minutes
- Preparation Time: 15 minutes
- Cooking Time: 15-20 minutes
- Servings: Approximately 4-6 servings (depending on portion size)
- Calories per Serving: Around 200-250 calories per serving, depending on the size and batter.
Nutrition Facts (Per Serving)
- Calories: 200-250 kcal
- Fat: 10-12g
- Carbohydrates: 28-32g
- Protein: 2g
- Fiber: 2g
- Sugar: 4-5g
Ingredients
For the Crispy Onion Rings:
- 2 large yellow onions (or sweet onions, if preferred)
- 1 cup all-purpose flour
- 1 teaspoon baking powder
- 1 teaspoon salt
- ½ teaspoon black pepper
- ½ teaspoon garlic powder (optional for extra flavor)
- ½ teaspoon paprika (optional for a hint of smokiness)
- 1 large egg
- 1 cup buttermilk (or regular milk if buttermilk is unavailable)
- 1 cup panko breadcrumbs (for extra crispiness)
- Vegetable oil, for frying (canola or sunflower oil works well)
For Dipping Sauce (Optional):
- ½ cup ketchup
- 2 tablespoons mayonnaise
- 1 tablespoon mustard
- 1 teaspoon hot sauce (optional for a spicy kick)
- Salt and pepper to taste
Step-by-Step Instructions
1. Prepare the Onions
Start by peeling the onions and cutting off both ends. Slice each onion into approximately ½-inch thick rings. Gently separate the rings from each other and set them aside. Depending on the size of the onion, you should be able to get 6-8 rings per onion.
If you’re looking for a more delicate texture, use a sweet onion like Vidalia, as it will have a milder taste and softer texture when fried. Yellow onions are also a great choice, providing a slightly stronger flavor that pairs well with the crispy coating.
2. Make the Batter
In a medium bowl, whisk together the all-purpose flour, baking powder, salt, pepper, garlic powder, and paprika (if using). The baking powder will help create a light, airy batter, giving the onion rings their signature crispy coating.
In a separate small bowl, whisk together the egg and buttermilk. Buttermilk helps give the batter a tangy flavor and contributes to the crispiness of the onion rings. If you don’t have buttermilk on hand, regular milk can be substituted, although the texture might be slightly different.
Next, slowly add the wet ingredients (egg and buttermilk) into the dry ingredients (flour mixture), stirring to combine. The batter should be smooth and slightly thick, but still able to coat the onion rings. If the batter is too thick, you can add a little more milk to reach the desired consistency.
3. Prepare the Panko Breadcrumbs
In a separate shallow dish or bowl, place the panko breadcrumbs. Panko breadcrumbs are lighter and crispier than regular breadcrumbs, giving the onion rings a much crunchier texture. You can season the breadcrumbs with additional salt, pepper, or paprika to enhance the flavor if you like.
4. Coat the Onion Rings
Take each onion ring and dip it into the batter, making sure it is completely coated. Then, transfer the battered onion ring into the panko breadcrumbs, pressing down lightly to ensure that the breadcrumbs stick well. Be sure to coat each ring evenly for the crispiest result.
Place the coated onion rings on a baking sheet or plate as you work through the batch. If you’re making a large quantity, you can work in batches to prevent overcrowding, which can lead to uneven frying.
5. Heat the Oil for Frying
In a large, deep skillet or a heavy-bottomed pan, pour enough vegetable oil to submerge the onion rings about halfway (around 2 inches deep). Heat the oil over medium-high heat until it reaches about 350°F (175°C). You can test the oil’s readiness by dropping a small piece of batter into the oil. If it sizzles and rises to the surface immediately, the oil is ready for frying.
For best results, use a thermometer to ensure the oil remains at a consistent temperature throughout the frying process. If the oil is too hot, the onion rings may burn before they cook through; if it’s not hot enough, the onion rings may become greasy and soggy.
6. Fry the Onion Rings
Carefully place the battered and breaded onion rings into the hot oil, one at a time, being careful not to overcrowd the pan. Fry the onion rings in batches, turning them occasionally, until they are golden brown and crispy. This should take about 2-3 minutes per batch.
Use tongs or a slotted spoon to remove the onion rings from the oil and place them on a plate lined with paper towels. This will help absorb any excess oil and keep the onion rings crispy.
7. Serve the Onion Rings
Once all the onion rings are fried, transfer them to a serving platter. Serve the crispy onion rings immediately while they are still hot and crunchy. If desired, serve with your favorite dipping sauce on the side, such as a tangy ketchup-mayo blend or a creamy ranch dip.
Tips for Perfect Crispy Onion Rings
- Use Cold Batter: To get an extra crispy coating, chill the batter in the fridge for 15-20 minutes before using it. The cold batter will create a better contrast with the hot oil, resulting in a crispier texture.
- Don’t Overcrowd the Pan: Fry the onion rings in small batches to ensure they cook evenly and achieve a crispy texture. Overcrowding the pan can cause the oil temperature to drop, resulting in soggy onion rings.
- Choose the Right Onion: Yellow onions are ideal for a classic flavor, but sweet onions, like Vidalia, can provide a milder, more delicate taste. Avoid using red onions, as their flavor can be too overpowering for this recipe.
- Double Coat for Extra Crispiness: For an even crunchier texture, you can double-coat the onion rings. After the first dip in the batter and breadcrumbs, dip them back into the batter and coat them with panko again.
- Maintain Oil Temperature: Keeping the oil at the right temperature (350°F/175°C) is crucial for crispy onion rings. Too low of a temperature will result in greasy rings, while too high will cause the outside to burn before the inside cooks.
Variations of Crispy Onion Rings
- Spicy Onion Rings: Add a pinch of cayenne pepper or a tablespoon of hot sauce to the batter for a spicy kick. You can also sprinkle some chili powder over the onion rings once they’re fried to enhance the heat.
- Beer-Battered Onion Rings: For a richer flavor, replace the buttermilk with beer. The carbonation in the beer will create an extra light, airy batter, giving the onion rings a different texture and taste.
- Cheese-Stuffed Onion Rings: For a decadent twist, stuff the onion rings with a slice of cheese before battering and frying them. Cheddar, mozzarella, or pepper jack cheese work well for this variation.
- Baked Onion Rings: If you prefer a healthier version, you can bake the onion rings instead of frying them. Place the coated onion rings on a baking sheet lined with parchment paper, lightly spray them with oil, and bake at 400°F (200°C) for 20-25 minutes or until golden and crispy.
- Garlic Parmesan Onion Rings: After frying, toss the onion rings in a mixture of melted butter, garlic powder, and freshly grated Parmesan cheese for a flavorful and savory twist.
Storage and Shelf Life
Crispy onion rings are best enjoyed fresh, as the batter loses its crispiness over time. However, if you have leftovers, they can be stored in an airtight container for up to 2 days. To reheat, place the onion rings on a baking sheet and bake at 375°F (190°C) for 10-15 minutes to restore
some of the crunch.
For longer storage, freeze the battered onion rings before frying. Arrange them in a single layer on a baking sheet and freeze them for 2-3 hours. Once frozen, transfer the rings to a freezer-safe bag or container. When ready to fry, there’s no need to thaw them—simply fry them from frozen until golden and crispy.
Side Dishes and Pairings for Crispy Onion Rings
Crispy onion rings are delicious on their own, but they also pair perfectly with a variety of dishes:
- Burgers and Sandwiches: Onion rings are the perfect side dish for a juicy burger or sandwich. The crunchy exterior and sweet, tender onion complement the richness of the meat.
- Fried Chicken: The crispy texture of the onion rings pairs wonderfully with fried chicken, making for a comforting and indulgent meal.
- Dips and Sauces: Serve your onion rings with an array of dipping sauces, such as ketchup, ranch, BBQ sauce, or even a creamy garlic dip. The possibilities are endless!
- Salads: For a lighter pairing, serve onion rings alongside a fresh salad to balance the richness of the fried rings.

Crispy Onion Rings Recipe
- Total Time: 40-45 minutes
Description
Golden, crunchy, and irresistible, these crispy onion rings are coated in a flavorful batter and fried to perfection. They make a great side dish or snack, and pair well with burgers or dipping sauces for an added treat.
Ingredients
For the Crispy Onion Rings:
- 2 large yellow onions (or sweet onions, if preferred)
- 1 cup all-purpose flour
- 1 teaspoon baking powder
- 1 teaspoon salt
- ½ teaspoon black pepper
- ½ teaspoon garlic powder (optional for extra flavor)
- ½ teaspoon paprika (optional for a hint of smokiness)
- 1 large egg
- 1 cup buttermilk (or regular milk if buttermilk is unavailable)
- 1 cup panko breadcrumbs (for extra crispiness)
- Vegetable oil, for frying (canola or sunflower oil works well)
For Dipping Sauce (Optional):
- ½ cup ketchup
- 2 tablespoons mayonnaise
- 1 tablespoon mustard
- 1 teaspoon hot sauce (optional for a spicy kick)
- Salt and pepper to taste
Instructions
1. Prepare the Onions
Start by peeling the onions and cutting off both ends. Slice each onion into approximately ½-inch thick rings. Gently separate the rings from each other and set them aside. Depending on the size of the onion, you should be able to get 6-8 rings per onion.
If you’re looking for a more delicate texture, use a sweet onion like Vidalia, as it will have a milder taste and softer texture when fried. Yellow onions are also a great choice, providing a slightly stronger flavor that pairs well with the crispy coating.
2. Make the Batter
In a medium bowl, whisk together the all-purpose flour, baking powder, salt, pepper, garlic powder, and paprika (if using). The baking powder will help create a light, airy batter, giving the onion rings their signature crispy coating.
In a separate small bowl, whisk together the egg and buttermilk. Buttermilk helps give the batter a tangy flavor and contributes to the crispiness of the onion rings. If you don’t have buttermilk on hand, regular milk can be substituted, although the texture might be slightly different.
Next, slowly add the wet ingredients (egg and buttermilk) into the dry ingredients (flour mixture), stirring to combine. The batter should be smooth and slightly thick, but still able to coat the onion rings. If the batter is too thick, you can add a little more milk to reach the desired consistency.
3. Prepare the Panko Breadcrumbs
In a separate shallow dish or bowl, place the panko breadcrumbs. Panko breadcrumbs are lighter and crispier than regular breadcrumbs, giving the onion rings a much crunchier texture. You can season the breadcrumbs with additional salt, pepper, or paprika to enhance the flavor if you like.
4. Coat the Onion Rings
Take each onion ring and dip it into the batter, making sure it is completely coated. Then, transfer the battered onion ring into the panko breadcrumbs, pressing down lightly to ensure that the breadcrumbs stick well. Be sure to coat each ring evenly for the crispiest result.
Place the coated onion rings on a baking sheet or plate as you work through the batch. If you’re making a large quantity, you can work in batches to prevent overcrowding, which can lead to uneven frying.
5. Heat the Oil for Frying
In a large, deep skillet or a heavy-bottomed pan, pour enough vegetable oil to submerge the onion rings about halfway (around 2 inches deep). Heat the oil over medium-high heat until it reaches about 350°F (175°C). You can test the oil’s readiness by dropping a small piece of batter into the oil. If it sizzles and rises to the surface immediately, the oil is ready for frying.
For best results, use a thermometer to ensure the oil remains at a consistent temperature throughout the frying process. If the oil is too hot, the onion rings may burn before they cook through; if it’s not hot enough, the onion rings may become greasy and soggy.
6. Fry the Onion Rings
Carefully place the battered and breaded onion rings into the hot oil, one at a time, being careful not to overcrowd the pan. Fry the onion rings in batches, turning them occasionally, until they are golden brown and crispy. This should take about 2-3 minutes per batch.
Use tongs or a slotted spoon to remove the onion rings from the oil and place them on a plate lined with paper towels. This will help absorb any excess oil and keep the onion rings crispy.
7. Serve the Onion Rings
Once all the onion rings are fried, transfer them to a serving platter. Serve the crispy onion rings immediately while they are still hot and crunchy. If desired, serve with your favorite dipping sauce on the side, such as a tangy ketchup-mayo blend or a creamy ranch dip.
- Prep Time: 15 minutes
- Cook Time: 15-20 minutes
Nutrition
- Calories: 200-250 kcal
- Fat: 10-12g
- Carbohydrates: 28-32g
- Protein: 2g
Conclusion
Crispy Onion Rings are a delicious and satisfying treat that will elevate any meal. With a crispy, golden coating and sweet, tender onions inside, they are perfect as a side dish, snack, or appetizer. Making them at home is simple and rewarding, and with the right tips and techniques, you can achieve restaurant-quality onion rings in your own kitchen.
With a few variations to explore, such as spicy, beer-battered, or cheesy onion rings, there are endless ways to make this dish your own. Whether you’re serving them with burgers, fried chicken, or just enjoying them on their own, crispy onion rings are sure to become a favorite in your recipe repertoire.


