

Introduction
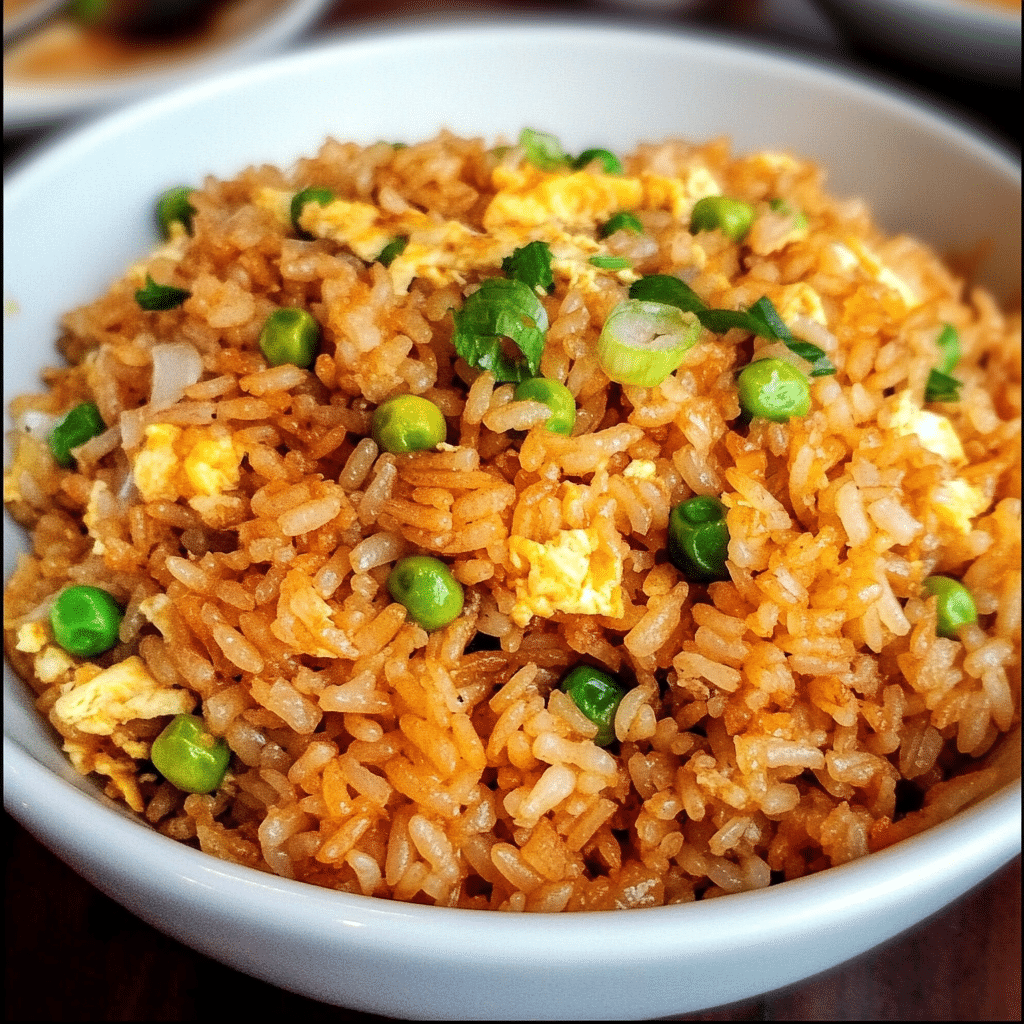
Hibachi-Style Fried Rice is a delicious, flavorful dish that brings the taste of a Japanese steakhouse right into your kitchen. Known for its signature smoky flavors, tender rice, and colorful vegetables, hibachi-style fried rice is a popular menu item at hibachi grills and Japanese restaurants. This version, made at home, offers the perfect balance of savory, umami-rich ingredients, and is an easy-to-make recipe that will satisfy all your cravings for fried rice.
What makes hibachi-style fried rice unique is its ability to combine basic ingredients like rice, vegetables, and eggs into a complex dish with layers of flavor. The quick stir-frying technique, often done on a large flat top grill, is the secret to achieving that smoky, charred flavor that’s so delicious. This homemade version brings those same flavors to your kitchen with a fraction of the effort but all the taste.
Whether you’re serving it as a side dish to complement grilled meats or as a stand-alone meal, Hibachi-Style Fried Rice is a comforting, satisfying option. It’s quick to prepare, perfect for using up leftover rice, and customizable with various proteins and vegetables. This recipe is designed to be easy to follow, so even if you’re not a seasoned cook, you can achieve the perfect hibachi fried rice at home.
Why You’ll Love Hibachi-Style Fried Rice
- Flavorful and Savory: The combination of soy sauce, sesame oil, garlic, and butter infuses the rice with rich, umami-packed flavor that’s enhanced by a touch of smokiness from the high-heat cooking process.
- Customizable: Hibachi-style fried rice is highly versatile. You can add whatever protein or vegetables you prefer, making it a great option for any dietary preference. Try it with chicken, shrimp, or tofu, or load it up with colorful veggies like peas, carrots, and onions.
- Quick and Easy: This recipe comes together in under 30 minutes, making it a perfect weeknight meal or a fast side dish for dinner parties.
- Perfect for Leftover Rice: It’s the ultimate way to use up leftover rice. The rice absorbs the flavors of the ingredients perfectly, creating a dish that’s better the next day.
- Satisfying and Filling: With a combination of rice, vegetables, eggs, and your choice of protein, hibachi-style fried rice is a complete, balanced meal that will leave you feeling satisfied.
Preparation and Cooking Time
- Total Time: 25-30 minutes
- Preparation Time: 10 minutes
- Cooking Time: 15-20 minutes
- Servings: Approximately 4 servings
- Calories per Serving: Around 300-400 calories per serving, depending on the ingredients and portion sizes.
Nutrition Facts (Per Serving)
- Calories: 300-400 kcal
- Fat: 10-15g
- Carbohydrates: 45-50g
- Protein: 6-10g
- Fiber: 2-3g
- Sugar: 3-5g
Ingredients
For Hibachi-Style Fried Rice:
- 3 cups cooked rice (preferably day-old rice)
- 2 tablespoons vegetable oil (or any neutral oil like canola or sunflower)
- 2 tablespoons sesame oil
- 3 tablespoons unsalted butter
- 2 large eggs, beaten
- 1 medium onion, finely diced
- 1 cup frozen peas and carrots (or fresh if preferred)
- 3 cloves garlic, minced
- 2 tablespoons soy sauce (preferably low-sodium)
- 1 tablespoon oyster sauce (optional for extra umami flavor)
- 1 teaspoon rice vinegar (optional for a touch of acidity)
- Salt and pepper, to taste
- Optional: 1 cup cooked chicken, shrimp, or tofu, diced
- Optional: Sliced green onions for garnish
Step-by-Step Instructions
1. Prepare the Rice
If you’re using freshly cooked rice, allow it to cool for a bit before using it for the fried rice. However, for the best texture, it’s recommended to use day-old rice that has been stored in the fridge. This rice tends to be drier and less sticky, which makes it ideal for stir-frying.
Break up any clumps of rice using your fingers or a fork to ensure each grain is separated before cooking. This helps achieve that signature fried rice texture with individual grains that aren’t too clumpy.
2. Prepare the Ingredients
While the rice is ready, gather and prep all your ingredients. Dice the onion, mince the garlic, and if you’re using vegetables or proteins, have them chopped and ready to go. Be sure to have your sauces (soy sauce, oyster sauce, and rice vinegar) measured out and within reach, as the cooking process moves quickly.
3. Cook the Eggs
Heat a large skillet or wok over medium-high heat. Add a small amount of vegetable oil (about 1 tablespoon) to the pan. Once hot, pour in the beaten eggs. Scramble them gently as they cook, stirring occasionally. When the eggs are fully cooked, transfer them to a plate and set aside. The eggs will be added back into the rice later.
4. Sauté the Vegetables
In the same skillet or wok, add the remaining vegetable oil (about 1 tablespoon) and sesame oil. Once the oil is hot, add the diced onions and sauté them for about 2-3 minutes until they become translucent and slightly caramelized. Add the minced garlic and sauté for another 30 seconds, until fragrant.
Next, add the frozen peas and carrots (or any other vegetables you prefer), stirring to combine. Cook for 2-3 minutes until the vegetables are heated through and softened.
5. Add the Rice
Add the day-old rice to the skillet with the vegetables, breaking up any clumps with a spoon or spatula. Stir-fry the rice for about 5-7 minutes, tossing it regularly to ensure it heats evenly. The rice should begin to take on a slightly crispy texture and pick up a bit of the flavor from the sesame oil and sautéed vegetables.
6. Season the Rice
Once the rice is evenly heated, pour the soy sauce and oyster sauce over the rice. Stir well to combine, ensuring the rice is evenly coated in the sauces. If you like a tangy kick, add a teaspoon of rice vinegar for a hint of acidity. Season with salt and pepper to taste. At this point, you can add any additional proteins, such as diced cooked chicken, shrimp, or tofu.
7. Combine the Eggs with the Rice
Add the scrambled eggs back into the skillet with the rice. Gently fold the eggs into the rice mixture until everything is evenly distributed. The eggs should be scattered throughout the fried rice, creating a fluffy, rich texture.
8. Finish and Garnish
Continue to stir-fry the rice for an additional 2-3 minutes, making sure everything is well combined and heated through. Taste and adjust the seasoning if needed, adding more soy sauce or a pinch of salt and pepper.
Once everything is perfectly cooked, remove the fried rice from the heat. If desired, garnish with sliced green onions for a burst of freshness and color. Serve the hibachi-style fried rice hot and enjoy!
Tips for Perfect Hibachi-Style Fried Rice
- Use Day-Old Rice: Freshly cooked rice is too moist and sticky for fried rice. Day-old rice, or rice that has been stored in the refrigerator overnight, has the perfect texture for stir-frying. If you don’t have day-old rice, spread freshly cooked rice on a baking sheet to cool it down before using it.
- High Heat Cooking: Hibachi-style fried rice is all about high-heat stir-frying, which gives the rice that slightly crispy texture and smoky flavor. Make sure your pan or wok is hot before adding the ingredients, and stir the rice constantly to prevent burning.
- Don’t Overcrowd the Pan: If you’re making a large batch, it’s best to cook the rice in batches to avoid overcrowding the pan. This ensures the rice cooks evenly and doesn’t become mushy.
- Add Protein: If you want to make the fried rice a complete meal, add protein like cooked chicken, shrimp, or tofu. These proteins complement the flavors of the fried rice and turn it into a satisfying, one-pan dish.
- Customize Your Vegetables: Feel free to experiment with different vegetables like bell peppers, zucchini, or mushrooms. You can even add some fresh herbs like cilantro for a refreshing twist.
- Use a Wok or Large Skillet: A wok is ideal for stir-frying because it heats up quickly and distributes the heat evenly. If you don’t have a wok, a large skillet will work just fine as long as it has a wide surface for the rice to cook evenly.
Variations of Hibachi-Style Fried Rice
- Chicken Hibachi Fried Rice: Add diced cooked chicken to your fried rice to make it heartier. You can use grilled chicken, rotisserie chicken, or leftover chicken for convenience.
- Shrimp Hibachi Fried Rice: For a seafood twist, sauté shrimp in the skillet before adding the vegetables and rice. Shrimp pairs perfectly with the savory soy sauce and sesame oil, making it a great addition.
- Vegetarian Hibachi Fried Rice: For a vegetarian version, skip the meat and load the fried rice with additional vegetables such as bell peppers, zucchini, and mushrooms. Tofu can also be added as a plant-based protein.
- Beef Hibachi Fried Rice: Thinly sliced beef, such as flank steak or sirloin, can be added to the fried rice for a rich, savory twist. Cook the beef first, then add it back in with the rice and vegetables.
- Eggplant Hibachi Fried Rice: Replace some or all of the vegetables with diced eggplant for a slightly sweet and savory flavor. Eggplant works wonderfully when stir-fried and absorbs the flavors of the sauce.
Storage and Shelf Life
Hibachi-style fried rice is best enjoyed fresh, but if you have leftovers, you can store them in an airtight container in the refrigerator for up to 3 days. When reheating, be sure to add a splash of water or broth to prevent the rice from drying out. You can reheat the fried rice in the microwave or on the stovetop over low heat.
For longer storage, hibachi-style fried rice can be frozen. Place the cooled fried rice in a freezer-safe container or bag and store it in the freezer for up to 2 months. To reheat, thaw in the refrigerator overnight, then heat it through in a pan or microwave.
Side Dishes and Pairings for Hibachi-Style Fried Rice
While hibachi-style fried rice is a complete meal on its own, pairing it with a few sides can enhance your meal even further:
- Grilled Vegetables: Serve hibachi-style fried rice with grilled vegetables such as zucchini, mushrooms, and bell peppers. The smoky flavors from the grill pair beautifully with the fried rice.
- Miso Soup: A warm bowl of miso soup is a traditional Japanese starter that complements hibachi fried rice. Its light, savory broth balances the richness of the rice.
- Japanese-Style Salad: A light cucumber salad or seaweed salad can add freshness to your meal. The crisp vegetables and tangy dressing are a perfect counterpoint to the richness of the fried rice.
- Egg Rolls: For an appetizer or side, serve crispy egg rolls alongside your fried rice. The crunchy exterior and savory filling make them a great addition.
- Gyoza (Japanese Dumplings): Pan-fried or steamed gyoza are a great pairing with hibachi-style fried rice. These dumplings, filled with pork, chicken, or vegetables, complement the fried rice perfectly.
Hibachi-Style Fried Rice Recipe
- Total Time: 25-30 minutes
Description
A deliciously savory rice dish cooked up in true hibachi fashion! This fried rice is tossed with vegetables, scrambled eggs, and your choice of protein, all seasoned with soy sauce and a touch of sesame oil for that signature hibachi flavor. Quick, easy, and packed with umami!
Ingredients
For Hibachi-Style Fried Rice:
- 3 cups cooked rice (preferably day-old rice)
- 2 tablespoons vegetable oil (or any neutral oil like canola or sunflower)
- 2 tablespoons sesame oil
- 3 tablespoons unsalted butter
- 2 large eggs, beaten
- 1 medium onion, finely diced
- 1 cup frozen peas and carrots (or fresh if preferred)
- 3 cloves garlic, minced
- 2 tablespoons soy sauce (preferably low-sodium)
- 1 tablespoon oyster sauce (optional for extra umami flavor)
- 1 teaspoon rice vinegar (optional for a touch of acidity)
- Salt and pepper, to taste
- Optional: 1 cup cooked chicken, shrimp, or tofu, diced
- Optional: Sliced green onions for garnish
Instructions
1. Prepare the Rice
If you’re using freshly cooked rice, allow it to cool for a bit before using it for the fried rice. However, for the best texture, it’s recommended to use day-old rice that has been stored in the fridge. This rice tends to be drier and less sticky, which makes it ideal for stir-frying.
Break up any clumps of rice using your fingers or a fork to ensure each grain is separated before cooking. This helps achieve that signature fried rice texture with individual grains that aren’t too clumpy.
2. Prepare the Ingredients
While the rice is ready, gather and prep all your ingredients. Dice the onion, mince the garlic, and if you’re using vegetables or proteins, have them chopped and ready to go. Be sure to have your sauces (soy sauce, oyster sauce, and rice vinegar) measured out and within reach, as the cooking process moves quickly.
3. Cook the Eggs
Heat a large skillet or wok over medium-high heat. Add a small amount of vegetable oil (about 1 tablespoon) to the pan. Once hot, pour in the beaten eggs. Scramble them gently as they cook, stirring occasionally. When the eggs are fully cooked, transfer them to a plate and set aside. The eggs will be added back into the rice later.
4. Sauté the Vegetables
In the same skillet or wok, add the remaining vegetable oil (about 1 tablespoon) and sesame oil. Once the oil is hot, add the diced onions and sauté them for about 2-3 minutes until they become translucent and slightly caramelized. Add the minced garlic and sauté for another 30 seconds, until fragrant.
Next, add the frozen peas and carrots (or any other vegetables you prefer), stirring to combine. Cook for 2-3 minutes until the vegetables are heated through and softened.
5. Add the Rice
Add the day-old rice to the skillet with the vegetables, breaking up any clumps with a spoon or spatula. Stir-fry the rice for about 5-7 minutes, tossing it regularly to ensure it heats evenly. The rice should begin to take on a slightly crispy texture and pick up a bit of the flavor from the sesame oil and sautéed vegetables.
6. Season the Rice
Once the rice is evenly heated, pour the soy sauce and oyster sauce over the rice. Stir well to combine, ensuring the rice is evenly coated in the sauces. If you like a tangy kick, add a teaspoon of rice vinegar for a hint of acidity. Season with salt and pepper to taste. At this point, you can add any additional proteins, such as diced cooked chicken, shrimp, or tofu.
7. Combine the Eggs with the Rice
Add the scrambled eggs back into the skillet with the rice. Gently fold the eggs into the rice mixture until everything is evenly distributed. The eggs should be scattered throughout the fried rice, creating a fluffy, rich texture.
8. Finish and Garnish
Continue to stir-fry the rice for an additional 2-3 minutes, making sure everything is well combined and heated through. Taste and adjust the seasoning if needed, adding more soy sauce or a pinch of salt and pepper.
Once everything is perfectly cooked, remove the fried rice from the heat. If desired, garnish with sliced green onions for a burst of freshness and color. Serve the hibachi-style fried rice hot and enjoy!
- Prep Time: 10 minutes
- Cook Time: 15-20 minutes
Nutrition
- Calories: 300-400 kcal
- Fat: 10-15g
- Carbohydrates: 45-50g
- Protein: 6-10g
Conclusion
Hibachi-Style Fried Rice is a flavorful, satisfying dish that brings the taste of a hibachi grill to your kitchen. With its rich umami flavors, tender rice, and smoky finish, this dish is perfect for a quick weeknight dinner, a special occasion, or as a side to accompany your favorite grilled meats. It’s a versatile recipe that can be customized with your favorite proteins and vegetables, making it a go-to dish that will never disappoint.
By following the simple steps in this recipe, you can recreate the iconic hibachi-style fried rice at home with ease. Whether you’re cooking for a crowd or just a quick weeknight meal, hibachi-style fried rice is sure to become a favorite in your household.


