Description
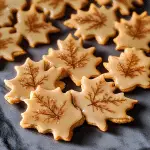
Iced Maple Leaf Sugar Cookies are a charming and festive treat that captures the essence of autumn in every bite. These cookies feature a tender, buttery base with the warm, inviting flavor of maple syrup. Shaped like vibrant maple leaves, they are decorated with a sweet, glossy icing that can be customized in a variety of colors. The combination of soft cookie and crisp icing creates a delightful contrast, making these cookies a perfect addition to holiday gatherings, fall celebrations, or any occasion that calls for a touch of sweetness and seasonal flair.
Ingredients
For the Cookies:
- 2 ¾ cups all-purpose flour: The base for your cookie dough. Make sure to spoon and level the flour to avoid packing it, which can lead to dry cookies.
- 1 teaspoon baking powder: Helps the cookies rise and stay fluffy, contributing to a tender texture.
- ½ teaspoon salt: Enhances flavor, balancing the sweetness of the cookies.
- 1 cup unsalted butter, softened: Provides richness and tenderness. Make sure it’s at room temperature for easier mixing.
- 1 cup granulated sugar: For sweetness. You could also experiment with brown sugar for a deeper flavor.
- 1 large egg: Binds the ingredients together, ensuring the cookies hold their shape.
- 2 tablespoons pure maple syrup: Infuses a lovely maple flavor, making these cookies truly special.
- 1 teaspoon vanilla extract: Adds a warm, aromatic touch that complements the maple syrup.
For the Icing:
- 2 cups powdered sugar: The main ingredient for a smooth icing. Sifting it beforehand can help eliminate lumps for a better texture.
- 2 tablespoons milk: Helps achieve the right consistency for the icing. You can use dairy or non-dairy milk, depending on your preference.
- 1 teaspoon vanilla extract: For flavor, enhancing the overall sweetness of the icing.
- Food coloring (optional): For decorating; gel food coloring works best to achieve vibrant colors without watering down the icing.
Instructions
STEP 1: PREPARE THE DOUGH
In a medium bowl, whisk together the flour, baking powder, and salt. Set aside. In a large mixing bowl, cream the softened butter and granulated sugar until light and fluffy, about 2-3 minutes. This step is crucial as it incorporates air into the mixture, giving the cookies a nice texture.
Add the egg, maple syrup, and vanilla extract, mixing until well combined. Gradually add the dry ingredients to the wet mixture, mixing until just combined. Be careful not to overmix; this can lead to tough cookies.
STEP 2: CHILL THE DOUGH
Form the dough into a disc, wrap it in plastic wrap, and refrigerate for at least 1 hour. Chilling the dough is essential for two reasons: it makes the dough easier to roll out, and it helps the cookies maintain their shape during baking.
STEP 3: PREHEAT THE OVEN
Preheat your oven to 350°F (175°C). Line baking sheets with parchment paper to prevent sticking. This step ensures even baking and makes cleanup easier.
STEP 4: ROLL OUT THE DOUGH
Once chilled, remove the dough from the refrigerator. On a lightly floured surface, roll out the dough to about ¼ inch thickness. Aim for uniform thickness to ensure even baking. Use a maple leaf-shaped cookie cutter to cut out cookies, placing them on the prepared baking sheets.
Gather any scraps, re-roll, and continue cutting out cookies until all the dough is used. If the dough becomes too soft while rolling, return it to the refrigerator for a few minutes to firm up.
STEP 5: BAKE THE COOKIES
Bake the cookies in the preheated oven for 8-10 minutes, or until the edges are lightly golden. Keep an eye on them to prevent over-baking; they will continue to firm up as they cool. Remove from the oven and let them cool on the baking sheets for a few minutes before transferring them to a wire rack to cool completely.
STEP 6: PREPARE THE ICING
In a medium bowl, whisk together the powdered sugar, milk, and vanilla extract until smooth. The icing should be thick but pourable; it should flow easily but hold its shape when piped. If you want to use food coloring, divide the icing into separate bowls and add your desired colors.
STEP 7: DECORATE THE COOKIES
Once the cookies are completely cool, it’s time to decorate! Use a piping bag or a small offset spatula to spread the icing over the cookies. Get creative! You can outline the cookies, fill them in, or even add details like veins on the leaves with different colors. Consider using a small brush or toothpick to create intricate designs.
STEP 8: ALLOW TO SET
Let the decorated cookies sit at room temperature for about 30 minutes to an hour to allow the icing to set completely. This will prevent smudging when you stack or package them.
- Prep Time: 30-40 minutes
- Baking Time: 10-12 minutes
Nutrition
- Calories: 150 kcal
- Fat: 7g
- Carbohydrates: 22g
- Protein: 1g