
Introduction
When it comes to Italian desserts, there’s a treasure trove of delicious treats that have been passed down for generations. One such gem is the Italian Ricotta Cookie—a soft, light, and flavorful cookie that’s beloved by many for its moist texture and delicate taste. These cookies are often served during the holidays, but they’re so versatile that they can be enjoyed year-round, bringing a little bit of Italy to your kitchen with each bite.
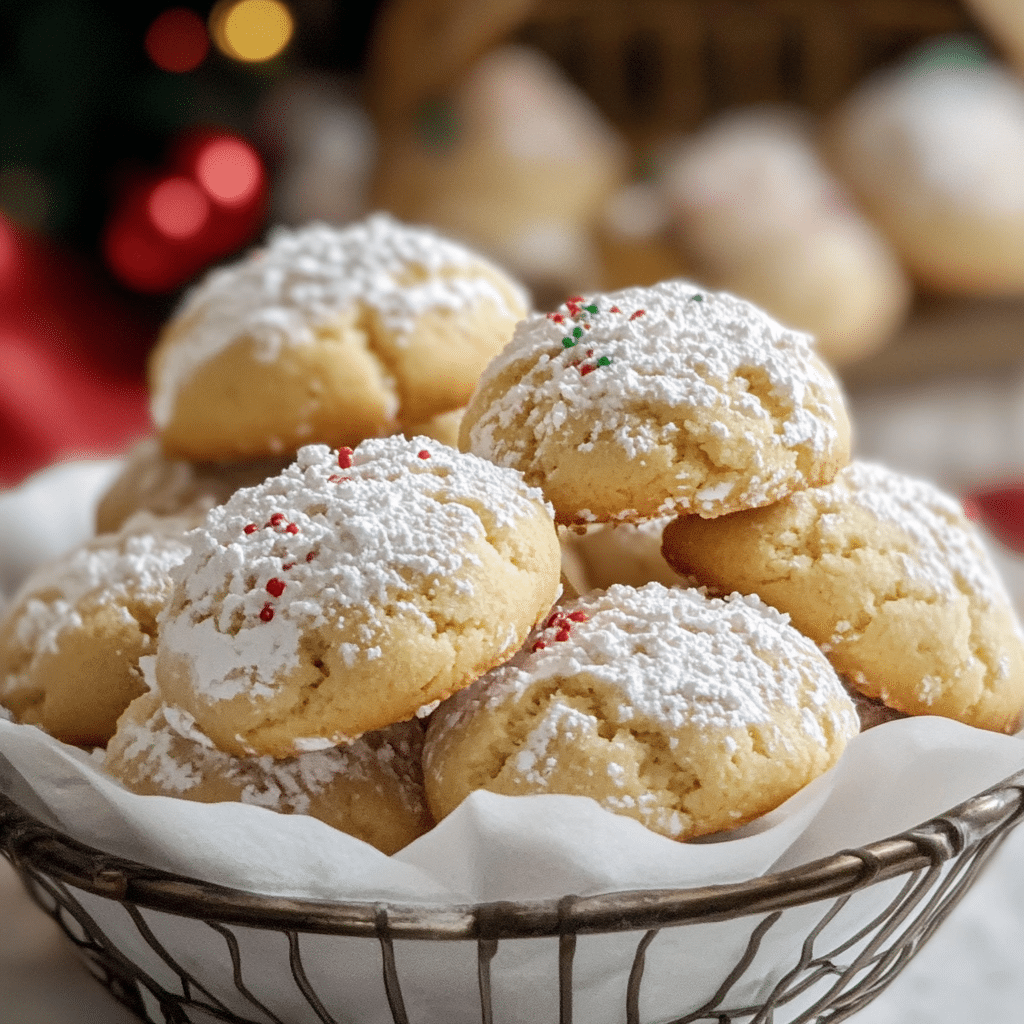
I first encountered Ricotta Cookies at a local Italian bakery, and it didn’t take long for me to fall in love with their unique texture and subtle sweetness. The rich, creamy ricotta cheese in the dough not only makes them incredibly soft but also imparts a light, fluffy texture that’s unlike any other cookie. These cookies are typically decorated with a light glaze and colorful sprinkles, making them as delightful to look at as they are to eat.
Whether you’re preparing for a family gathering, a holiday celebration, or just craving something sweet and comforting, Italian Ricotta Cookies are the perfect treat. In this article, I’ll share why you’ll love this recipe, how to make these delightful cookies, and a few tips to make them even better. Let’s dive in!
Why You’ll Love This Recipe
Soft and Light Texture: One of the standout features of Italian Ricotta Cookies is their incredibly soft and light texture. Thanks to the ricotta cheese in the dough, they are moist and fluffy, making them an irresistible treat.
Delicate Flavor: These cookies have a mild, slightly sweet flavor that makes them perfect for those who prefer less sugary desserts. The ricotta gives them a creamy depth, while a touch of lemon zest brightens them up.
Perfect for Any Occasion: While often associated with holiday baking, these cookies are versatile enough to enjoy throughout the year. They are great for parties, gift-giving, or just a quiet afternoon with tea or coffee.
Easy to Make: Don’t let the fact that these are Italian cookies fool you—this recipe is surprisingly simple! With just a few ingredients and clear instructions, you’ll have a batch of these delicious treats in no time.
Customizable: The glaze can be customized with different flavors, and you can top the cookies with colorful sprinkles or even drizzle them with melted chocolate for extra indulgence.
Preparation Time and Servings
- Total Time: 1 hour 30 minutes (20 minutes prep, 15 minutes chilling, 12-15 minutes baking, 10 minutes cooling)
- Servings: This recipe yields about 24 cookies, depending on the size of your dough balls.
- Nutrition Facts (per cookie):
- Calories: 160
- Protein: 3g
- Carbs: 20g
- Fat: 7g
- Fiber: 1g
Ingredients
- 2 ½ cups all-purpose flour: This is the base of the dough, providing structure and texture.
- 1 teaspoon baking powder: This gives the cookies a slight rise, ensuring they are soft and airy.
- 1/2 teaspoon salt: Enhances the sweetness and balances out the flavors in the dough.
- 1 cup unsalted butter, softened: Adds richness and moisture to the cookies.
- 1 cup granulated sugar: Sweetens the dough and contributes to the cookies’ delicate flavor.
- 1 large egg: Binds the dough together and helps with the cookies’ structure.
- 1 container (15 ounces) ricotta cheese: The star ingredient, providing the cookies with a soft, moist, and creamy texture.
- 1 teaspoon vanilla extract: Adds depth and warmth to the flavor profile.
- 1 teaspoon lemon zest: A touch of lemon brightens the cookies and gives them a fresh, citrusy flavor.
- 1 ½ cups powdered sugar: Used for the glaze, giving it that sweet, smooth finish.
- 1 tablespoon lemon juice: Adds flavor and thinness to the glaze, making it easy to drizzle over the cookies.
- Optional: Sprinkles or colored sugar for decoration, or a drizzle of melted chocolate for an extra indulgent touch.
Step-by-Step Instructions
STEP 1: PREHEAT THE OVEN
Start by preheating your oven to 350°F (175°C). Line two baking sheets with parchment paper or silicone baking mats to ensure the cookies don’t stick.
STEP 2: MIX THE DRY INGREDIENTS
In a medium-sized bowl, whisk together the all-purpose flour, baking powder, and salt. This ensures that the dry ingredients are well combined and evenly distributed throughout the dough.
STEP 3: CREAM THE BUTTER AND SUGAR
In a large bowl, beat the softened butter and granulated sugar together until light and fluffy. This process usually takes 2-3 minutes. The creaming of the butter and sugar helps create air pockets in the dough, making the cookies light and tender.
STEP 4: ADD THE EGG, RICOTTA, VANILLA, AND LEMON ZEST
Next, add the egg to the butter and sugar mixture, and beat until fully incorporated. Then, stir in the ricotta cheese, vanilla extract, and lemon zest. The ricotta cheese is what gives these cookies their signature texture and moistness, so be sure to mix it in thoroughly. The mixture should be smooth, without any lumps.
STEP 5: COMBINE THE DRY AND WET INGREDIENTS
Slowly add the dry ingredients into the wet mixture, mixing until just combined. Be careful not to overmix, as this can make the cookies dense. The dough should be soft but not sticky. If it seems too sticky, add a little more flour, one tablespoon at a time, until the dough holds together without sticking to your hands.
STEP 6: FORM THE COOKIES
Using a tablespoon or a cookie scoop, drop rounded spoonfuls of dough onto the prepared baking sheets. Space the dough balls about 2 inches apart, as the cookies will spread slightly during baking. If you prefer smaller or larger cookies, adjust the dough portions accordingly.
STEP 7: BAKE THE COOKIES
Bake the cookies in the preheated oven for 12-15 minutes, or until the edges are lightly golden. The cookies will puff up slightly and remain soft in the center. Keep a close eye on them, as oven temperatures can vary.
STEP 8: COOL THE COOKIES
Once the cookies are done, remove them from the oven and let them cool on the baking sheets for about 5 minutes. After that, transfer the cookies to a wire rack to cool completely. The cookies will firm up slightly as they cool, but they should remain soft and moist.
STEP 9: GLAZE THE COOKIES
While the cookies are cooling, prepare the glaze. In a small bowl, whisk together the powdered sugar, lemon juice, and a few teaspoons of water until smooth and pourable. You can adjust the consistency by adding more powdered sugar if the glaze is too runny or a little more water if it’s too thick. Once the cookies have cooled, drizzle the glaze over the tops. For a festive touch, add colorful sprinkles or sugar on top of the glaze.
STEP 10: LET THE GLAZE SET
Allow the glaze to set for at least 15 minutes before serving or packaging the cookies. This will ensure the glaze hardens slightly, making them easier to handle and adding a beautiful finish to the cookies.
How to Serve
- Perfect for Holidays and Parties: Italian Ricotta Cookies are great for holiday gatherings, cookie exchanges, or as a sweet addition to any party. Their vibrant glaze and delicate texture make them an eye-catching and delicious treat.
- With Coffee or Tea: These cookies are perfect for enjoying with your morning coffee or afternoon tea. Their light texture and mild sweetness pair wonderfully with hot beverages.
- Gift-Giving: Ricotta cookies make an excellent homemade gift. Package them in a decorative tin or jar with a ribbon for a thoughtful, homemade touch.
Additional Tips
- Use Full-Fat Ricotta: For the best texture and flavor, use full-fat ricotta cheese. Low-fat or part-skim ricotta may result in drier cookies.
- Don’t Overmix the Dough: When combining the dry and wet ingredients, mix just until incorporated. Overmixing can result in dense cookies.
- Chill the Dough (Optional): If you find that the dough is too sticky to work with, you can chill it for about 30 minutes. This will make it easier to scoop and shape the cookies.
- Glaze Variations: While the traditional glaze is made with lemon juice, feel free to experiment with different flavors. Orange juice, almond extract, or vanilla extract can be used for a different twist.
- Make Ahead: You can make the dough ahead of time and refrigerate it for up to 2 days. Just be sure to bring it to room temperature before baking.
Recipe Variations
- Chocolate-Dipped Ricotta Cookies: After glazing the cookies, dip them halfway into melted chocolate for a decadent twist on this classic treat.
- Orange Ricotta Cookies: Substitute lemon zest with orange zest for a different citrusy flavor. An orange glaze would also complement this variation perfectly.
- Nutty Ricotta Cookies: Add chopped pistachios, almonds, or walnuts to the dough for added texture and flavor.
- Lemon Ricotta Cookies with a Cream Cheese Glaze: If you prefer a richer glaze, you can mix cream cheese with powdered sugar and lemon juice for a tangy, creamy finish.
Freezing and Storage
- Storage: Store your Italian Ricotta Cookies in an airtight container at room temperature for up to 1 week. They will stay soft and fresh for several days.
- Freezing: These cookies freeze beautifully! Place them in a single layer on a baking sheet and freeze until firm. Then, transfer them to a freezer-safe container or zip-top bag. They will keep in the freezer for up to 3 months. Thaw at room temperature before enjoying.
- Freezing Cookie Dough: You can also freeze the dough. Scoop the dough into balls, place them on a baking sheet, and freeze them until firm. Transfer the dough balls to a freezer-safe bag or container. When ready to bake, place them on a baking sheet and bake as usual, adding a few extra minutes to the baking time.
FAQ Section
Can I use part-skim ricotta instead of full-fat?
Yes, but for the softest and richest texture, full-fat ricotta is recommended.
Can I make these cookies without the glaze?
Of course! The cookies are delicious on their own, but the glaze adds a nice touch of sweetness and makes them look more festive.
How do I prevent the cookies from spreading too much while baking?
Chilling the dough before baking can help prevent the cookies from spreading too much.
Can I add other flavorings to the cookies?
Yes! You can experiment with almond extract, orange zest, or even a hint of cinnamon to change up the flavor profile.
How can I make these cookies gluten-free?
You can substitute a gluten-free all-purpose flour blend for the regular flour. The cookies will still turn out delicious!
Conclusion
Italian Ricotta Cookies are a timeless treat that combines a delicate texture with a light, sweet flavor. Whether you’re preparing them for the holidays, a family gathering, or just a sweet indulgence, these cookies will be sure to impress. Their soft, pillowy texture and simple glaze make them the perfect combination of light and flavorful.
I hope you enjoy baking these Italian Ricotta Cookies as much as I have! Don’t forget to share your creations with me—whether you’re making them for a special occasion or just because. Happy baking!
Print
Italian Ricotta Cookies: A Soft, Light, and Flavorful Delight
- Total Time: 1 hour 30 minutes
Description
Italian Ricotta Cookies are a delightful, soft, and fluffy treat that showcases the unique richness of ricotta cheese. These cookies have a light, cake-like texture that melts in your mouth, with the ricotta adding moisture and a subtle richness. The dough is flavored with hints of vanilla and citrus zest, creating a refreshing, aromatic flavor profile. Often glazed with a sweet, simple icing and topped with colorful sprinkles, these cookies have a festive, delicate appearance that makes them perfect for special occasions or holiday celebrations. Their light sweetness and tender crumb make them a beloved classic in Italian baking.
Ingredients
- 2 ½ cups all-purpose flour: This is the base of the dough, providing structure and texture.
- 1 teaspoon baking powder: This gives the cookies a slight rise, ensuring they are soft and airy.
- 1/2 teaspoon salt: Enhances the sweetness and balances out the flavors in the dough.
- 1 cup unsalted butter, softened: Adds richness and moisture to the cookies.
- 1 cup granulated sugar: Sweetens the dough and contributes to the cookies’ delicate flavor.
- 1 large egg: Binds the dough together and helps with the cookies’ structure.
- 1 container (15 ounces) ricotta cheese: The star ingredient, providing the cookies with a soft, moist, and creamy texture.
- 1 teaspoon vanilla extract: Adds depth and warmth to the flavor profile.
- 1 teaspoon lemon zest: A touch of lemon brightens the cookies and gives them a fresh, citrusy flavor.
- 1 ½ cups powdered sugar: Used for the glaze, giving it that sweet, smooth finish.
- 1 tablespoon lemon juice: Adds flavor and thinness to the glaze, making it easy to drizzle over the cookies.
- Optional: Sprinkles or colored sugar for decoration, or a drizzle of melted chocolate for an extra indulgent touch.
Instructions
STEP 1: PREHEAT THE OVEN
Start by preheating your oven to 350°F (175°C). Line two baking sheets with parchment paper or silicone baking mats to ensure the cookies don’t stick.
STEP 2: MIX THE DRY INGREDIENTS
In a medium-sized bowl, whisk together the all-purpose flour, baking powder, and salt. This ensures that the dry ingredients are well combined and evenly distributed throughout the dough.
STEP 3: CREAM THE BUTTER AND SUGAR
In a large bowl, beat the softened butter and granulated sugar together until light and fluffy. This process usually takes 2-3 minutes. The creaming of the butter and sugar helps create air pockets in the dough, making the cookies light and tender.
STEP 4: ADD THE EGG, RICOTTA, VANILLA, AND LEMON ZEST
Next, add the egg to the butter and sugar mixture, and beat until fully incorporated. Then, stir in the ricotta cheese, vanilla extract, and lemon zest. The ricotta cheese is what gives these cookies their signature texture and moistness, so be sure to mix it in thoroughly. The mixture should be smooth, without any lumps.
STEP 5: COMBINE THE DRY AND WET INGREDIENTS
Slowly add the dry ingredients into the wet mixture, mixing until just combined. Be careful not to overmix, as this can make the cookies dense. The dough should be soft but not sticky. If it seems too sticky, add a little more flour, one tablespoon at a time, until the dough holds together without sticking to your hands.
STEP 6: FORM THE COOKIES
Using a tablespoon or a cookie scoop, drop rounded spoonfuls of dough onto the prepared baking sheets. Space the dough balls about 2 inches apart, as the cookies will spread slightly during baking. If you prefer smaller or larger cookies, adjust the dough portions accordingly.
STEP 7: BAKE THE COOKIES
Bake the cookies in the preheated oven for 12-15 minutes, or until the edges are lightly golden. The cookies will puff up slightly and remain soft in the center. Keep a close eye on them, as oven temperatures can vary.
STEP 8: COOL THE COOKIES
Once the cookies are done, remove them from the oven and let them cool on the baking sheets for about 5 minutes. After that, transfer the cookies to a wire rack to cool completely. The cookies will firm up slightly as they cool, but they should remain soft and moist.
STEP 9: GLAZE THE COOKIES
While the cookies are cooling, prepare the glaze. In a small bowl, whisk together the powdered sugar, lemon juice, and a few teaspoons of water until smooth and pourable. You can adjust the consistency by adding more powdered sugar if the glaze is too runny or a little more water if it’s too thick. Once the cookies have cooled, drizzle the glaze over the tops. For a festive touch, add colorful sprinkles or sugar on top of the glaze.
STEP 10: LET THE GLAZE SET
Allow the glaze to set for at least 15 minutes before serving or packaging the cookies. This will ensure the glaze hardens slightly, making them easier to handle and adding a beautiful finish to the cookies.
- Prep Time: 20 minutes
- Baking, Cooling, and Chilling Time: 15 minutes chilling, 12-15 minutes baking, 10 minutes cooling
Nutrition
- Calories: 160 kcal
- Fat: 7g
- Carbohydrates: 20g
- Protein: 3g


