

Introduction
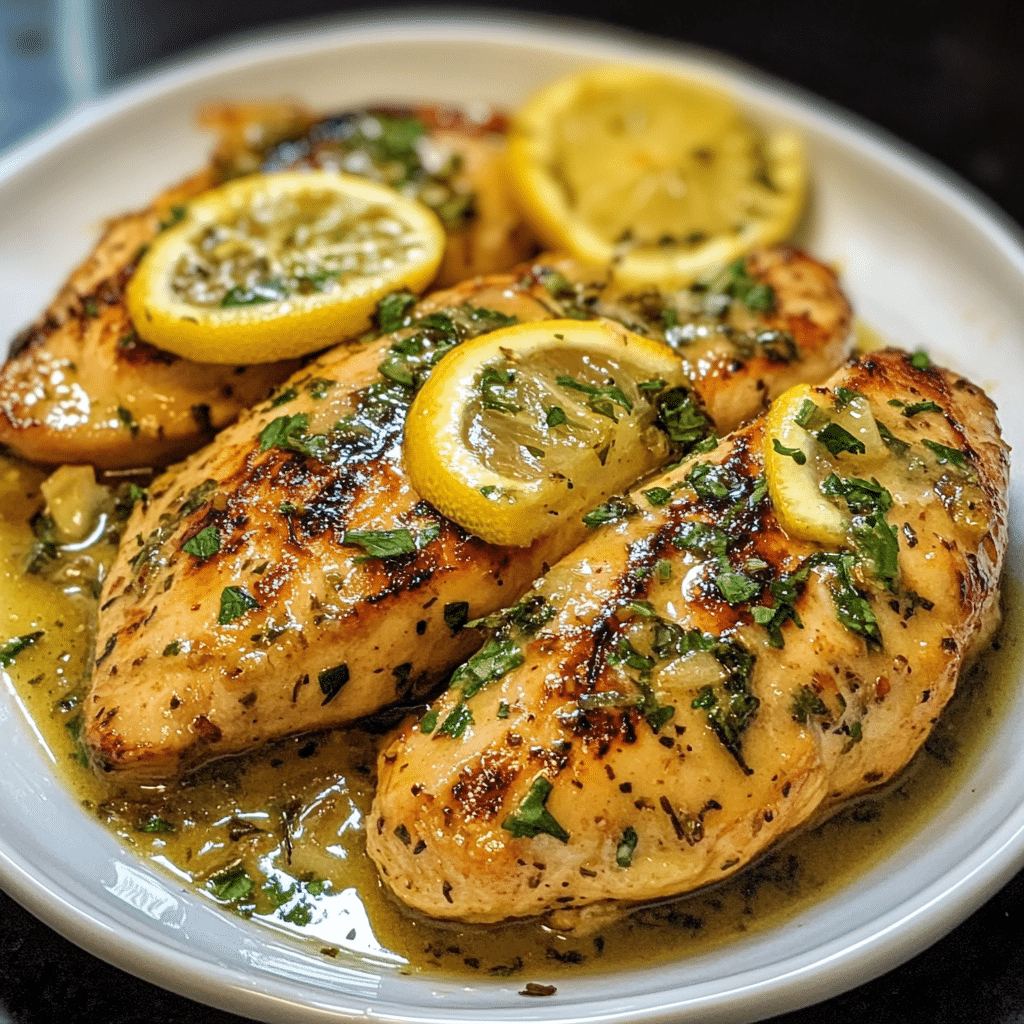
Lemon Garlic Butter Chicken Thighs are the perfect combination of succulent, tender chicken and a rich, flavorful garlic butter sauce with the refreshing brightness of lemon. This dish is an easy-to-make, yet impressive meal that’s ideal for a weeknight dinner, a special occasion, or even meal prepping for the week ahead. With its crispy golden-brown exterior and juicy, flavorful interior, these chicken thighs will quickly become a favorite in your kitchen.
The lemon garlic butter sauce is what truly elevates this dish, providing a perfect balance of zesty citrus and savory garlic. Paired with the richness of butter, the sauce coats the chicken thighs beautifully, infusing every bite with flavor. Whether you’re serving it with a side of vegetables, rice, or a simple salad, this recipe is guaranteed to satisfy your cravings and leave everyone asking for more.
This Lemon Garlic Butter Chicken Thighs recipe is simple, quick, and customizable, making it an excellent choice for both beginner cooks and experienced chefs. With a handful of ingredients and minimal effort, you’ll have a mouthwatering dish ready to enjoy in just 30 minutes!
Why You’ll Love Lemon Garlic Butter Chicken Thighs
- Rich, Savory Flavor: The lemon garlic butter sauce gives the chicken thighs a rich, savory flavor, balanced with a bright citrusy zing that will awaken your taste buds with every bite.
- Tender, Juicy Chicken Thighs: Chicken thighs are naturally juicy and flavorful, making them perfect for this dish. They stay moist and tender when cooked, making each bite irresistibly succulent.
- Quick and Easy to Make: Despite its gourmet taste, this recipe comes together quickly. With just a few steps, you’ll have a delicious, restaurant-quality meal on the table in no time.
- Versatile: You can pair these chicken thighs with virtually any side dish—vegetables, potatoes, rice, or pasta—making it a flexible recipe for any occasion.
- Perfect for Meal Prep: These chicken thighs are great for preparing in advance, as they store well in the fridge and can be reheated easily for a quick meal throughout the week.
Preparation and Cooking Time
- Total Time: 30 minutes
- Preparation Time: 10 minutes
- Cooking Time: 20 minutes
- Servings: 4 servings
- Calories per Serving: Approximately 350-400 calories per serving, depending on the ingredients and portion sizes.
Nutrition Facts (Per Serving)
- Calories: 350-400 kcal
- Fat: 25-28g
- Carbohydrates: 4-5g
- Protein: 30-35g
- Fiber: 1g
- Sugar: 2-3g
Ingredients
For the Lemon Garlic Butter Chicken Thighs:
- 4 bone-in, skin-on chicken thighs (approximately 6 ounces each)
- 2 tablespoons olive oil
- Salt and freshly ground black pepper (to taste)
- 1 teaspoon paprika (optional, for extra flavor)
- 1 tablespoon unsalted butter
- 4 cloves garlic, minced
- 1 tablespoon fresh lemon juice (from about 1 lemon)
- 1 teaspoon lemon zest
- ½ cup chicken broth (or white wine for a richer flavor)
- 1 tablespoon fresh parsley, chopped (for garnish)
- Lemon wedges (for serving)
Step-by-Step Instructions
1. Prepare the Chicken Thighs
Start by patting the chicken thighs dry with paper towels. This step is essential to achieving crispy skin when cooking the chicken. Once dry, season both sides of the chicken thighs with salt, pepper, and paprika (if using). The paprika will give the chicken a nice color and a touch of smoky flavor.
Next, heat a large skillet over medium-high heat and add the olive oil. Once the oil is hot and shimmering, place the chicken thighs, skin-side down, in the skillet. Allow the chicken to cook without moving it for 5-7 minutes, or until the skin becomes golden brown and crispy. Don’t try to flip the chicken too early—let the skin get nice and crispy before turning it over.
2. Flip and Cook the Chicken
Once the skin is crispy and golden, flip the chicken thighs over and reduce the heat to medium. Continue cooking the chicken for an additional 7-10 minutes, or until the chicken reaches an internal temperature of 165°F (74°C) when measured with a meat thermometer. The chicken should be fully cooked, with the juices running clear.
After the chicken is cooked through, remove it from the skillet and set it aside on a plate, tented with foil to keep it warm while you prepare the sauce.
3. Prepare the Lemon Garlic Butter Sauce
In the same skillet where you cooked the chicken, add the unsalted butter. Allow the butter to melt and become bubbly, scraping up any delicious browned bits from the bottom of the skillet with a wooden spoon—this will add extra flavor to the sauce.
Once the butter has melted, add the minced garlic and cook for 1-2 minutes, stirring frequently, until the garlic becomes fragrant but not burnt. Be cautious, as garlic can burn quickly and become bitter.
Next, add the fresh lemon juice, lemon zest, and chicken broth (or white wine) to the skillet. Stir to combine, and bring the mixture to a gentle simmer. Let the sauce cook for about 3-4 minutes, allowing it to reduce slightly and thicken. The sauce should be aromatic and slightly tangy from the lemon.
4. Combine the Chicken with the Sauce
Once the sauce has thickened slightly, return the cooked chicken thighs to the skillet. Spoon some of the sauce over the chicken, allowing it to absorb the flavors. Let the chicken simmer in the sauce for 2-3 minutes to warm through and soak up the delicious lemon garlic butter sauce.
5. Garnish and Serve
Once the chicken is fully coated in the sauce, remove it from the skillet and place it on a serving platter. Spoon any remaining sauce from the skillet over the chicken for extra flavor. Garnish the chicken with fresh chopped parsley and lemon wedges for a bright, fresh touch.
Serve the Lemon Garlic Butter Chicken Thighs immediately, accompanied by your favorite side dishes.
Tips for Perfect Lemon Garlic Butter Chicken Thighs
- Pat the Chicken Dry: Be sure to pat the chicken thighs dry with paper towels before seasoning them. This will help achieve crispy skin, which adds a wonderful texture to the dish.
- Use Bone-In, Skin-On Chicken Thighs: Bone-in, skin-on chicken thighs work best for this recipe as they retain moisture during cooking and provide extra flavor. The skin crisps up beautifully when seared in the skillet.
- Don’t Overcook the Chicken: Chicken thighs should be cooked to an internal temperature of 165°F (74°C). Use a meat thermometer to ensure the chicken is cooked through without overcooking it, which can lead to dry meat.
- Adjust the Lemon Flavor: If you prefer a stronger lemon flavor, feel free to add more lemon juice or zest to the sauce. You can also increase the amount of garlic for a more intense garlic flavor.
- Serve with Rice or Vegetables: These chicken thighs pair wonderfully with sides like roasted vegetables, mashed potatoes, rice pilaf, or a simple salad. The sauce is also great drizzled over these sides.
- Make It Spicy: If you enjoy a bit of heat, add a pinch of red pepper flakes to the sauce while cooking the garlic, or drizzle some hot sauce over the chicken before serving.
Variations of Lemon Garlic Butter Chicken Thighs
- Lemon Garlic Butter Chicken Breasts: If you prefer chicken breasts, you can easily swap the thighs for boneless, skinless chicken breasts. Be sure to adjust the cooking time as chicken breasts cook faster than thighs. They will also need to be carefully monitored to prevent overcooking.
- Honey Lemon Garlic Butter Chicken: For a touch of sweetness, add 1 tablespoon of honey or maple syrup to the sauce. This will create a more balanced sweet-savory profile that complements the lemon.
- Lemon Garlic Butter Chicken with Herbs: Add fresh herbs like rosemary, thyme, or oregano to the sauce to enhance the flavor profile. You can toss the chicken in these herbs before cooking or add them to the sauce for extra depth.
- Lemon Garlic Butter Chicken with Mushrooms: Sauté some sliced mushrooms in the pan after cooking the chicken, and incorporate them into the sauce for a richer, umami-packed addition.
- Grilled Lemon Garlic Butter Chicken: For a smoky flavor, grill the chicken thighs instead of pan-searing them. You can baste the chicken with the lemon garlic butter sauce while grilling for an added burst of flavor.
Storage and Shelf Life
Lemon Garlic Butter Chicken Thighs are best enjoyed fresh, but if you have leftovers, you can store them in an airtight container in the refrigerator for up to 3 days. To reheat, place the chicken in a skillet over low heat and cover with a lid to retain moisture, or microwave until warmed through.
You can also freeze the chicken for longer storage. To freeze, allow the chicken to cool completely, then place it in a freezer-safe container or bag. Freeze for up to 3 months. When ready to eat, thaw overnight in the refrigerator and reheat in the skillet.
Side Dishes and Pairings for Lemon Garlic Butter Chicken Thighs
- Garlic Mashed Potatoes: Creamy mashed potatoes are a classic side dish that pairs wonderfully with the rich lemon garlic butter sauce.
- Roasted Vegetables: Serve these chicken thighs with a side of roasted vegetables like asparagus, broccoli, or Brussels sprouts. The vegetables complement the chicken and soak up the flavorful sauce.
- Rice Pilaf: A light, flavorful rice pilaf is an excellent choice to pair with lemon garlic butter chicken thighs. It will soak up the sauce beautifully.
- Cauliflower Rice: For a low-carb option, serve the chicken with cauliflower rice. This works especially well if you’re watching your carbohydrate intake.
- Simple Green Salad: A fresh, crisp salad with lemon vinaigrette adds a refreshing balance to the richness of the chicken.

Lemon Garlic Butter Chicken Thighs and Green Beans Skillet: A Delicious One-Pan Wonder
- Total Time: 30 minutes
Description
Lemon Garlic Butter Chicken Thighs and Green Beans Skillet is a one-pan meal that’s packed with flavor and perfect for a quick, weeknight dinner. Bone-in, skin-on chicken thighs are seared until golden and crispy, then simmered in a rich and tangy garlic butter sauce with a burst of fresh lemon. The chicken thighs become tender and juicy as they soak up the garlicky, buttery goodness. Fresh green beans are added to the skillet, absorbing the flavors of the sauce while becoming perfectly tender and slightly caramelized at the edges. The bright acidity of the lemon cuts through the richness of the butter, making every bite a delightful balance of savory and citrusy. This dish is simple, yet incredibly flavorful, and it’s all made in one pan, making cleanup a breeze. Perfect for busy nights when you want something both comforting and fresh.
Ingredients
- 1 cup (227g) unsalted butter: The star ingredient of any shortbread recipe! Softened butter creates a rich, smooth dough with that melt-in-your-mouth texture. Be sure to use unsalted butter so you can control the amount of salt in the cookies.
- 1/2 cup (60g) powdered sugar: Powdered sugar (also known as icing sugar) gives these cookies a smooth, velvety texture. It’s key to getting the light, airy consistency that whipped shortbread is known for.
- 1 1/2 cups (180g) all-purpose flour: This is the base of the dough. The flour provides structure, while the cornstarch helps to give the cookies their soft, crumbly texture.
- 1/4 cup (30g) cornstarch: Cornstarch helps lighten the dough and contributes to the tender, melt-in-your-mouth texture that shortbread cookies are known for.
- 1/2 teaspoon vanilla extract: Adds a warm, aromatic flavor that perfectly complements the buttery richness of the cookies.
- Pinch of salt: A small amount of salt balances out the sweetness and enhances the other flavors in the cookies.
- Optional: Sprinkles, colored sugar, or a few chocolate chips for decoration or added flavor.
Instructions
First Step: PREPARE YOUR INGREDIENTS
Before you start mixing the dough, make sure all of your ingredients are prepared and ready to go. Since whipped shortbread cookies come together quickly, it’s helpful to have everything measured out and at room temperature.
- Soften the Butter: Start by bringing your butter to room temperature. It should be soft enough to easily whip but not melted. This ensures that it will blend smoothly with the other ingredients and incorporate air into the dough.
- Measure the Ingredients: Measure out the powdered sugar, flour, cornstarch, and salt. Having everything ready will help streamline the process and ensure the dough comes together easily.
Second Step: CREAM THE BUTTER AND SUGAR
The first step in making whipped shortbread cookies is to create a smooth, light base for the dough by creaming together the butter and powdered sugar. This process is key to creating the airy texture that defines whipped shortbread.
- Cream the Butter and Sugar: Using a hand mixer or stand mixer, beat the softened butter and powdered sugar together on medium speed. Beat for 3-4 minutes, or until the mixture is light and fluffy. This step incorporates air into the butter, which is what gives the cookies their light, melt-in-your-mouth texture. Be sure to scrape down the sides of the bowl a few times to ensure even mixing.
- Add the Vanilla: Once the butter and sugar mixture is fluffy, add the vanilla extract and a pinch of salt. Beat for another 30 seconds until fully incorporated.
Third Step: ADD THE DRY INGREDIENTS
Now it’s time to incorporate the dry ingredients. You want to add the flour and cornstarch gradually to prevent the mixture from becoming too dense or lumpy.
- Sift the Dry Ingredients: Sift the all-purpose flour and cornstarch together to ensure there are no lumps. Sifting also helps to incorporate air into the dough, which contributes to the lightness of the cookies.
- Add the Dry Ingredients to the Wet Ingredients: Gradually add the sifted dry ingredients to the butter-sugar mixture. Mix on low speed until the dough begins to come together. Once it forms a dough, increase the speed slightly and mix for an additional 1-2 minutes until fully combined. The dough should be soft, smooth, and slightly fluffy.
Fourth Step: PIPE OR SCOOP THE DOUGH
Once your dough is ready, it’s time to shape the cookies. You can either pipe the dough onto the baking sheet for a more uniform look or simply scoop spoonfuls of dough for a rustic, homemade appearance.
- Prepare the Baking Sheet: Line a baking sheet with parchment paper or a silicone baking mat to prevent the cookies from sticking and to make cleanup easier.
- Pipe the Dough: If you’re piping the dough, use a large star tip or any piping tip of your choice. Place the dough into a piping bag and pipe small rosettes or swirls onto the baking sheet. You can make them as big or as small as you like, but about 1-inch wide is ideal for bite-sized cookies. If you don’t have a piping bag, you can also use a zip-top plastic bag with the corner cut off.
- Scoop the Dough: If you prefer a simpler method, use a spoon or cookie scoop to portion out dough. Roll the dough into balls and place them on the baking sheet, flattening them slightly with the back of the spoon or your fingers.
Fifth Step: BAKE THE COOKIES
Whipped shortbread cookies bake quickly, so keep an eye on them to avoid overbaking. The goal is to achieve a pale golden color, not a dark, browned one, so the texture remains light and tender.
- Preheat the Oven: Preheat your oven to 325°F (165°C). This lower temperature helps ensure the cookies bake evenly and don’t brown too much.
- Bake the Cookies: Place the baking sheet in the preheated oven and bake for 12-15 minutes, or until the cookies are just beginning to turn golden around the edges. The cookies should still look pale in the center. Be careful not to overbake them, as they can become dry.
- Cool on a Wire Rack: Once baked, remove the cookies from the oven and let them cool on the baking sheet for a few minutes before transferring them to a wire rack to cool completely.
Final Step: DECORATE AND ENJOY
Once the cookies have cooled, you can decorate them with sprinkles, colored sugar, or even a dusting of powdered sugar for a festive touch. Whipped shortbread cookies are incredibly versatile, so feel free to get creative with your toppings.
- Decorate the Cookies: If you like, sprinkle a little colored sugar or regular granulated sugar on top of each cookie before baking, or add sprinkles after baking while the cookies are still slightly warm. You can also dip the cookies in melted chocolate for an extra indulgent treat.
- Serve and Store: Serve your freshly baked Whipped Shortbread Cookies at a holiday gathering, with tea, or as a sweet snack for yourself. Store any leftovers in an airtight container at room temperature for up to a week. These cookies also freeze well, so you can make them ahead of time and store them in the freezer for up to 3 months.
- Prep Time: 10 minutes
- Cook Time: 20 minutes
Nutrition
- Calories: 120 kcal
- Fat: 7g
- Carbohydrates: 13g
- Protein: 1g
Conclusion
Lemon Garlic Butter Chicken Thighs are a flavorful and satisfying dish that’s perfect for any occasion. The combination of crispy skin, tender meat, and a zesty, buttery sauce creates a mouthwatering experience that is sure to become a favorite in your home. With simple ingredients and quick preparation, this dish is a breeze to make and can be enjoyed by everyone at the table.
Whether you’re serving it for a weeknight dinner, a special meal, or meal prepping for the week ahead, this Lemon Garlic Butter Chicken Thighs recipe is versatile, easy to make, and always delicious. Enjoy!


