
Introduction
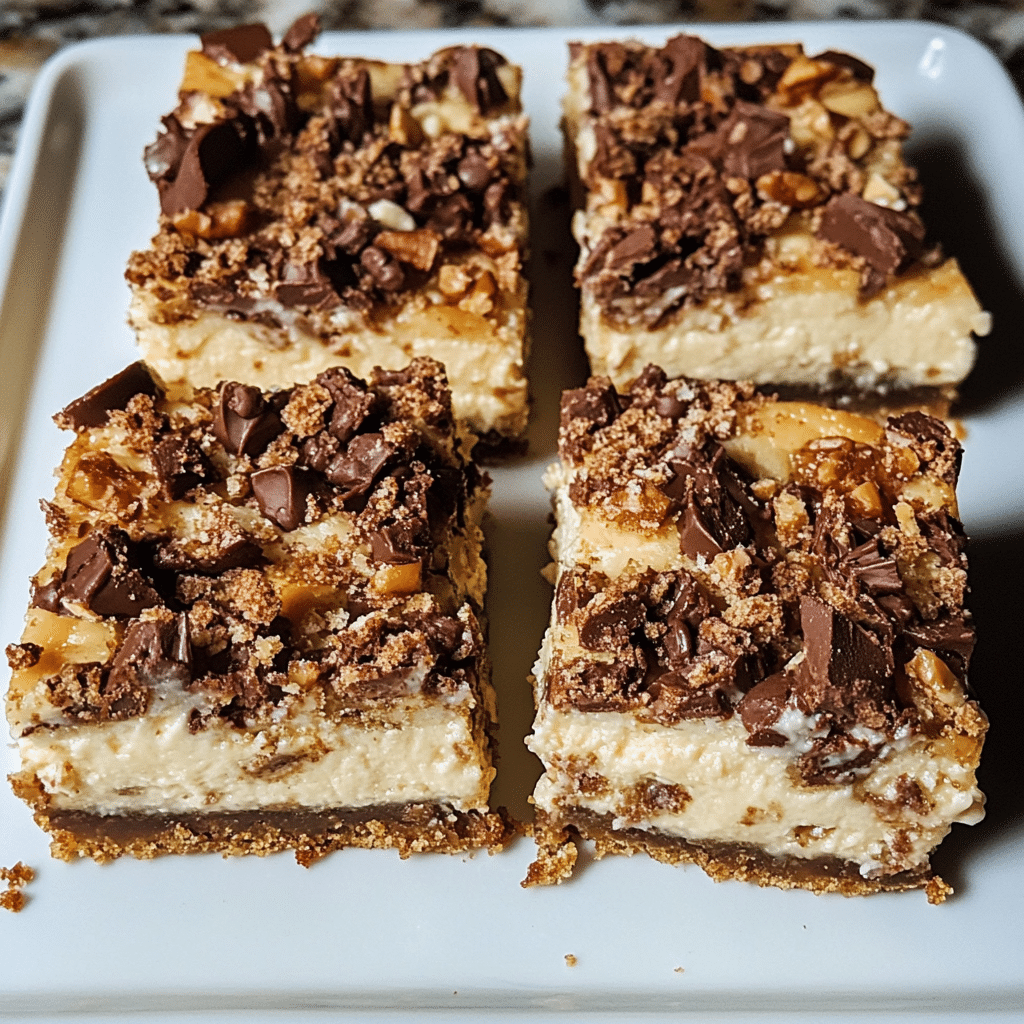
Magic Cheesecake Bars are the ultimate dessert that beautifully combines the creamy richness of cheesecake with a buttery, cookie-like crust and a delightful layer of chocolate ganache. These bars are a true crowd-pleaser, offering a decadent treat that’s perfect for any occasion—be it a family gathering, a holiday celebration, or a simple weeknight indulgence. With their luscious texture and rich flavors, they will leave everyone asking for seconds!
I discovered this recipe while searching for a new way to showcase classic cheesecake flavors in a portable format. Once I made these bars, they quickly became a favorite in my household. The blend of creamy cheesecake filling, cookie crust, and chocolate topping creates a heavenly combination that is hard to resist. The best part? They are surprisingly easy to make, making them an accessible dessert option for bakers of all skill levels. Let’s dive into why you’ll love these Magic Cheesecake Bars and how to make them perfectly!
Why You’ll Love This Recipe
- Decadent Flavor: The combination of rich cream cheese, sweet chocolate, and a buttery crust creates an irresistible flavor profile.
- Easy to Make: With straightforward steps and minimal ingredients, these bars are a breeze to prepare.
- Perfect for Sharing: Cut them into squares for a delightful treat that’s easy to share at gatherings.
- Versatile Dessert: Great for any occasion, whether it’s a holiday party or a casual family dinner.
- Make Ahead: These bars can be made in advance, making them a convenient option for busy bakers.
Preparation Time and Servings
- Total Time: 1 hour 30 minutes (20 minutes prep, 30 minutes baking, plus cooling time)
- Servings: This recipe yields approximately 16 bars.
- Nutrition Facts: Calories per bar: 300, Protein: 5g, Carbs: 35g, Fat: 15g.
Ingredients
For the Crust
- 1 ½ cups graham cracker crumbs: Forms the base of the bars, providing a sweet and crunchy texture.
- ½ cup unsalted butter, melted: Binds the crumbs together and adds richness.
- ¼ cup granulated sugar: Sweetens the crust.
For the Cheesecake Filling
- 16 oz cream cheese, softened: The star ingredient that gives the bars their creamy texture.
- 1 cup granulated sugar: Adds sweetness to the cheesecake.
- 2 large eggs: Helps set the filling and adds richness.
- 1 teaspoon vanilla extract: Enhances the flavor of the cheesecake.
For the Chocolate Ganache Topping
- 1 cup semi-sweet chocolate chips: Provides a rich chocolate layer on top.
- ½ cup heavy cream: Used to create a smooth ganache.
Step-by-Step Instructions
STEP 1: PREPARE THE OVEN AND PAN
- Preheat the Oven: Start by preheating your oven to 325°F (160°C). This ensures the cheesecake bakes evenly.
- Prepare the Baking Dish: Line a 9×9 inch square baking pan with parchment paper, leaving some overhang for easy removal. Lightly grease the parchment paper to prevent sticking.
STEP 2: MAKE THE CRUST
- Mix the Ingredients: In a medium bowl, combine the graham cracker crumbs, melted butter, and granulated sugar. Stir until the mixture resembles wet sand.
- Press into the Pan: Pour the crumb mixture into the prepared baking pan and press it down firmly using the back of a measuring cup or your fingers. Ensure it’s evenly distributed across the bottom of the pan.
- Pre-bake the Crust: Bake the crust in the preheated oven for about 10 minutes, or until it is lightly golden. Remove from the oven and let it cool slightly while you prepare the cheesecake filling.
STEP 3: MAKE THE CHEESECAKE FILLING
- Beat the Cream Cheese: In a large mixing bowl, beat the softened cream cheese with an electric mixer until smooth and creamy. This may take a few minutes, so be patient!
- Add Sugar and Eggs: Gradually add the granulated sugar, mixing until well combined. Then, add the eggs, one at a time, beating well after each addition. Mix in the vanilla extract until fully incorporated.
- Pour Over the Crust: Carefully pour the cheesecake filling over the pre-baked crust, spreading it evenly with a spatula.
STEP 4: BAKE THE CHEESECAKE BARS
- Bake: Return the pan to the oven and bake for 30 minutes, or until the cheesecake is set around the edges but slightly jiggly in the center.
- Cool: Once baked, remove the pan from the oven and let it cool on a wire rack for at least 30 minutes at room temperature. Then, refrigerate for at least 2 hours or until fully chilled.
STEP 5: MAKE THE CHOCOLATE GANACHE
- Heat the Cream: In a small saucepan, heat the heavy cream over medium heat until it begins to simmer. Do not let it boil.
- Add Chocolate Chips: Remove the saucepan from the heat and add the semi-sweet chocolate chips. Let them sit for a minute to melt, then stir until smooth and glossy.
- Pour Over Cheesecake: Once the cheesecake has fully chilled, pour the ganache over the top, spreading it evenly with a spatula.
- Chill Again: Place the pan back in the refrigerator for another 30 minutes to allow the ganache to set.
STEP 6: SERVE AND ENJOY
- Slice the Bars: Once the ganache has set, use the parchment overhang to lift the bars out of the pan. Transfer to a cutting board and slice into squares.
- Garnish (Optional): For an extra touch, consider garnishing with whipped cream, chocolate shavings, or fresh berries before serving.
How to Serve
- Presentation: Arrange the cheesecake bars on a decorative platter for an appealing display.
- Accompaniments: Serve with a dollop of whipped cream and a drizzle of chocolate sauce for an extra indulgent treat.
- Beverage Pairing: These bars pair wonderfully with a cup of coffee, tea, or a dessert wine, enhancing the overall experience.
Additional Tips
- Soften the Cream Cheese: For a smooth filling, ensure the cream cheese is at room temperature before mixing. This prevents lumps and creates a creamy texture.
- Avoid Overbaking: Keep an eye on the cheesecake while it bakes. Overbaking can lead to cracks and a dry texture.
- Chill Thoroughly: Allow ample chilling time to set the cheesecake and ganache, ensuring the bars hold their shape when sliced.
- Store Properly: Keep any leftovers in an airtight container in the refrigerator for up to 5 days.
- Freeze for Later: These bars freeze well! Wrap individual squares in plastic wrap and then in aluminum foil for up to 2 months. Thaw in the refrigerator before serving.
Recipe Variations
- Flavor Infusions: Add a tablespoon of lemon or orange zest to the cheesecake filling for a refreshing citrus twist.
- Nutty Crust: Incorporate finely chopped nuts, such as walnuts or pecans, into the crust for added texture and flavor.
- Fruit Topping: Consider adding a layer of fresh fruit, such as strawberries or raspberries, on top of the ganache for a fruity contrast.
- Swirled Cheesecake: Swirl in some fruit preserves or chocolate sauce into the cheesecake filling before baking for a marbled effect.
- Different Chocolates: Experiment with white chocolate or dark chocolate ganache for a unique flavor profile.
Freezing and Storage
- Storage: Keep the cheesecake bars in an airtight container in the refrigerator for up to 5 days. For optimal flavor, consume them within this time.
- Freezing: Wrap individual bars tightly in plastic wrap and store them in a freezer-safe container for up to 2 months.
- Thawing: To enjoy frozen bars, transfer them to the refrigerator overnight to thaw before serving.
Special Equipment
- 9×9 Inch Baking Pan: A standard size for this recipe, ensuring even baking.
- Parchment Paper: Lining the pan with parchment makes for easy removal and cleanup.
- Electric Mixer: A hand mixer or stand mixer makes it easy to achieve a smooth filling.
- Mixing Bowls: Use separate bowls for the crust and filling to keep your ingredients organized.
- Spatula: Essential for spreading the cheesecake filling and ganache evenly.
FAQ Section
Can I use reduced-fat cream cheese?
Yes, but the texture may be slightly less creamy. Full-fat cream cheese yields the best results.
Can I prepare these bars in advance?
Absolutely! These bars can be made a day or two in advance and stored in the refrigerator.
What can I use instead of graham cracker crumbs?
You can substitute with crushed cookies, such as Oreos or digestive biscuits, for a different flavor.
How do I know when the cheesecake is done?
The edges should be set, and the center should have a slight jiggle. It will firm up as it cools.
Can I use different chocolate for the ganache?
Yes! Feel free to experiment with milk
chocolate, dark chocolate, or even white chocolate for a unique flavor.
Conclusion
I hope you’re excited to try these Magic Cheesecake Bars! They are a delightful treat that brings together the best of cheesecake and chocolate in a format that’s perfect for sharing. Whether for a holiday celebration or a casual get-together, these bars will impress your guests and leave them craving more.
These bars not only deliver a rich and creamy flavor but also a stunning visual appeal that makes them a standout dessert. The combination of buttery crust, luscious cheesecake filling, and decadent chocolate swirls creates a harmonious experience for the taste buds. Don’t miss out on the chance to bring a little magic to your next gathering!
Don’t forget to share your results! I can’t wait to see how your Magic Cheesecake Bars turn out—be sure to leave a comment or tag me on social media with your delicious creations. Enjoy your baking!
Print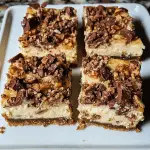
Magic Cheesecake Bars: An Irresistible Dessert Delight
- Total Time: 1 hour 30 minutes
Description
Magic Cheesecake Bars are a dreamy blend of creamy cheesecake and rich chocolate, all beautifully layered in a convenient bar format. With a buttery graham cracker crust, a velvety cheesecake filling, and swirls of decadent chocolate, these bars offer a heavenly taste experience that’s hard to resist. Perfect for sharing at parties or enjoying as a sweet treat at home, these cheesecake bars are not only easy to make but also visually stunning, making them an ideal dessert for any occasion. Indulge in the magic and delight your taste buds with every bite!
Ingredients
For the Crust
- 1 ½ cups graham cracker crumbs: Forms the base of the bars, providing a sweet and crunchy texture.
- ½ cup unsalted butter, melted: Binds the crumbs together and adds richness.
- ¼ cup granulated sugar: Sweetens the crust.
For the Cheesecake Filling
- 16 oz cream cheese, softened: The star ingredient that gives the bars their creamy texture.
- 1 cup granulated sugar: Adds sweetness to the cheesecake.
- 2 large eggs: Helps set the filling and adds richness.
- 1 teaspoon vanilla extract: Enhances the flavor of the cheesecake.
For the Chocolate Ganache Topping
- 1 cup semi-sweet chocolate chips: Provides a rich chocolate layer on top.
- ½ cup heavy cream: Used to create a smooth ganache.
Instructions
STEP 1: PREPARE THE OVEN AND PAN
- Preheat the Oven: Start by preheating your oven to 325°F (160°C). This ensures the cheesecake bakes evenly.
- Prepare the Baking Dish: Line a 9×9 inch square baking pan with parchment paper, leaving some overhang for easy removal. Lightly grease the parchment paper to prevent sticking.
STEP 2: MAKE THE CRUST
- Mix the Ingredients: In a medium bowl, combine the graham cracker crumbs, melted butter, and granulated sugar. Stir until the mixture resembles wet sand.
- Press into the Pan: Pour the crumb mixture into the prepared baking pan and press it down firmly using the back of a measuring cup or your fingers. Ensure it’s evenly distributed across the bottom of the pan.
- Pre-bake the Crust: Bake the crust in the preheated oven for about 10 minutes, or until it is lightly golden. Remove from the oven and let it cool slightly while you prepare the cheesecake filling.
STEP 3: MAKE THE CHEESECAKE FILLING
- Beat the Cream Cheese: In a large mixing bowl, beat the softened cream cheese with an electric mixer until smooth and creamy. This may take a few minutes, so be patient!
- Add Sugar and Eggs: Gradually add the granulated sugar, mixing until well combined. Then, add the eggs, one at a time, beating well after each addition. Mix in the vanilla extract until fully incorporated.
- Pour Over the Crust: Carefully pour the cheesecake filling over the pre-baked crust, spreading it evenly with a spatula.
STEP 4: BAKE THE CHEESECAKE BARS
- Bake: Return the pan to the oven and bake for 30 minutes, or until the cheesecake is set around the edges but slightly jiggly in the center.
- Cool: Once baked, remove the pan from the oven and let it cool on a wire rack for at least 30 minutes at room temperature. Then, refrigerate for at least 2 hours or until fully chilled.
STEP 5: MAKE THE CHOCOLATE GANACHE
- Heat the Cream: In a small saucepan, heat the heavy cream over medium heat until it begins to simmer. Do not let it boil.
- Add Chocolate Chips: Remove the saucepan from the heat and add the semi-sweet chocolate chips. Let them sit for a minute to melt, then stir until smooth and glossy.
- Pour Over Cheesecake: Once the cheesecake has fully chilled, pour the ganache over the top, spreading it evenly with a spatula.
- Chill Again: Place the pan back in the refrigerator for another 30 minutes to allow the ganache to set.
STEP 6: SERVE AND ENJOY
- Slice the Bars: Once the ganache has set, use the parchment overhang to lift the bars out of the pan. Transfer to a cutting board and slice into squares.
- Garnish (Optional): For an extra touch, consider garnishing with whipped cream, chocolate shavings, or fresh berries before serving.
- Prep Time: 20 minutes
- Baking Time: 30 minutes
Nutrition
- Calories: 300 kcal
- Fat: 15g
- Carbohydrates: 35g
- Protein: 5g


