
Introduction
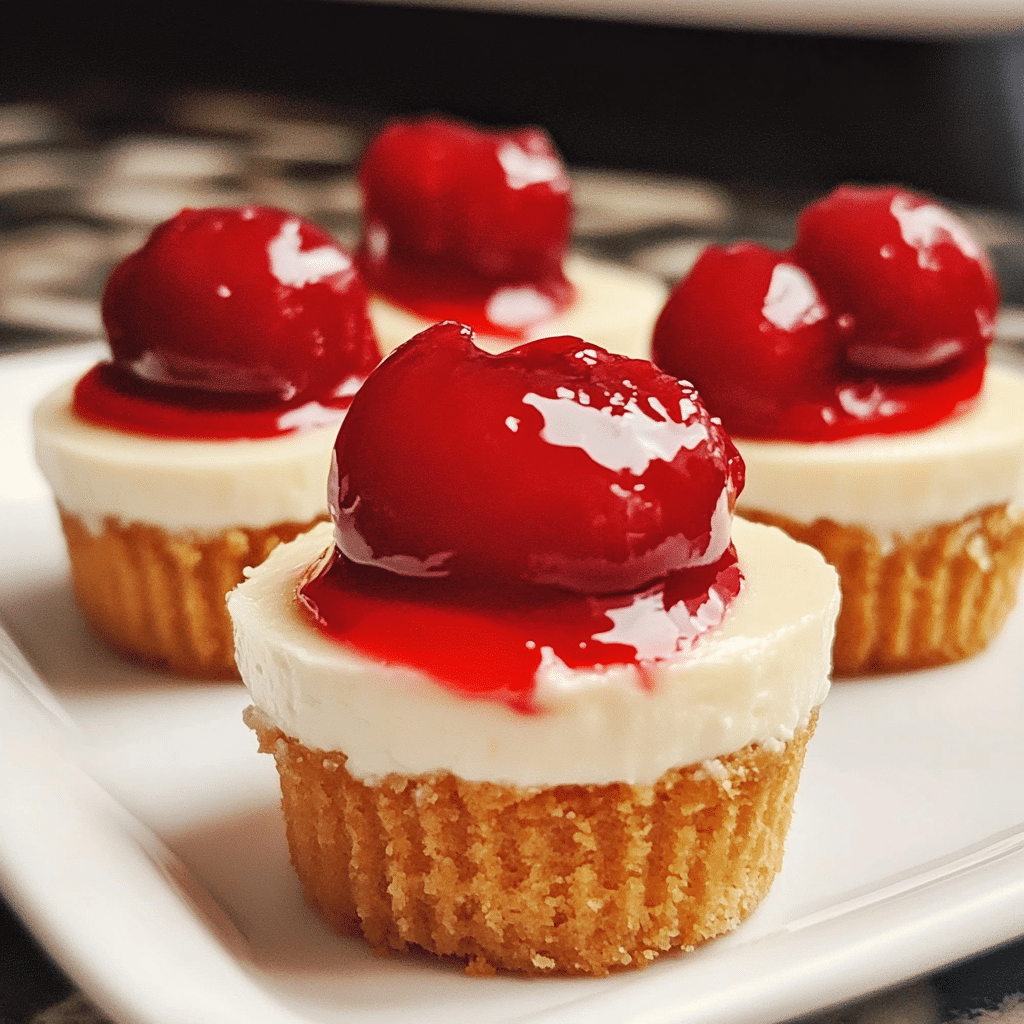
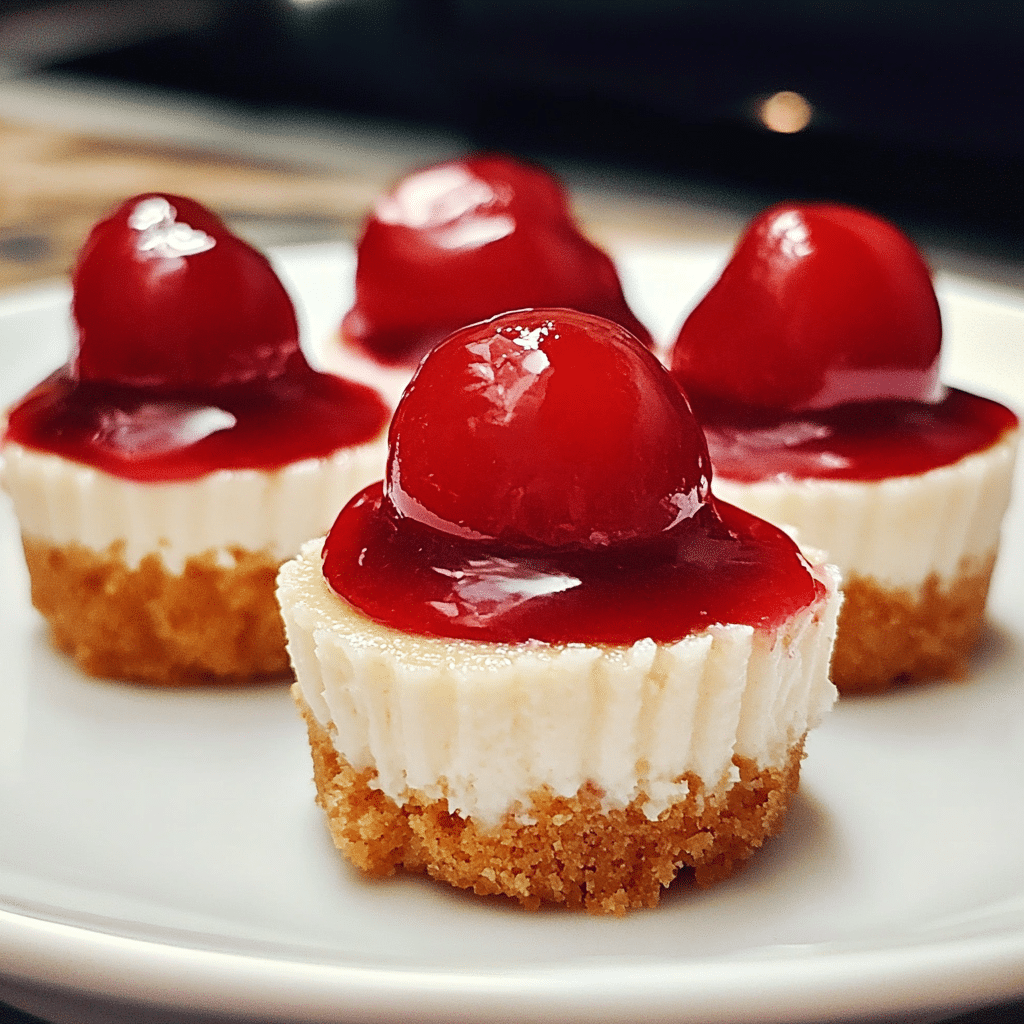
Mini Cherry Cheesecakes are the perfect individual-sized dessert that combines the rich, creamy texture of cheesecake with the sweet and tangy flavor of cherries. These little treats are perfect for any occasion—whether you’re hosting a party, celebrating a special event, or just craving a delicious dessert. With their buttery graham cracker crust, velvety cheesecake filling, and luscious cherry topping, they are sure to be a hit with friends and family.
What makes these mini cheesecakes even more appealing is their portability. Each mini cheesecake is easy to serve and enjoy, making them an ideal addition to potlucks, picnics, and dessert buffets. You can make them ahead of time, and they keep well in the fridge, so they’re always ready for your next gathering or whenever you want a sweet treat.
In this guide, we’ll walk you through every step of making these delightful Mini Cherry Cheesecakes, provide helpful tips for the perfect texture and flavor, and share some fun variations to personalize your cheesecakes. Whether you’re a novice baker or an experienced one, these mini cheesecakes are a must-try!
Why You’ll Love Mini Cherry Cheesecakes
- Perfect Balance of Flavors: The rich and creamy cheesecake filling is perfectly complemented by the tart sweetness of the cherry topping. The combination of flavors in these cheesecakes is simply irresistible.
- Individual Servings: With their mini size, these cheesecakes are perfect for serving at events and parties. They’re easy to portion, so everyone can enjoy their own serving without the need for slicing.
- No-Bake Option: These mini cheesecakes can be made without turning on the oven, which is perfect for hot days or when you want to avoid the heat in the kitchen. Plus, no-bake cheesecakes are typically easier and quicker to make!
- Make-Ahead Convenience: Mini Cherry Cheesecakes can be made a day or two in advance and stored in the refrigerator. This makes them a great dessert to prepare ahead of time for busy events.
- Versatile: While the cherry topping is delicious, these mini cheesecakes can also be topped with a variety of other fruits like blueberries, strawberries, or even a swirl of chocolate for a fun twist.
Preparation and Cooking Time
- Total Time: 2 hours 30 minutes (including chilling time)
- Preparation Time: 30 minutes
- Cooking Time: 10-12 minutes (if using baked crust option)
- Chilling Time: 2 hours (minimum)
- Servings: 12 mini cheesecakes
- Calories per Serving: Approximately 300-350 calories per mini cheesecake, depending on the ingredients and portion sizes.
Nutrition Facts (Per Serving)
- Calories: 300-350 kcal
- Fat: 18-20g
- Carbohydrates: 30-35g
- Protein: 4g
- Fiber: 1g
- Sugar: 20-25g
Ingredients
For the Crust:
- 1 ½ cups graham cracker crumbs (about 10-12 graham crackers)
- 1/4 cup granulated sugar
- 1/2 cup unsalted butter, melted
For the Cheesecake Filling:
- 2 (8 oz) packages cream cheese, softened
- 1 cup powdered sugar
- 1 teaspoon vanilla extract
- 1 cup heavy whipping cream
Cherry Topping:
- 1 jar (about 12 oz) of cherry pie filling (or fresh cherries if preferred)
Step-by-Step Instructions
1. Prepare the Crust
Begin by preheating your oven to 325°F (165°C). Line a 12-cup muffin tin with paper cupcake liners. This will make it easy to remove the mini cheesecakes once they are chilled and ready to serve.
In a medium-sized bowl, combine the graham cracker crumbs and granulated sugar. Stir well to ensure that the sugar is evenly distributed throughout the crumbs. Pour in the melted butter and mix until the crumbs are fully coated, and the mixture begins to resemble wet sand.
Spoon about 1 ½ tablespoons of the graham cracker mixture into each muffin cup. Press the crumbs down with the back of a spoon or your fingers to create an even, compact crust. If you prefer a firmer crust, you can bake the crusts for about 10 minutes to set them. Simply place the muffin tin in the oven for 10 minutes, then remove it and allow the crusts to cool completely before filling them with the cheesecake mixture.
Alternatively, if you want to skip baking the crusts, you can proceed directly to filling them with the cheesecake filling. The no-bake option will result in a softer crust, but it will still hold together well once chilled.
2. Make the Cheesecake Filling
In a large mixing bowl, beat the softened cream cheese and powdered sugar together until smooth and creamy. This can be done with a hand mixer or stand mixer on medium speed. Scrape down the sides of the bowl to ensure that all the ingredients are fully incorporated.
Next, add the vanilla extract and beat it into the mixture until well combined. In a separate mixing bowl, whip the heavy whipping cream until stiff peaks form. You can do this using a hand mixer or stand mixer. The whipped cream will give the filling a light, airy texture and help it set when chilled.
Gently fold the whipped cream into the cream cheese mixture using a spatula. Be careful not to deflate the whipped cream. Fold until everything is fully combined, and the mixture is smooth and fluffy.
3. Assemble the Mini Cheesecakes
Spoon the cheesecake filling into each muffin cup, filling them to the top. Use a small offset spatula or the back of a spoon to smooth the tops. Be careful not to disturb the crust too much, but make sure that the filling is evenly distributed.
Once all the muffin cups are filled, gently tap the muffin tin on the counter to remove any air bubbles and help the filling settle.
4. Chill the Cheesecakes
Place the muffin tin in the refrigerator and chill the mini cheesecakes for at least 2 hours, or until they are firm to the touch. This chilling time is important for setting the cheesecake filling and allowing the flavors to meld together.
If you’re short on time, you can place the cheesecakes in the freezer for about 30 minutes to speed up the chilling process. Just be sure to let them sit at room temperature for a few minutes before serving if you choose the freezer method.
5. Add the Cherry Topping
Once the cheesecakes are chilled and set, it’s time to add the cherry topping. Spoon about 1 tablespoon of cherry pie filling onto each mini cheesecake, or more if you prefer a larger topping. If using fresh cherries, you can either add them whole or cut them in half for easier serving.
If you like, you can also drizzle a bit of cherry syrup over the top for extra sweetness and flavor. Alternatively, you can skip the cherry topping entirely and serve the cheesecakes plain, or with another type of fruit topping like blueberries or strawberries.
6. Serve and Enjoy
Once topped with cherries, the mini cheesecakes are ready to be served! They can be enjoyed immediately, or you can store them in the refrigerator until you’re ready to serve them. These mini cheesecakes are perfect for a sweet treat after dinner, a casual snack, or as part of a dessert spread at a party.
Tips for Perfect Mini Cherry Cheesecakes
- Soften the Cream Cheese: Be sure to allow the cream cheese to soften before mixing it with the powdered sugar. This will help prevent lumps in the cheesecake filling and result in a smooth, creamy texture.
- Don’t Overmix the Filling: When combining the whipped cream with the cream cheese mixture, be sure to fold it gently. Overmixing can cause the whipped cream to lose its airiness and result in a denser filling.
- Use a Cupcake Pan for Easy Portioning: A standard muffin tin works perfectly for these mini cheesecakes, as it helps create individual servings that are easy to serve and eat.
- Add a Dash of Lemon: To enhance the flavor of the cheesecake, try adding a teaspoon of lemon zest or a tablespoon of lemon juice to the filling. The acidity will balance the sweetness and give the cheesecakes a refreshing twist.
- Experiment with Toppings: While cherries are a classic choice, feel free to get creative with other toppings. Fresh berries, chocolate ganache, or a swirl of caramel can all be used to make these mini cheesecakes even more delicious.
Variations of Mini Cherry Cheesecakes
- Mini Strawberry Cheesecakes: Swap out the cherry topping for fresh or canned strawberries. You can also make a strawberry compote by simmering fresh strawberries with sugar until they break down into a syrupy consistency.
- Mini Blueberry Cheesecakes: Blueberries make a great alternative to cherries. You can use fresh blueberries, or make a quick blueberry sauce by cooking down fresh or frozen blueberries with a little sugar and lemon juice.
- Chocolate Cherry Cheesecakes: Add a layer of melted chocolate to the base of the graham cracker crust before filling with the cheesecake mixture. This will add a rich chocolate flavor that pairs beautifully with the cherry topping.
- Nutella Mini Cheesecakes: Add a spoonful of Nutella to the cheesecake filling for a hazelnut-chocolate twist. You can swirl the Nutella into the cheesecake mixture or add it as a topping.
- Lemon Cherry Cheesecakes: Add a teaspoon of lemon juice to the cheesecake filling for a tangy, citrusy flavor that pairs wonderfully with the sweetness of the cherries.
Storage and Shelf Life
Mini Cherry Cheesecakes can be stored in an airtight container in the refrigerator for up to 3-4 days. They may soften slightly over time, but the flavors will continue to meld together. If you’ve added fresh fruit toppings, such as fresh cherries, be sure to add them just before serving to prevent them from becoming soggy.
If you want to store the mini cheesecakes for a longer period, they can be frozen. To freeze them, place the cheesecakes in a single layer on a baking sheet and freeze them until firm. Then, transfer them to an airtight container or freezer-safe bag and store them for up to 1 month. To serve, let them thaw in the refrigerator for several hours or overnight.
Side Dishes and Pairings for Mini Cherry Cheesecakes
- Coffee or Espresso: The rich, creamy flavor of the cheesecakes pairs perfectly with a strong cup of coffee or espresso, making them an ideal dessert after a meal.
- Iced Tea: A glass of sweetened iced tea or a refreshing herbal tea will complement the sweetness of the mini cheesecakes while offering a cool and light contrast.
- Fresh Fruit Salad: A light fruit salad made with fresh berries or citrus fruits provides a refreshing balance to the rich flavor of the cheesecakes.
- Whipped Cream: If you want to add a little extra indulgence, serve these mini cheesecakes with a dollop of freshly whipped cream.
Mini Cherry Cheesecakes Recipe
- Total Time: 2 hours 30 minutes
Description
Creamy, decadent cheesecake topped with a sweet, juicy cherry and a buttery graham cracker crust. These individual mini cheesecakes are a delightful combination of smooth, rich filling and a tangy, fruity topping.
Ingredients
For the Crust:
- 1 ½ cups graham cracker crumbs (about 10–12 graham crackers)
- 1/4 cup granulated sugar
- 1/2 cup unsalted butter, melted
For the Cheesecake Filling:
- 2 (8 oz) packages cream cheese, softened
- 1 cup powdered sugar
- 1 teaspoon vanilla extract
- 1 cup heavy whipping cream
For the Cherry Topping:
- 1 jar (about 12 oz) of cherry pie filling (or fresh cherries if preferred)
Instructions
1. Prepare the Crust
Begin by preheating your oven to 325°F (165°C). Line a 12-cup muffin tin with paper cupcake liners. This will make it easy to remove the mini cheesecakes once they are chilled and ready to serve.
In a medium-sized bowl, combine the graham cracker crumbs and granulated sugar. Stir well to ensure that the sugar is evenly distributed throughout the crumbs. Pour in the melted butter and mix until the crumbs are fully coated, and the mixture begins to resemble wet sand.
Spoon about 1 ½ tablespoons of the graham cracker mixture into each muffin cup. Press the crumbs down with the back of a spoon or your fingers to create an even, compact crust. If you prefer a firmer crust, you can bake the crusts for about 10 minutes to set them. Simply place the muffin tin in the oven for 10 minutes, then remove it and allow the crusts to cool completely before filling them with the cheesecake mixture.
Alternatively, if you want to skip baking the crusts, you can proceed directly to filling them with the cheesecake filling. The no-bake option will result in a softer crust, but it will still hold together well once chilled.
2. Make the Cheesecake Filling
In a large mixing bowl, beat the softened cream cheese and powdered sugar together until smooth and creamy. This can be done with a hand mixer or stand mixer on medium speed. Scrape down the sides of the bowl to ensure that all the ingredients are fully incorporated.
Next, add the vanilla extract and beat it into the mixture until well combined. In a separate mixing bowl, whip the heavy whipping cream until stiff peaks form. You can do this using a hand mixer or stand mixer. The whipped cream will give the filling a light, airy texture and help it set when chilled.
Gently fold the whipped cream into the cream cheese mixture using a spatula. Be careful not to deflate the whipped cream. Fold until everything is fully combined, and the mixture is smooth and fluffy.
3. Assemble the Mini Cheesecakes
Spoon the cheesecake filling into each muffin cup, filling them to the top. Use a small offset spatula or the back of a spoon to smooth the tops. Be careful not to disturb the crust too much, but make sure that the filling is evenly distributed.
Once all the muffin cups are filled, gently tap the muffin tin on the counter to remove any air bubbles and help the filling settle.
4. Chill the Cheesecakes
Place the muffin tin in the refrigerator and chill the mini cheesecakes for at least 2 hours, or until they are firm to the touch. This chilling time is important for setting the cheesecake filling and allowing the flavors to meld together.
If you’re short on time, you can place the cheesecakes in the freezer for about 30 minutes to speed up the chilling process. Just be sure to let them sit at room temperature for a few minutes before serving if you choose the freezer method.
5. Add the Cherry Topping
Once the cheesecakes are chilled and set, it’s time to add the cherry topping. Spoon about 1 tablespoon of cherry pie filling onto each mini cheesecake, or more if you prefer a larger topping. If using fresh cherries, you can either add them whole or cut them in half for easier serving.
If you like, you can also drizzle a bit of cherry syrup over the top for extra sweetness and flavor. Alternatively, you can skip the cherry topping entirely and serve the cheesecakes plain, or with another type of fruit topping like blueberries or strawberries.
6. Serve and Enjoy
Once topped with cherries, the mini cheesecakes are ready to be served! They can be enjoyed immediately, or you can store them in the refrigerator until you’re ready to serve them. These mini cheesecakes are perfect for a sweet treat after dinner, a casual snack, or as part of a dessert spread at a party.
- Prep Time: 30 minutes
- Chilling Time: 2 hours
- Cook Time: 10-12 minutes
Nutrition
- Calories: 300-350 kcal
- Fat: 18-20g
- Carbohydrates: 30-35g
- Protein: 4g
Conclusion
Mini Cherry Cheesecakes are a delightful and elegant dessert that is sure to impress your guests or satisfy your sweet tooth. With their creamy filling, buttery graham cracker crust, and sweet cherry topping, they’re the perfect treat for any occasion. Easy to make and full of flavor, these cheesecakes are as fun to eat as they are to prepare.
Whether you’re making them for a special celebration, a casual gathering, or just because you love cheesecake, these mini treats are sure to become a favorite in your dessert repertoire. Try this recipe today, and enjoy the sweet, tangy goodness of these delicious Mini Cherry Cheesecakes!


