Description
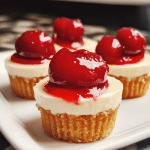
Creamy, decadent cheesecake topped with a sweet, juicy cherry and a buttery graham cracker crust. These individual mini cheesecakes are a delightful combination of smooth, rich filling and a tangy, fruity topping.
Ingredients
For the Crust:
- 1 ½ cups graham cracker crumbs (about 10–12 graham crackers)
- 1/4 cup granulated sugar
- 1/2 cup unsalted butter, melted
For the Cheesecake Filling:
- 2 (8 oz) packages cream cheese, softened
- 1 cup powdered sugar
- 1 teaspoon vanilla extract
- 1 cup heavy whipping cream
For the Cherry Topping:
- 1 jar (about 12 oz) of cherry pie filling (or fresh cherries if preferred)
Instructions
1. Prepare the Crust
Begin by preheating your oven to 325°F (165°C). Line a 12-cup muffin tin with paper cupcake liners. This will make it easy to remove the mini cheesecakes once they are chilled and ready to serve.
In a medium-sized bowl, combine the graham cracker crumbs and granulated sugar. Stir well to ensure that the sugar is evenly distributed throughout the crumbs. Pour in the melted butter and mix until the crumbs are fully coated, and the mixture begins to resemble wet sand.
Spoon about 1 ½ tablespoons of the graham cracker mixture into each muffin cup. Press the crumbs down with the back of a spoon or your fingers to create an even, compact crust. If you prefer a firmer crust, you can bake the crusts for about 10 minutes to set them. Simply place the muffin tin in the oven for 10 minutes, then remove it and allow the crusts to cool completely before filling them with the cheesecake mixture.
Alternatively, if you want to skip baking the crusts, you can proceed directly to filling them with the cheesecake filling. The no-bake option will result in a softer crust, but it will still hold together well once chilled.
2. Make the Cheesecake Filling
In a large mixing bowl, beat the softened cream cheese and powdered sugar together until smooth and creamy. This can be done with a hand mixer or stand mixer on medium speed. Scrape down the sides of the bowl to ensure that all the ingredients are fully incorporated.
Next, add the vanilla extract and beat it into the mixture until well combined. In a separate mixing bowl, whip the heavy whipping cream until stiff peaks form. You can do this using a hand mixer or stand mixer. The whipped cream will give the filling a light, airy texture and help it set when chilled.
Gently fold the whipped cream into the cream cheese mixture using a spatula. Be careful not to deflate the whipped cream. Fold until everything is fully combined, and the mixture is smooth and fluffy.
3. Assemble the Mini Cheesecakes
Spoon the cheesecake filling into each muffin cup, filling them to the top. Use a small offset spatula or the back of a spoon to smooth the tops. Be careful not to disturb the crust too much, but make sure that the filling is evenly distributed.
Once all the muffin cups are filled, gently tap the muffin tin on the counter to remove any air bubbles and help the filling settle.
4. Chill the Cheesecakes
Place the muffin tin in the refrigerator and chill the mini cheesecakes for at least 2 hours, or until they are firm to the touch. This chilling time is important for setting the cheesecake filling and allowing the flavors to meld together.
If you’re short on time, you can place the cheesecakes in the freezer for about 30 minutes to speed up the chilling process. Just be sure to let them sit at room temperature for a few minutes before serving if you choose the freezer method.
5. Add the Cherry Topping
Once the cheesecakes are chilled and set, it’s time to add the cherry topping. Spoon about 1 tablespoon of cherry pie filling onto each mini cheesecake, or more if you prefer a larger topping. If using fresh cherries, you can either add them whole or cut them in half for easier serving.
If you like, you can also drizzle a bit of cherry syrup over the top for extra sweetness and flavor. Alternatively, you can skip the cherry topping entirely and serve the cheesecakes plain, or with another type of fruit topping like blueberries or strawberries.
6. Serve and Enjoy
Once topped with cherries, the mini cheesecakes are ready to be served! They can be enjoyed immediately, or you can store them in the refrigerator until you’re ready to serve them. These mini cheesecakes are perfect for a sweet treat after dinner, a casual snack, or as part of a dessert spread at a party.
- Prep Time: 30 minutes
- Chilling Time: 2 hours
- Cook Time: 10-12 minutes
Nutrition
- Calories: 300-350 kcal
- Fat: 18-20g
- Carbohydrates: 30-35g
- Protein: 4g