
Introduction
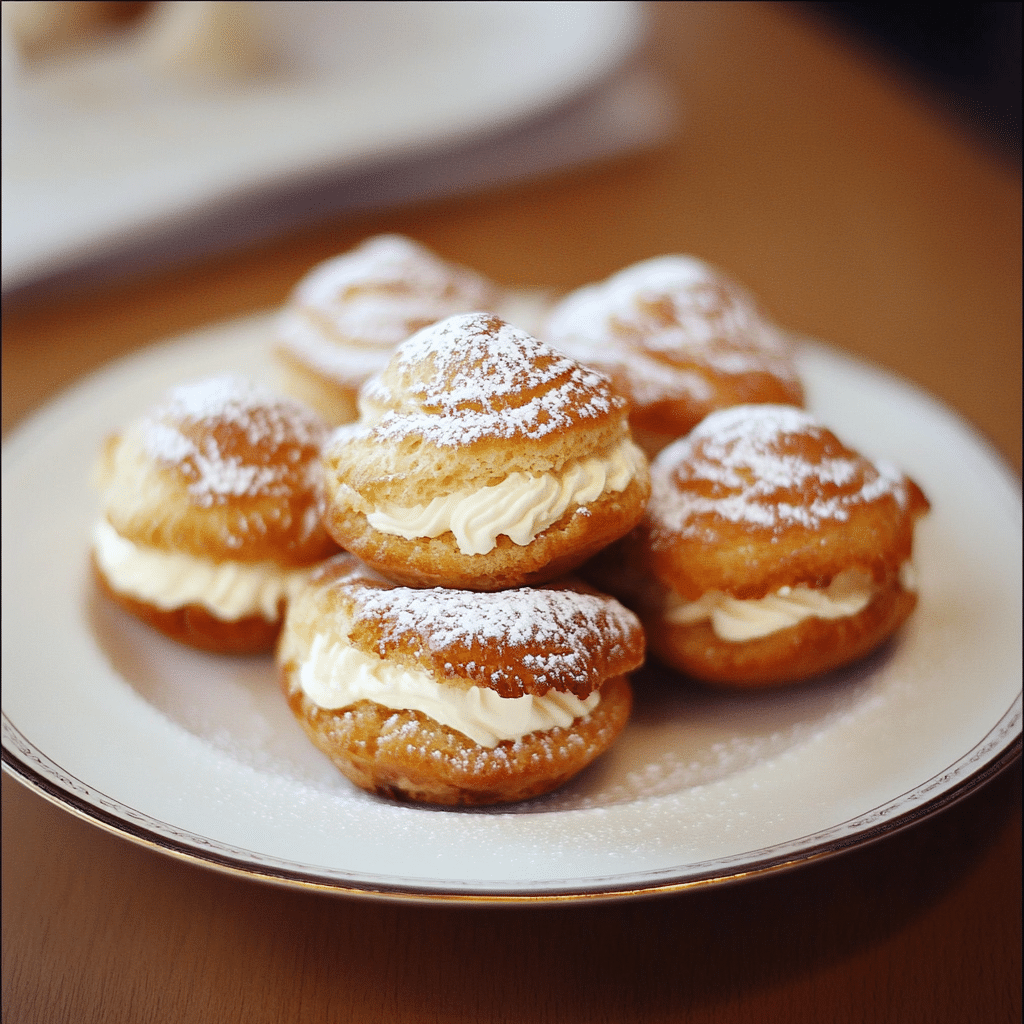
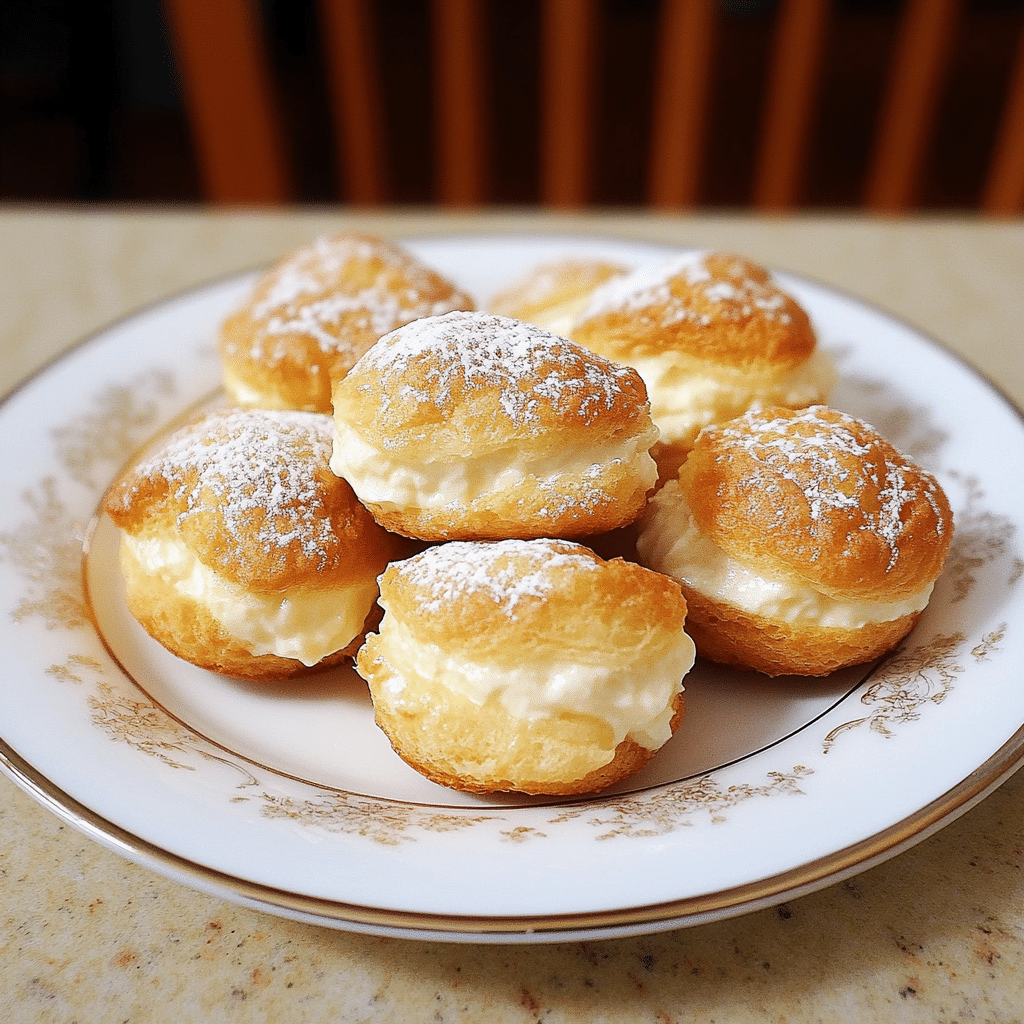
Mini Cream Puffs are the ultimate delicate and indulgent treat, offering a delightful combination of light, airy pastry filled with a smooth, sweet cream filling. These bite-sized puffs are perfect for any occasion, from elegant parties to casual get-togethers, and they always leave a lasting impression. Whether you’re serving them at a special celebration or just craving a sweet, decadent dessert, Mini Cream Puffs are guaranteed to satisfy.
Made with choux pastry—known for its light, puffy texture—and filled with a rich, vanilla-flavored cream, Mini Cream Puffs are an ideal choice for anyone looking to create an elegant, yet simple dessert. They can be made ahead of time, and with their versatility, they can easily be customized with different fillings and toppings to suit any preference.
In this guide, we’ll walk you through every step of making Mini Cream Puffs, offer useful tips for perfect results, and suggest variations to make them even more exciting. Whether you’re a seasoned baker or just starting out, this recipe is approachable and sure to impress.
Why You’ll Love Mini Cream Puffs
- Delicate, Light Texture: The choux pastry creates a light, airy shell that puffs up perfectly in the oven, providing the perfect base for the rich filling.
- Customizable Fillings: While the traditional filling is a sweetened vanilla cream, you can experiment with other fillings like chocolate mousse, coffee-flavored cream, or even fruit preserves.
- Elegant Presentation: These little cream puffs look incredibly elegant and sophisticated, making them perfect for parties, holidays, or special gatherings.
- Easy to Make: Despite their delicate appearance, Mini Cream Puffs are actually quite easy to make, especially with the step-by-step instructions. They require only basic ingredients, and the result is impressive every time.
- Perfect for Sharing: Their bite-sized nature makes Mini Cream Puffs ideal for sharing with family, friends, or guests. They’re also portable, making them great for picnics, buffets, or dessert tables.
Preparation and Cooking Time
- Total Time: 1 hour 10 minutes
- Preparation Time: 25 minutes
- Cooking Time: 25-30 minutes
- Cooling Time: 20-30 minutes
- Servings: Approximately 24 mini cream puffs
- Calories per Serving: Around 90-110 calories per cream puff, depending on the ingredients and portion sizes.
Nutrition Facts (Per Serving)
- Calories: 90-110 kcal
- Fat: 5-7g
- Carbohydrates: 10-13g
- Protein: 1-2g
- Fiber: 1g
- Sugar: 4-6g
Ingredients
For the Choux Pastry:
- 1/2 cup (1 stick) unsalted butter
- 1 cup water
- 1/4 teaspoon salt
- 1 cup all-purpose flour
- 4 large eggs, beaten
For the Cream Filling:
- 1 cup heavy whipping cream
- 1/2 cup powdered sugar
- 1 teaspoon vanilla extract
Optional for Topping:
- Powdered sugar, for dusting
- Chocolate ganache or melted chocolate (for dipping)
Step-by-Step Instructions
1. Prepare the Choux Pastry
Start by preheating your oven to 400°F (200°C). Line a baking sheet with parchment paper or a silicone baking mat to prevent the cream puffs from sticking.
In a medium saucepan, combine the butter, water, and salt over medium heat. Stir occasionally until the butter is completely melted, and the mixture begins to boil. Once the mixture comes to a boil, remove it from the heat and immediately stir in the flour.
Mix vigorously with a wooden spoon or spatula until the dough comes together into a smooth ball. This will happen quickly, so be ready to move fast. Return the saucepan to the heat and cook the dough for another 1-2 minutes, stirring constantly. This helps to remove excess moisture and ensures the dough will puff properly when baked.
Remove the saucepan from the heat and let the dough cool for a few minutes. Once it has cooled slightly, begin adding the beaten eggs one at a time. After each addition, stir vigorously to incorporate the eggs into the dough. The dough should be smooth and glossy, with a consistency that holds its shape when piped, but still a little soft. If it seems too stiff, you can add a little bit of water or milk to loosen it.
2. Pipe the Choux Pastry
Once the dough is ready, transfer it to a piping bag fitted with a large round tip (or you can use a plastic zip-top bag with the tip of one corner snipped off). Pipe the dough onto the prepared baking sheet, forming small rounds about 1 inch in diameter. Leave about 2 inches of space between each puff, as they will expand as they bake.
If you don’t have a piping bag, you can use two spoons to drop small mounds of dough onto the baking sheet. Try to make the mounds as uniform as possible to ensure even baking.
To smooth out any peaks or uneven edges, dip your finger in a bit of water and gently smooth the tops of the puffs. This will help them bake evenly and avoid any sharp points.
3. Bake the Choux Pastry
Place the baking sheet in the preheated oven and bake the cream puffs for 25-30 minutes, or until they are golden brown and puffed up. Do not open the oven door during the first 20 minutes of baking, as this can cause the puffs to collapse.
The puffs are done when they are golden brown and sound hollow when tapped on the bottom. If they seem too soft, you can leave them in the oven for a few more minutes. Once they are baked, remove them from the oven and let them cool on a wire rack. Be sure to let them cool completely before filling.
4. Prepare the Cream Filling
While the puffs are cooling, you can prepare the cream filling. In a medium mixing bowl, combine the heavy whipping cream, powdered sugar, and vanilla extract. Use an electric mixer or a hand whisk to beat the cream on medium-high speed until stiff peaks form. The whipped cream should hold its shape and be smooth and fluffy.
If you prefer a firmer filling, you can fold in some mascarpone cheese or cream cheese to add a richer texture. For a flavored twist, you can also add a few tablespoons of cocoa powder, lemon zest, or even a shot of espresso to the whipped cream for an extra layer of flavor.
5. Fill the Cream Puffs
Once the choux pastry shells have cooled, use a small sharp knife to cut a slit in the side of each puff. Alternatively, you can make a small hole in the bottom of each puff with a pastry tip or a wooden skewer. This will be the opening for filling the puffs.
Transfer the whipped cream filling to a piping bag fitted with a round tip. Insert the tip into the slit or hole in each puff and gently squeeze to fill them with the cream. Be sure not to overfill, as the cream may spill out. Alternatively, you can spoon the cream into the puffs if you don’t have a piping bag.
6. Optional Toppings and Serving
To add a touch of elegance, you can dust the filled mini cream puffs with powdered sugar just before serving. If you’re feeling extra indulgent, you can drizzle or dip the cream puffs in melted chocolate or chocolate ganache for a glossy finish. This will give the puffs an additional layer of sweetness and create a beautiful contrast with the soft cream inside.
Arrange the cream puffs on a serving platter and serve immediately, or refrigerate them for later. If refrigerating, be sure to store them in an airtight container to keep the puffs from becoming soggy.
7. Serve and Enjoy
Mini Cream Puffs are best enjoyed the same day they are made, as the pastry can become soggy if left for too long. However, they can be refrigerated for up to 1-2 days. They make a stunning dessert for any occasion and are perfect for sharing at parties, family gatherings, or holiday meals.
Tips for Perfect Mini Cream Puffs
- Do Not Open the Oven Door: During the first 20 minutes of baking, do not open the oven door. Opening the door too early can cause the puffs to collapse, ruining their delicate texture.
- Use Fresh Eggs: Fresh eggs will help the choux pastry rise properly and give it a light, airy texture.
- Cool the Dough Before Adding Eggs: Let the dough cool for a few minutes before adding the eggs. This ensures that the eggs won’t cook when they’re mixed into the dough, resulting in a smoother and better texture.
- Piping the Dough: If you don’t have a piping bag, you can use a spoon or a zip-top bag with the tip of one corner snipped off to pipe the dough onto the baking sheet.
- Make Ahead: You can prepare the choux pastry shells ahead of time and store them in an airtight container. Simply fill them with the cream right before serving.
Variations of Mini Cream Puffs
- Chocolate Cream Puffs: For a chocolate twist, add cocoa powder to the cream filling or dip the filled puffs in chocolate ganache for extra flavor.
- Fruit-Filled Cream Puffs: Add a dollop of fruit preserves or fresh fruit, such as raspberries or strawberries, to the cream filling for a fresh, tangy addition.
- Coffee-Flavored Cream Puffs: Incorporate a teaspoon of instant coffee or espresso powder into the cream filling for a rich coffee-flavored treat.
- Lemon Cream Puffs: Add some lemon zest or lemon curd to the cream filling for a refreshing citrus twist.
Storage and Shelf Life
Mini Cream Puffs are best enjoyed fresh, but they can be stored for a few days in an airtight container in the refrigerator. Be sure to fill them only when you are ready to serve, as the cream filling can make the pastry soggy if left for too long.
If you want to store the pastry shells for longer, you can freeze them. Place the baked and cooled shells in a single layer on a baking sheet and freeze until solid. Then transfer them to a freezer-safe bag or container. The shells can be stored in the freezer for up to 1-2 months. To serve, simply thaw them at room temperature and fill with the cream.
Side Dishes and Pairings for Mini Cream Puffs
- Coffee or Espresso: A strong cup of coffee or espresso is the perfect complement to the light, creamy texture of the mini cream puffs.
- Tea: Mini cream puffs are an elegant treat to serve with afternoon tea. A delicate black or herbal tea will pair beautifully with the sweetness of the puffs.
- Fruit Salad: A fresh fruit salad provides a refreshing contrast to the rich and creamy filling of the puffs.
- Ice Cream: Serve the cream puffs with a scoop of vanilla, chocolate, or fruit-flavored ice cream for an indulgent dessert.

Mini Cream Puffs Recipe
- Total Time: 1 hour 10 minutes
Description
Light and airy choux pastry filled with sweetened whipped cream, these bite-sized mini cream puffs are a delicate and delicious dessert. A perfect balance of crisp and creamy, they melt in your mouth with each bite.
Ingredients
For the Choux Pastry:
- 1/2 cup (1 stick) unsalted butter
- 1 cup water
- 1/4 teaspoon salt
- 1 cup all-purpose flour
- 4 large eggs, beaten
For the Cream Filling:
- 1 cup heavy whipping cream
- 1/2 cup powdered sugar
- 1 teaspoon vanilla extract
Optional for Topping:
- Powdered sugar, for dusting
- Chocolate ganache or melted chocolate (for dipping)
Instructions
1. Prepare the Choux Pastry
Start by preheating your oven to 400°F (200°C). Line a baking sheet with parchment paper or a silicone baking mat to prevent the cream puffs from sticking.
In a medium saucepan, combine the butter, water, and salt over medium heat. Stir occasionally until the butter is completely melted, and the mixture begins to boil. Once the mixture comes to a boil, remove it from the heat and immediately stir in the flour.
Mix vigorously with a wooden spoon or spatula until the dough comes together into a smooth ball. This will happen quickly, so be ready to move fast. Return the saucepan to the heat and cook the dough for another 1-2 minutes, stirring constantly. This helps to remove excess moisture and ensures the dough will puff properly when baked.
Remove the saucepan from the heat and let the dough cool for a few minutes. Once it has cooled slightly, begin adding the beaten eggs one at a time. After each addition, stir vigorously to incorporate the eggs into the dough. The dough should be smooth and glossy, with a consistency that holds its shape when piped, but still a little soft. If it seems too stiff, you can add a little bit of water or milk to loosen it.
2. Pipe the Choux Pastry
Once the dough is ready, transfer it to a piping bag fitted with a large round tip (or you can use a plastic zip-top bag with the tip of one corner snipped off). Pipe the dough onto the prepared baking sheet, forming small rounds about 1 inch in diameter. Leave about 2 inches of space between each puff, as they will expand as they bake.
If you don’t have a piping bag, you can use two spoons to drop small mounds of dough onto the baking sheet. Try to make the mounds as uniform as possible to ensure even baking.
To smooth out any peaks or uneven edges, dip your finger in a bit of water and gently smooth the tops of the puffs. This will help them bake evenly and avoid any sharp points.
3. Bake the Choux Pastry
Place the baking sheet in the preheated oven and bake the cream puffs for 25-30 minutes, or until they are golden brown and puffed up. Do not open the oven door during the first 20 minutes of baking, as this can cause the puffs to collapse.
The puffs are done when they are golden brown and sound hollow when tapped on the bottom. If they seem too soft, you can leave them in the oven for a few more minutes. Once they are baked, remove them from the oven and let them cool on a wire rack. Be sure to let them cool completely before filling.
4. Prepare the Cream Filling
While the puffs are cooling, you can prepare the cream filling. In a medium mixing bowl, combine the heavy whipping cream, powdered sugar, and vanilla extract. Use an electric mixer or a hand whisk to beat the cream on medium-high speed until stiff peaks form. The whipped cream should hold its shape and be smooth and fluffy.
If you prefer a firmer filling, you can fold in some mascarpone cheese or cream cheese to add a richer texture. For a flavored twist, you can also add a few tablespoons of cocoa powder, lemon zest, or even a shot of espresso to the whipped cream for an extra layer of flavor.
5. Fill the Cream Puffs
Once the choux pastry shells have cooled, use a small sharp knife to cut a slit in the side of each puff. Alternatively, you can make a small hole in the bottom of each puff with a pastry tip or a wooden skewer. This will be the opening for filling the puffs.
Transfer the whipped cream filling to a piping bag fitted with a round tip. Insert the tip into the slit or hole in each puff and gently squeeze to fill them with the cream. Be sure not to overfill, as the cream may spill out. Alternatively, you can spoon the cream into the puffs if you don’t have a piping bag.
6. Optional Toppings and Serving
To add a touch of elegance, you can dust the filled mini cream puffs with powdered sugar just before serving. If you’re feeling extra indulgent, you can drizzle or dip the cream puffs in melted chocolate or chocolate ganache for a glossy finish. This will give the puffs an additional layer of sweetness and create a beautiful contrast with the soft cream inside.
Arrange the cream puffs on a serving platter and serve immediately, or refrigerate them for later. If refrigerating, be sure to store them in an airtight container to keep the puffs from becoming soggy.
7. Serve and Enjoy
Mini Cream Puffs are best enjoyed the same day they are made, as the pastry can become soggy if left for too long. However, they can be refrigerated for up to 1-2 days. They make a stunning dessert for any occasion and are perfect for sharing at parties, family gatherings, or holiday meals.
- Prep Time: 25 minutes
- Cooling Time: 20-30 minutes
- Cook Time: 25-30 minutes
Nutrition
- Calories: 90-110 kcal
- Fat: 5-7g
- Carbohydrates: 10-13g
- Protein: 1-2g
Conclusion
Mini Cream Puffs are a classic, elegant dessert that combines the delicate texture of choux pastry with a rich, sweet filling. Whether you’re making them for a special occasion or just to treat yourself, these little bites are sure to impress. With their versatility, you can experiment with different flavors and toppings, making them the perfect dessert for any event.
With the simple instructions provided, even novice bakers can create beautiful and delicious Mini Cream Puffs that will be the highlight of any gathering. Try this recipe today, and enjoy the light, airy goodness of these delightful treats!


