
Introduction
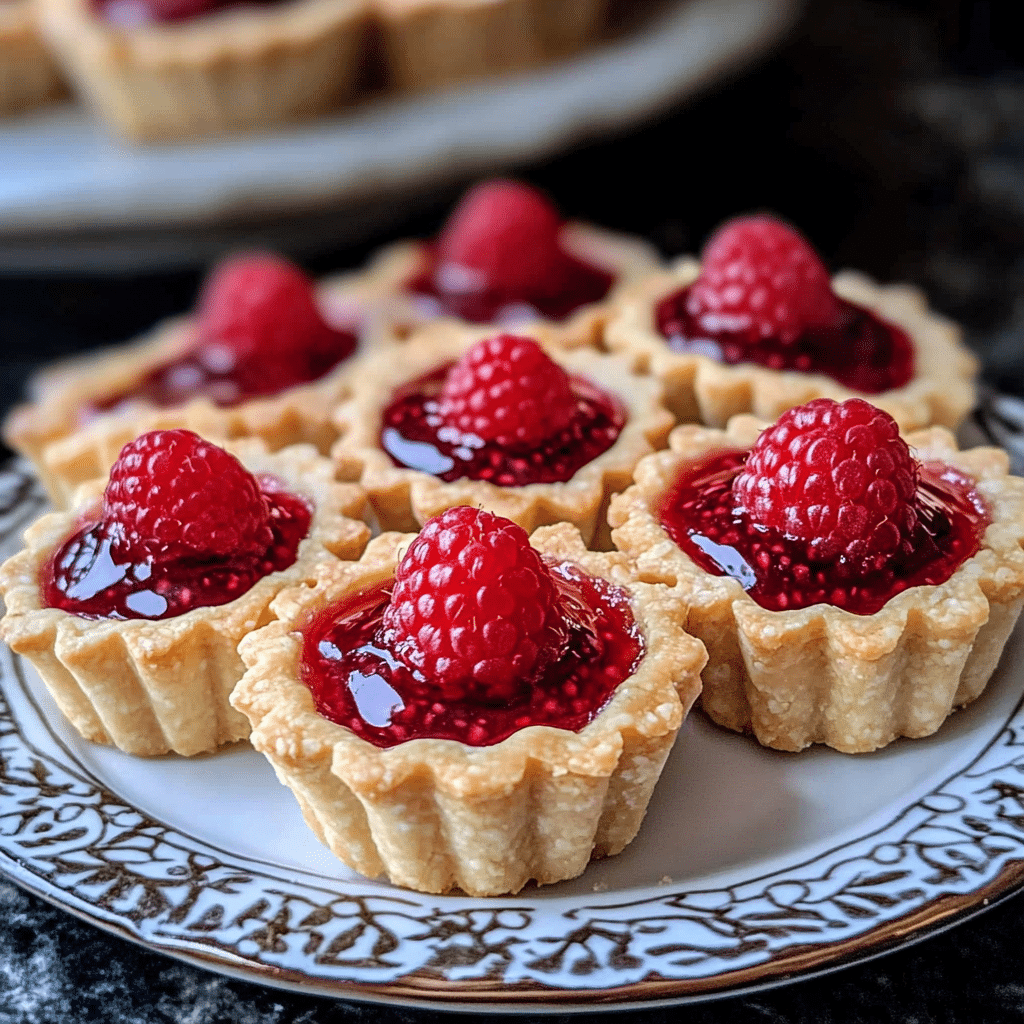
Mini Raspberry Almond Tarts are a delightful combination of rich, buttery tart crusts filled with a sweet almond cream and topped with fresh, vibrant raspberries. These individual-sized tarts make the perfect dessert for any special occasion, from dinner parties to holiday gatherings. With their delicious almond-flavored filling and tangy raspberries, they are a crowd-pleasing treat that strikes the perfect balance between sweet and tart.
The beauty of these tarts lies in their elegant presentation, as well as their simplicity in preparation. Although they may seem like a complicated dessert, Mini Raspberry Almond Tarts come together fairly quickly and easily, making them an ideal choice for both novice and experienced bakers. Whether you’re serving them at a special event or enjoying them for a weekend treat, these tarts are sure to become a favorite in your dessert repertoire. This guide will walk you through every step of the process, provide helpful tips for making them just right, and suggest fun variations to try.
Why You’ll Love Mini Raspberry Almond Tarts
- Perfect Balance of Flavors: The combination of sweet almond cream and tart raspberries creates a flavor profile that is both rich and refreshing. The almond filling has a delicate, nutty taste that pairs beautifully with the bright, juicy raspberries on top.
- Elegant and Eye-Catching: These mini tarts are as stunning as they are delicious. The individual serving size and the vibrant raspberry topping give them a sophisticated look, making them perfect for parties, weddings, or any event where you want to impress your guests.
- Simple Yet Impressive: Although these tarts look fancy, they are surprisingly easy to prepare. The recipe uses simple, accessible ingredients, and with the help of a tart pan or muffin tin, you can create a polished dessert with minimal effort.
- Versatile: While this recipe features raspberries, you can easily swap them out for other fruits such as strawberries, blackberries, or even blueberries, depending on your preferences or what is in season.
- Make Ahead: These tarts can be made ahead of time and stored for a few days, making them a great option for stress-free entertaining. The flavor improves as they sit, allowing the almond cream to fully set into the tart crust.
Preparation and Cooking Time
- Total Time: 2 hours
- Preparation Time: 45 minutes
- Chilling Time: 1 hour
- Cooking Time: 25 minutes
- Servings: Approximately 12 mini tarts
- Calories per Serving: Around 230-270 calories per tart, depending on the portion size and ingredients used.
Nutrition Facts (Per Serving)
- Calories: 230-270 kcal
- Fat: 15-18g
- Carbohydrates: 22-26g
- Protein: 3g
- Fiber: 2g
- Sugar: 12-16g
Ingredients
For the Tart Crust:
- 1 ¼ cups all-purpose flour
- ¼ cup powdered sugar
- ¼ teaspoon salt
- ½ cup unsalted butter, chilled and cut into cubes
- 1 large egg yolk
- 1-2 tablespoons ice water (as needed)
For the Almond Cream Filling:
- ½ cup unsalted butter, softened
- ½ cup granulated sugar
- 1 large egg
- 1 teaspoon almond extract
- 1 cup almond flour (or finely ground almonds)
- 1 tablespoon all-purpose flour
- ¼ teaspoon salt
Raspberry Topping:
- 1 ½ cups fresh raspberries
- 1-2 tablespoons honey or sugar (optional, depending on sweetness of raspberries)
- Powdered sugar for dusting (optional)
Step-by-Step Instructions
1. Make the Tart Crust
Start by preparing the tart crust. In a large mixing bowl, combine the all-purpose flour, powdered sugar, and salt. Add the chilled cubes of butter and use a pastry cutter or your fingertips to work the butter into the dry ingredients. Continue until the mixture resembles coarse crumbs with pea-sized pieces of butter remaining.
Next, add the egg yolk and mix it into the dough. Gradually add ice water, one tablespoon at a time, until the dough comes together. You may not need all of the water, so add just enough to form a soft, non-sticky dough. Turn the dough out onto a lightly floured surface and gently knead it a few times to bring it together.
Shape the dough into a disk, wrap it in plastic wrap, and refrigerate it for at least 30 minutes to allow it to chill and firm up. This chilling step is crucial for preventing the dough from shrinking during baking and ensuring that the tarts hold their shape.
2. Roll and Shape the Dough
Once the dough has chilled, remove it from the refrigerator. Lightly flour your work surface and roll out the dough to about ¼ inch thickness. Using a round cookie cutter or the top of a glass, cut out circles of dough that are slightly larger than the wells of your tart pan or muffin tin. Press each circle of dough into the bottom and sides of the individual tart pans, making sure the dough is evenly distributed and there are no gaps.
Trim off any excess dough from the edges of the tart pans with a sharp knife or kitchen scissors. If you have extra dough, you can re-roll it to make additional tarts or use it for mini tartlets. Once the dough is in the pans, refrigerate the tarts for another 15-20 minutes to ensure that they hold their shape during baking.
3. Blind Bake the Tart Shells
Preheat your oven to 350°F (175°C). To prevent the tart crusts from puffing up while baking, line each tart shell with a piece of parchment paper and fill it with pie weights or dried beans. This is called “blind baking.” Place the tart pans on a baking sheet and bake for 10-12 minutes, or until the edges of the crust are golden brown.
After the crusts are baked, remove them from the oven and carefully take out the parchment paper and weights. Return the tart shells to the oven for an additional 5 minutes to ensure the bottoms are fully cooked and golden. Once done, remove the tart shells from the oven and set them aside to cool.
4. Make the Almond Cream Filling
While the tart shells are cooling, prepare the almond cream filling. In a large mixing bowl, beat together the softened butter and granulated sugar until light and fluffy, about 3-5 minutes. Add the egg and almond extract, and continue to beat until fully combined.
Next, add the almond flour (or finely ground almonds), all-purpose flour, and salt. Stir until the mixture is smooth and well incorporated. The filling should have a thick, creamy consistency that will hold up well in the tart shells.
5. Fill the Tart Shells
Once the tart shells have cooled, spoon a generous amount of the almond cream filling into each tart shell. Use a spoon or offset spatula to smooth the filling and create an even layer. Be sure not to overfill the tarts, as the almond cream will expand slightly during baking.
After filling all the tarts, gently tap the tart pans on the counter to level out the filling and remove any air bubbles. This will help the almond cream settle evenly within the shells.
6. Bake the Tarts
Place the filled tarts on a baking sheet and bake them in the preheated oven at 350°F (175°C) for 18-20 minutes, or until the almond cream is set and golden brown on top. The crust should also be golden and crisp. Once baked, remove the tarts from the oven and allow them to cool completely in the pans.
7. Top with Raspberries
Once the tarts have cooled, it’s time to add the raspberry topping. Gently place fresh raspberries on top of each tart, arranging them in a decorative pattern. If you’d like, drizzle a little honey or sprinkle some sugar over the raspberries for added sweetness and shine.
You can also dust the tarts with powdered sugar just before serving for an elegant finishing touch.
8. Serve and Enjoy
After topping the tarts with raspberries, they’re ready to serve! These mini tarts can be enjoyed right away or stored in the refrigerator for up to 2-3 days. The almond cream filling will stay fresh and smooth, while the tart crust remains crisp. Serve them as a sweet ending to a dinner party or as a special treat for afternoon tea.

Tips for Perfect Mini Raspberry Almond Tarts
- Chill the Dough: Make sure to chill the dough before rolling it out, and again after pressing it into the tart pans. This will help prevent the dough from shrinking during baking and ensure a flaky, crisp crust.
- Use a Tart Pan with Removable Bottoms: A tart pan with a removable bottom makes it much easier to remove the tarts once they’ve cooled. It helps the tarts maintain their shape and ensures they are easy to serve.
- Don’t Overfill the Tarts: Be careful not to overfill the tart shells with the almond cream. The filling will expand slightly during baking, and you want to leave enough space for the raspberries.
- Substitute the Raspberries: While raspberries are the star of this recipe, you can easily swap them for other fruits. Try using strawberries, blackberries, or blueberries depending on your preference or what’s in season.
- Use Almond Flour for Best Texture: Almond flour is key to achieving the nutty, smooth texture of the almond cream. You can grind your own almonds at home if almond flour isn’t readily available, but make sure they are finely ground to avoid a grainy filling.
Variations of Mini Raspberry Almond Tarts
- Strawberry Almond Tarts: Swap the raspberries for fresh strawberries for a sweet and slightly less tart flavor. You can slice the strawberries and arrange them in a fan pattern on top for a beautiful presentation.
- Lemon Almond Tarts: Add a teaspoon of lemon zest to the almond cream filling for a bright, citrusy twist. You can also top the tarts with a few lemon slices for extra flair.
- Chocolate Almond Tarts: For a richer dessert, melt some dark chocolate and swirl it into the almond cream filling before baking. This adds a luxurious depth of flavor to the tarts.
- Apricot Almond Tarts: Use fresh apricots or apricot jam as the topping for a different fruity variation. The sweet and slightly tangy apricots complement the almond cream beautifully.
Storage and Shelf Life
Mini Raspberry Almond Tarts are best enjoyed within a few days of preparation. To store leftovers, cover them with plastic wrap or place them in an airtight container and refrigerate for up to 2-3 days. If you want to store them for a longer period, you can freeze the baked tarts without the raspberry topping. When ready to serve, simply thaw them in the refrigerator and add the fresh raspberries before serving.
Side Dishes and Pairings for Mini Raspberry Almond Tarts
- Tea or Coffee: These tarts pair beautifully with a hot cup of tea or coffee. Try serving them with a light green tea or an aromatic espresso for a sophisticated pairing.
- Fruit Salad: A refreshing fruit salad made with mixed berries, citrus, or tropical fruits would balance the sweetness of the tarts and provide a light, refreshing contrast.
- Whipped Cream or Ice Cream: For an extra indulgent dessert, serve these tarts with a dollop of freshly whipped cream or a scoop of vanilla ice cream.
- Cheese Plate: A cheese plate with creamy brie or tangy goat cheese offers a savory counterpart to the sweetness of the tarts.

Mini Raspberry Almond Tarts Recipe
- Total Time: 2 hours
Description
These elegant tarts are filled with a luscious almond cream and topped with sweet-tart raspberries, all housed in a crisp pastry shell. A delightful combination of flavors and textures, these mini tarts are perfect for a sophisticated dessert.
Ingredients
For the Tart Crust:
- 1 ¼ cups all-purpose flour
- ¼ cup powdered sugar
- ¼ teaspoon salt
- ½ cup unsalted butter, chilled and cut into cubes
- 1 large egg yolk
- 1–2 tablespoons ice water (as needed)
For the Almond Cream Filling:
- ½ cup unsalted butter, softened
- ½ cup granulated sugar
- 1 large egg
- 1 teaspoon almond extract
- 1 cup almond flour (or finely ground almonds)
- 1 tablespoon all-purpose flour
- ¼ teaspoon salt
For the Raspberry Topping:
- 1 ½ cups fresh raspberries
- 1–2 tablespoons honey or sugar (optional, depending on sweetness of raspberries)
- Powdered sugar for dusting (optional)
Instructions
1. Make the Tart Crust
Start by preparing the tart crust. In a large mixing bowl, combine the all-purpose flour, powdered sugar, and salt. Add the chilled cubes of butter and use a pastry cutter or your fingertips to work the butter into the dry ingredients. Continue until the mixture resembles coarse crumbs with pea-sized pieces of butter remaining.
Next, add the egg yolk and mix it into the dough. Gradually add ice water, one tablespoon at a time, until the dough comes together. You may not need all of the water, so add just enough to form a soft, non-sticky dough. Turn the dough out onto a lightly floured surface and gently knead it a few times to bring it together.
Shape the dough into a disk, wrap it in plastic wrap, and refrigerate it for at least 30 minutes to allow it to chill and firm up. This chilling step is crucial for preventing the dough from shrinking during baking and ensuring that the tarts hold their shape.
2. Roll and Shape the Dough
Once the dough has chilled, remove it from the refrigerator. Lightly flour your work surface and roll out the dough to about ¼ inch thickness. Using a round cookie cutter or the top of a glass, cut out circles of dough that are slightly larger than the wells of your tart pan or muffin tin. Press each circle of dough into the bottom and sides of the individual tart pans, making sure the dough is evenly distributed and there are no gaps.
Trim off any excess dough from the edges of the tart pans with a sharp knife or kitchen scissors. If you have extra dough, you can re-roll it to make additional tarts or use it for mini tartlets. Once the dough is in the pans, refrigerate the tarts for another 15-20 minutes to ensure that they hold their shape during baking.
3. Blind Bake the Tart Shells
Preheat your oven to 350°F (175°C). To prevent the tart crusts from puffing up while baking, line each tart shell with a piece of parchment paper and fill it with pie weights or dried beans. This is called “blind baking.” Place the tart pans on a baking sheet and bake for 10-12 minutes, or until the edges of the crust are golden brown.
After the crusts are baked, remove them from the oven and carefully take out the parchment paper and weights. Return the tart shells to the oven for an additional 5 minutes to ensure the bottoms are fully cooked and golden. Once done, remove the tart shells from the oven and set them aside to cool.
4. Make the Almond Cream Filling
While the tart shells are cooling, prepare the almond cream filling. In a large mixing bowl, beat together the softened butter and granulated sugar until light and fluffy, about 3-5 minutes. Add the egg and almond extract, and continue to beat until fully combined.
Next, add the almond flour (or finely ground almonds), all-purpose flour, and salt. Stir until the mixture is smooth and well incorporated. The filling should have a thick, creamy consistency that will hold up well in the tart shells.
5. Fill the Tart Shells
Once the tart shells have cooled, spoon a generous amount of the almond cream filling into each tart shell. Use a spoon or offset spatula to smooth the filling and create an even layer. Be sure not to overfill the tarts, as the almond cream will expand slightly during baking.
After filling all the tarts, gently tap the tart pans on the counter to level out the filling and remove any air bubbles. This will help the almond cream settle evenly within the shells.
6. Bake the Tarts
Place the filled tarts on a baking sheet and bake them in the preheated oven at 350°F (175°C) for 18-20 minutes, or until the almond cream is set and golden brown on top. The crust should also be golden and crisp. Once baked, remove the tarts from the oven and allow them to cool completely in the pans.
7. Top with Raspberries
Once the tarts have cooled, it’s time to add the raspberry topping. Gently place fresh raspberries on top of each tart, arranging them in a decorative pattern. If you’d like, drizzle a little honey or sprinkle some sugar over the raspberries for added sweetness and shine.
You can also dust the tarts with powdered sugar just before serving for an elegant finishing touch.
8. Serve and Enjoy
After topping the tarts with raspberries, they’re ready to serve! These mini tarts can be enjoyed right away or stored in the refrigerator for up to 2-3 days. The almond cream filling will stay fresh and smooth, while the tart crust remains crisp. Serve them as a sweet ending to a dinner party or as a special treat for afternoon tea.
- Prep Time: 45 minutes
- Chilling Time: 1 hour
- Cook Time: 25 minutes
Nutrition
- Calories: 230-270 kcal
- Fat: 15-18g
- Carbohydrates: 22-26g
- Protein: 3g
Conclusion
Mini Raspberry Almond Tarts are a delicious and elegant dessert that will impress anyone who tries them. With their buttery tart crusts, almond cream filling, and fresh raspberry topping, they combine the best of both flavor and presentation. Perfect for any special occasion, these mini tarts offer a sophisticated touch that’s surprisingly simple to make.
With these easy-to-follow instructions and plenty of tips for making them just right, you’ll be able to create a stunning dessert that your guests will rave about. Whether you stick to the classic raspberry topping or experiment with different fruit variations, these tarts are sure to become a favorite in your baking collection. Enjoy the delicate, nutty sweetness of Mini Raspberry Almond Tarts today!


