
Introduction
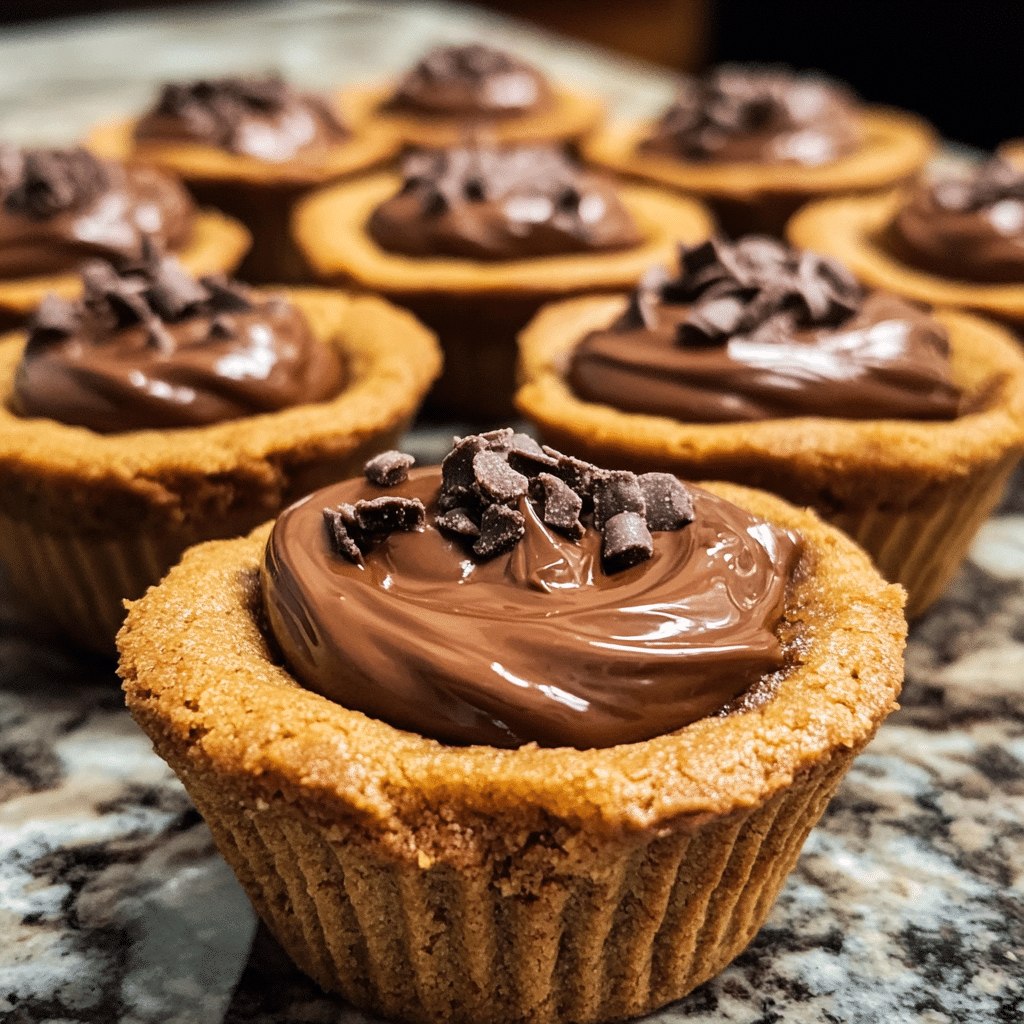
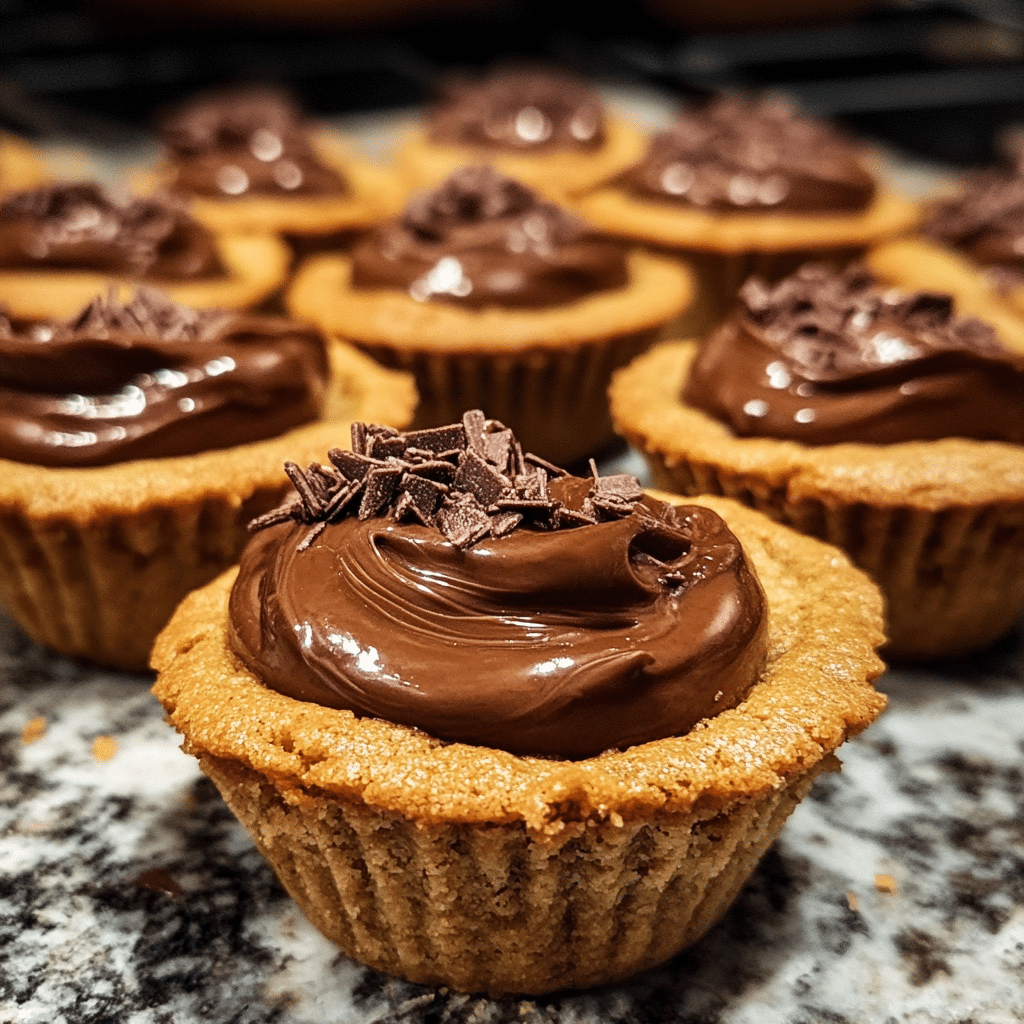
Nutella Cookie Cups are a decadent, bite-sized dessert that blends the classic flavors of chocolate chip cookies with the rich, creamy goodness of Nutella. These cookie cups are filled with a dollop of Nutella, creating an irresistible treat that satisfies both cookie and chocolate lovers alike. With a golden, soft cookie crust and a gooey Nutella center, they’re the perfect combination of textures and flavors.
Whether you’re looking for a delicious dessert for a party, a holiday gathering, or simply a sweet treat to enjoy at home, Nutella Cookie Cups are sure to impress. They are easy to make, require just a handful of ingredients, and are guaranteed to be a crowd favorite. Best of all, they’re customizable—so you can experiment with different fillings or toppings to make them your own.
In this guide, we’ll walk you through every step of making these mouthwatering cookie cups, offering tips for perfect results and ideas for making them even more fun and exciting. Whether you’re a beginner baker or an experienced pastry chef, Nutella Cookie Cups will become a new favorite recipe in your baking repertoire.
Why You’ll Love Nutella Cookie Cups
- Irresistible Flavor Combination: The sweet, chewy cookie dough forms a perfect base for the rich, creamy Nutella filling. The combination of these two flavors creates an indulgent dessert that is sure to satisfy any chocolate craving.
- Easy to Make: Despite their impressive appearance, Nutella Cookie Cups are incredibly easy to make with just a few basic ingredients. The steps are straightforward, and the result is a stunning and delicious dessert.
- Perfect for Sharing: These mini cookie cups are perfect for sharing at parties, family gatherings, or special occasions. Their bite-sized nature makes them easy to serve and enjoy without any mess.
- Customizable: The filling can be swapped out for different spreads, such as peanut butter, caramel, or even marshmallow fluff, depending on your preferences. You can also top the cookie cups with crushed nuts, chocolate chips, or whipped cream to make them even more indulgent.
- Versatile for Any Occasion: Whether it’s a holiday, a birthday, or just an everyday treat, Nutella Cookie Cups are the ideal dessert for any occasion. They’re also a great option for gifts or homemade treats to share with friends and family.
Preparation and Cooking Time
- Total Time: 45-55 minutes
- Preparation Time: 15 minutes
- Cooking Time: 10-12 minutes
- Chilling Time: 10 minutes (optional)
- Servings: Approximately 12 Nutella Cookie Cups
- Calories per Serving: Around 160-180 calories per cookie cup, depending on the ingredients and portion sizes.
Nutrition Facts (Per Serving)
- Calories: 160-180 kcal
- Fat: 10-12g
- Carbohydrates: 20-25g
- Protein: 2g
- Fiber: 1g
- Sugar: 14-16g
Ingredients
For the Cookie Cups:
- 1 cup (2 sticks) unsalted butter, softened
- 1 cup granulated sugar
- 1 teaspoon vanilla extract
- 1 large egg
- 2 cups all-purpose flour
- 1/2 teaspoon baking soda
- 1/4 teaspoon salt
- 1 cup mini chocolate chips (optional, for added texture)
For the Filling:
- 1/2 cup Nutella (or other chocolate-hazelnut spread)
- Optional: Whipped cream, chocolate drizzle, or crushed hazelnuts for topping
Step-by-Step Instructions
1. Prepare the Cookie Dough
Start by preheating your oven to 350°F (175°C). Grease a 12-cup muffin tin or line it with muffin liners. If you’re not using liners, lightly grease the cups to ensure the cookie cups don’t stick.
In a large mixing bowl, cream together the softened butter and granulated sugar until light and fluffy. You can use a hand mixer or stand mixer on medium speed for this step. This process typically takes about 2-3 minutes and helps incorporate air into the dough, making it soft and chewy.
Once the butter and sugar are fully mixed, add in the vanilla extract and the egg, beating until smooth and well combined. The egg helps bind the ingredients together and adds moisture to the dough, while the vanilla provides a delicious aroma and flavor.
In a separate bowl, whisk together the all-purpose flour, baking soda, and salt. The baking soda helps the cookies rise slightly, creating a soft and chewy texture, while the salt balances the sweetness of the dough.
Gradually add the dry ingredients to the wet ingredients, mixing until just combined. Be careful not to overmix, as this can lead to dense cookies. The dough should be thick, soft, and easy to work with. If desired, fold in the mini chocolate chips for added texture and a bit of extra chocolate flavor.
2. Form the Cookie Cups
Scoop about one tablespoon of cookie dough for each cup and place it into the bottom of each muffin cup. Use your fingers or the back of a spoon to gently press the dough into the bottom and up the sides of the cup, forming a small well in the center of each dough ball. This well will hold the Nutella filling later on.
The cookie dough should form a small, even crust in each muffin cup, with a slightly raised edge. Be careful not to press the dough too thin, as you want the cookie cups to hold their shape and be sturdy enough to contain the Nutella filling.
3. Bake the Cookie Cups
Place the muffin tin in the preheated oven and bake for 10-12 minutes, or until the edges of the cookie cups are golden brown. The centers may look a little soft, but that’s okay. The cookies will firm up as they cool.
If you want a slightly firmer base, you can bake them for an extra minute, but be careful not to overbake, as the dough could dry out and become too crumbly.
Once baked, remove the muffin tin from the oven and let the cookie cups cool in the tin for 5-10 minutes. This helps them set before you add the Nutella filling. You can gently use a spoon or your fingers to make the wells in the center of the cookies slightly deeper if necessary.
4. Add the Nutella Filling
After the cookie cups have cooled slightly, it’s time to add the Nutella. Use a spoon or a small piping bag to place about one teaspoon of Nutella into the center of each cookie cup. You can add more if you like a gooier center, but one teaspoon is usually enough to create a perfect filling.
The Nutella should sink slightly into the center of the cookie cup, but it will stay gooey and delicious. If you want to get creative, you can drizzle more Nutella on top for an extra chocolatey finish or sprinkle crushed hazelnuts for added crunch and flavor.
5. Cool and Serve
Allow the Nutella Cookie Cups to cool completely in the muffin tin. The Nutella filling will firm up slightly as it cools, making them easier to remove from the tin. Once they are fully cooled, carefully run a knife around the edges of the cookie cups to loosen them from the tin. Gently lift them out and transfer them to a wire rack to cool completely.
For an extra touch, you can top the Nutella Cookie Cups with whipped cream, chocolate drizzle, or a sprinkle of crushed hazelnuts. These toppings will add a nice contrast in texture and make the cookie cups look even more decadent.
6. Serve and Enjoy
Your Nutella Cookie Cups are now ready to serve! They’re perfect for a special dessert, a party treat, or an indulgent snack. Serve them as is or pair them with a scoop of vanilla ice cream for an extra special treat. Enjoy!
Tips for Perfect Nutella Cookie Cups
- Don’t Overmix the Dough: When mixing the dough, be careful not to overwork it. Overmixing can lead to tough cookies. Mix until just combined to ensure soft, chewy cookie cups.
- Use Room Temperature Butter: Make sure your butter is softened to room temperature before mixing. This will help create a smooth, creamy dough that is easy to work with.
- Don’t Overbake: Be mindful of the baking time. Overbaking can lead to dry cookies that don’t hold up as well once filled with Nutella. The cookies should be golden brown around the edges but soft in the center.
- Add Extra Flavor: For a more indulgent treat, add a pinch of sea salt on top of the Nutella filling to create a salty-sweet contrast. You can also sprinkle mini chocolate chips or crushed hazelnuts on top for added texture.
- Customize the Filling: While Nutella is a classic, you can also experiment with other fillings like peanut butter, caramel, or chocolate ganache. The possibilities are endless!
- Use a Piping Bag: To make filling the cookie cups easier and more precise, use a piping bag to pipe the Nutella into each cookie cup. This will ensure a uniform amount of filling in each one.
Variations of Nutella Cookie Cups
- Peanut Butter Nutella Cookie Cups: Add a layer of peanut butter between the cookie and Nutella filling for a sweet and savory twist. The combination of peanut butter and Nutella is a match made in heaven.
- Caramel Nutella Cookie Cups: Add a layer of caramel sauce underneath the Nutella for an extra rich and indulgent filling. The sweet caramel will pair perfectly with the hazelnut chocolate.
- Chocolate Ganache Nutella Cookie Cups: For an even richer experience, make a simple chocolate ganache and add it as a filling in place of the Nutella. The ganache will give the cookie cups a smooth, velvety texture.
- Marshmallow Nutella Cookie Cups: After baking the cookie cups, add a small amount of marshmallow fluff along with the Nutella. The soft, sticky marshmallow adds an extra layer of sweetness and texture.
Storage and Shelf Life
Nutella Cookie Cups are best enjoyed fresh, but they can be stored for later. Keep the cookie cups in an airtight container at room temperature for up to 3-4 days. To preserve their freshness, place a piece of parchment paper between layers of cookies to prevent sticking.
For longer storage, you can freeze the cookie cups. Arrange them in a single layer on a baking sheet and freeze until solid. Then transfer them to a freezer-safe bag or container. Frozen Nutella Cookie Cups can be stored for up to 2-3 months. To thaw, simply let them sit at room temperature for 30 minutes to 1 hour before serving.
Side Dishes and Pairings for Nutella Cookie Cups
- Milk: A glass of cold milk is the ultimate pairing with Nutella Cookie Cups. The creamy milk balances the richness of the Nutella, creating the perfect combination.
- Ice Cream: For an extra indulgent dessert, serve these cookie cups with a scoop of vanilla or chocolate ice cream. The cold ice cream pairs beautifully with the warm, gooey Nutella.
- Coffee or Espresso: Nutella and coffee are a match made in heaven. A strong cup of coffee or espresso complements the sweetness of the cookie cups and balances the rich chocolate flavor.
- Whipped Cream: Top the Nutella Cookie Cups with a dollop of freshly whipped cream for added richness and a light, fluffy contrast to the dense cookie.

Nutella Cookie Cups Recipe
- Total Time: 45-55 minutes
Description
Soft, melt-in-your-mouth cookie cups filled with rich, creamy Nutella spread. These irresistible mini treats offer a perfect balance of chocolatey sweetness and a soft, cookie-like base.
Ingredients
For the Cookie Cups:
- 1 cup (2 sticks) unsalted butter, softened
- 1 cup granulated sugar
- 1 teaspoon vanilla extract
- 1 large egg
- 2 cups all-purpose flour
- 1/2 teaspoon baking soda
- 1/4 teaspoon salt
- 1 cup mini chocolate chips (optional, for added texture)
For the Filling:
- 1/2 cup Nutella (or other chocolate-hazelnut spread)
- Optional: Whipped cream, chocolate drizzle, or crushed hazelnuts for topping
Instructions
1. Prepare the Cookie Dough
Start by preheating your oven to 350°F (175°C). Grease a 12-cup muffin tin or line it with muffin liners. If you’re not using liners, lightly grease the cups to ensure the cookie cups don’t stick.
In a large mixing bowl, cream together the softened butter and granulated sugar until light and fluffy. You can use a hand mixer or stand mixer on medium speed for this step. This process typically takes about 2-3 minutes and helps incorporate air into the dough, making it soft and chewy.
Once the butter and sugar are fully mixed, add in the vanilla extract and the egg, beating until smooth and well combined. The egg helps bind the ingredients together and adds moisture to the dough, while the vanilla provides a delicious aroma and flavor.
In a separate bowl, whisk together the all-purpose flour, baking soda, and salt. The baking soda helps the cookies rise slightly, creating a soft and chewy texture, while the salt balances the sweetness of the dough.
Gradually add the dry ingredients to the wet ingredients, mixing until just combined. Be careful not to overmix, as this can lead to dense cookies. The dough should be thick, soft, and easy to work with. If desired, fold in the mini chocolate chips for added texture and a bit of extra chocolate flavor.
2. Form the Cookie Cups
Scoop about one tablespoon of cookie dough for each cup and place it into the bottom of each muffin cup. Use your fingers or the back of a spoon to gently press the dough into the bottom and up the sides of the cup, forming a small well in the center of each dough ball. This well will hold the Nutella filling later on.
The cookie dough should form a small, even crust in each muffin cup, with a slightly raised edge. Be careful not to press the dough too thin, as you want the cookie cups to hold their shape and be sturdy enough to contain the Nutella filling.
3. Bake the Cookie Cups
Place the muffin tin in the preheated oven and bake for 10-12 minutes, or until the edges of the cookie cups are golden brown. The centers may look a little soft, but that’s okay. The cookies will firm up as they cool.
If you want a slightly firmer base, you can bake them for an extra minute, but be careful not to overbake, as the dough could dry out and become too crumbly.
Once baked, remove the muffin tin from the oven and let the cookie cups cool in the tin for 5-10 minutes. This helps them set before you add the Nutella filling. You can gently use a spoon or your fingers to make the wells in the center of the cookies slightly deeper if necessary.
4. Add the Nutella Filling
After the cookie cups have cooled slightly, it’s time to add the Nutella. Use a spoon or a small piping bag to place about one teaspoon of Nutella into the center of each cookie cup. You can add more if you like a gooier center, but one teaspoon is usually enough to create a perfect filling.
The Nutella should sink slightly into the center of the cookie cup, but it will stay gooey and delicious. If you want to get creative, you can drizzle more Nutella on top for an extra chocolatey finish or sprinkle crushed hazelnuts for added crunch and flavor.
5. Cool and Serve
Allow the Nutella Cookie Cups to cool completely in the muffin tin. The Nutella filling will firm up slightly as it cools, making them easier to remove from the tin. Once they are fully cooled, carefully run a knife around the edges of the cookie cups to loosen them from the tin. Gently lift them out and transfer them to a wire rack to cool completely.
For an extra touch, you can top the Nutella Cookie Cups with whipped cream, chocolate drizzle, or a sprinkle of crushed hazelnuts. These toppings will add a nice contrast in texture and make the cookie cups look even more decadent.
6. Serve and Enjoy
Your Nutella Cookie Cups are now ready to serve! They’re perfect for a special dessert, a party treat, or an indulgent snack. Serve them as is or pair them with a scoop of vanilla ice cream for an extra special treat. Enjoy!
- Prep Time: 15 minutes
- Chilling Time: 10 minutes
- Cook Time: 10-12 minutes
Nutrition
- Calories: 160-180 kcal
- Fat: 10-12g
- Carbohydrates: 20-25g
- Protein: 2g
Conclusion
Nutella Cookie Cups are a decadent, indulgent dessert that combines the rich flavors of Nutella with soft, chewy cookies. Whether you’re making them for a special occasion, a party, or simply as a treat for yourself, these cookie cups are sure to be a hit. With their easy preparation, customizable fillings, and delightful presentation, Nutella Cookie Cups are bound to become a favorite in your baking collection.
So, gather your ingredients, follow these simple steps, and enjoy the mouthwatering, gooey goodness of Nutella Cookie Cups. These little bites of heaven are sure to leave a lasting impression!


