
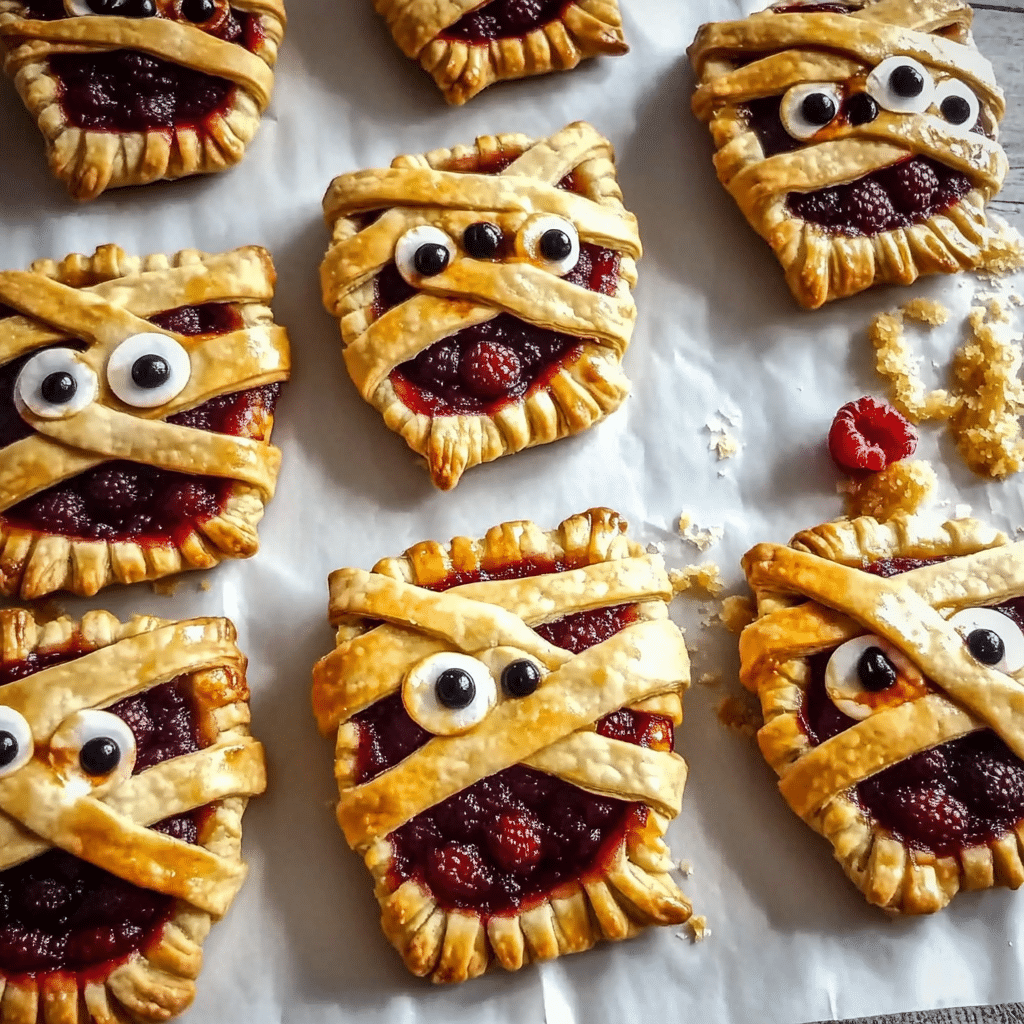
These Raspberry Halloween Mummy Pies are the perfect blend of spooky and sweet! With a flaky pie crust, a luscious raspberry filling, and a mummy-inspired lattice of icing, these adorable mini pies make a fun and delicious treat for Halloween. They’re easy to prepare and sure to be a hit with kids and adults alike, combining a playful look with irresistible flavor.
Ingredients
Here’s what you’ll need to make these spooky mummy pies:
- 1 package (14 oz) refrigerated pie crusts (or homemade if you prefer)
- 1 cup raspberry jam or fresh raspberries (mashed with a bit of sugar)
- 2 tablespoons sugar (optional, for sweetness)
- 1 tablespoon cornstarch (optional, for thickening if using fresh raspberries)
- 1 egg (for egg wash, optional)
- 1/2 cup white icing (store-bought or homemade)
- Candy eyes (or small chocolate chips for eyes)
- Flour for rolling out dough
Instructions
- Preheat the Oven:
Preheat your oven to 375°F (190°C). Line a baking sheet with parchment paper for easy cleanup. - Prepare the Pie Crust:
Roll out the pie dough on a lightly floured surface. Using a round cookie cutter (about 3 inches in diameter), cut out circles of dough. You’ll need two circles per mummy pie—one for the bottom and one for the top. - Make the Filling:
If using fresh raspberries, mash them in a small bowl and mix with the sugar and cornstarch to thicken the filling. If using store-bought raspberry jam, you can skip this step. Spoon about 1 tablespoon of the raspberry filling onto the center of each bottom pie circle. Be sure to leave a small border around the edges. - Create the Mummy Lattice:
Place the second pie dough circle over the raspberry filling and cut strips of dough about 1/2 inch wide. Lay these strips across the top pie crust in a criss-cross pattern, leaving gaps to create a “mummy bandage” look. Make sure to press the edges of the dough strips down slightly so they stick. - Add Egg Wash (Optional):
For a golden, shiny crust, brush the top of the pies with a lightly beaten egg mixed with a tablespoon of water. This step is optional but adds a nice finish. - Bake the Mummy Pies:
Bake in the preheated oven for 25-30 minutes, or until the crust is golden brown and the filling is bubbling. Keep an eye on them in the last few minutes to avoid burning the edges. - Decorate the Mummies:
While the pies are cooling, prepare the mummy eyes. Once the pies are cool enough to handle, pipe the white icing across the top of the pies to mimic the look of mummy bandages. Add two candy eyes to each pie for the finishing touch. (If using chocolate chips for eyes, you can simply press them into the icing before it sets.) - Serve:
Serve your adorable Raspberry Halloween Mummy Pies as a sweet treat at a Halloween party or as a fun after-dinner dessert. Pair them with a glass of milk or a seasonal beverage like apple cider.
Nutrition Facts
Servings: 8 mini pies (1 pie per serving)
Calories per Serving: Approximately 220
- Total Fat: 11g
- Saturated Fat: 2g
- Cholesterol: 15mg
- Carbohydrates: 31g
- Fiber: 2g
- Sugar: 16g
- Protein: 2g
Preparation Time
- Total Time: 1 hour
- Preparation Time: 20 minutes
- Baking Time: 25-30 minutes
How to Serve
- Serve these mummy pies on a festive Halloween-themed platter with other seasonal treats like pumpkin cookies, spooky cupcakes, or caramel apples.
- Pair with a fun drink, like pumpkin spice lattes, hot chocolate, or spooky punch, for the perfect Halloween dessert spread.
- For a more festive look, display the pies in mini cupcake liners or small pastry boxes.
Additional Tips
- Make It Ahead: These mummy pies can be made a day ahead of time and stored in an airtight container at room temperature. You can even freeze the unbaked pies for up to a month and bake them fresh on Halloween.
- Flavor Variations: While raspberry is a classic and tangy choice, feel free to swap out the raspberry jam for strawberry, blueberry, or even apple pie filling for a different twist.
- Icing Variations: If you prefer a more colorful mummy, you can use colored icing instead of white, or even sprinkle the pies with edible glitter or Halloween sprinkles to add an extra festive touch.
Recipe Variations
- Pumpkin Mummy Pies: Swap the raspberry filling for a spiced pumpkin pie filling for a fall-flavored variation.
- Chocolate Mummy Pies: Add some chocolate chips or a thin layer of Nutella inside the pie for a delicious twist.
Serving Suggestions
- Pair these mummy pies with other spooky-themed treats like Monster Cookies, Witch’s Brew Popcorn, or Candy Corn Cupcakes for a well-rounded Halloween dessert spread.
- They can also be served as a fun snack after a day of trick-or-treating or as part of a spooky dessert table at a Halloween party.
Freezing and Storage
- Freezing: These pies freeze well! Before baking, place them on a baking sheet in the freezer until fully frozen, then transfer to an airtight container or freezer bag. Bake directly from frozen, adding an extra 5 minutes to the baking time.
- Storage: Store leftover mummy pies in an airtight container at room temperature for up to 3 days. You can also refrigerate them for up to a week, but they are best eaten fresh.
Special Equipment
- Cookie cutter (about 3 inches in diameter)
- Baking sheet
- Parchment paper
- Small piping bag or plastic sandwich bag for icing
FAQ Section
Q1: Can I use homemade pie crust?
A1: Absolutely! If you prefer homemade pie crust, it will work just as well. Just be sure it’s chilled before rolling out and cutting the circles.
Q2: Can I make these ahead of time?
A2: Yes! You can prepare the pies a day ahead and store them in an airtight container. Alternatively, you can freeze the unbaked pies and bake them fresh on the day you plan to serve them.
Q3: How do I keep the mummy bandages looking neat?
A3: Make sure the strips of dough are of even width and laid on the pies gently. If you find the dough is sticky, you can refrigerate it briefly before assembling.
Q4: Can I use a different fruit for the filling?
A4: Yes! These pies are versatile. You can use blueberry, strawberry, or even a mix of berries. Just adjust the sugar content based on the fruit you choose.
Q5: Can I make the icing without store-bought icing?
A5: Sure! You can easily make a simple icing by combining 1 cup powdered sugar with a few teaspoons of milk or water until smooth. Add a drop of vanilla extract for extra flavor.
These Raspberry Halloween Mummy Pies are a fun, easy, and delicious way to celebrate the spooky season! With their charming mummy appearance and sweet raspberry filling, they’ll be the talk of your Halloween party or gathering. Enjoy making and sharing these spooky treats!
Print
Raspberry Halloween Mummy Pies
- Total Time: 1 hour
Ingredients
- 1 package (14 oz) refrigerated pie crusts (or homemade if you prefer)
- 1 cup raspberry jam or fresh raspberries (mashed with a bit of sugar)
- 2 tablespoons sugar (optional, for sweetness)
- 1 tablespoon cornstarch (optional, for thickening if using fresh raspberries)
- 1 egg (for egg wash, optional)
- 1/2 cup white icing (store-bought or homemade)
- Candy eyes (or small chocolate chips for eyes)
- Flour for rolling out dough
Instructions
- Preheat the Oven:
Preheat your oven to 375°F (190°C). Line a baking sheet with parchment paper for easy cleanup. - Prepare the Pie Crust:
Roll out the pie dough on a lightly floured surface. Using a round cookie cutter (about 3 inches in diameter), cut out circles of dough. You’ll need two circles per mummy pie—one for the bottom and one for the top. - Make the Filling:
If using fresh raspberries, mash them in a small bowl and mix with the sugar and cornstarch to thicken the filling. If using store-bought raspberry jam, you can skip this step. Spoon about 1 tablespoon of the raspberry filling onto the center of each bottom pie circle. Be sure to leave a small border around the edges. - Create the Mummy Lattice:
Place the second pie dough circle over the raspberry filling and cut strips of dough about 1/2 inch wide. Lay these strips across the top pie crust in a criss-cross pattern, leaving gaps to create a “mummy bandage” look. Make sure to press the edges of the dough strips down slightly so they stick. - Add Egg Wash (Optional):
For a golden, shiny crust, brush the top of the pies with a lightly beaten egg mixed with a tablespoon of water. This step is optional but adds a nice finish. - Bake the Mummy Pies:
Bake in the preheated oven for 25-30 minutes, or until the crust is golden brown and the filling is bubbling. Keep an eye on them in the last few minutes to avoid burning the edges. - Decorate the Mummies:
While the pies are cooling, prepare the mummy eyes. Once the pies are cool enough to handle, pipe the white icing across the top of the pies to mimic the look of mummy bandages. Add two candy eyes to each pie for the finishing touch. (If using chocolate chips for eyes, you can simply press them into the icing before it sets.) - Serve:
Serve your adorable Raspberry Halloween Mummy Pies as a sweet treat at a Halloween party or as a fun after-dinner dessert. Pair them with a glass of milk or a seasonal beverage like apple cider.
- Prep Time: 20 minutes
- Cook Time: 25-30 minutes
Nutrition
- Calories: 220 kcal
- Fat: 11g
- Carbohydrates: 31g
- Protein: 2g


