
Introduction
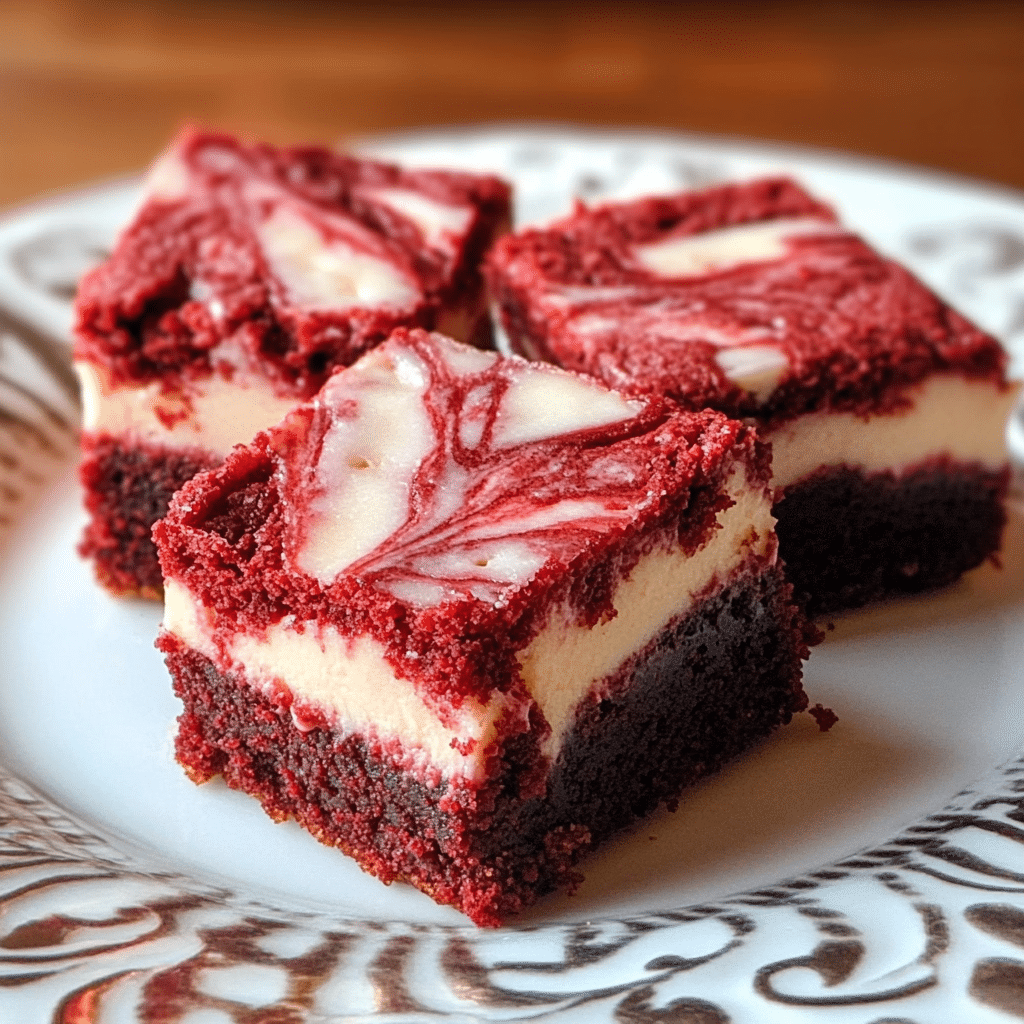
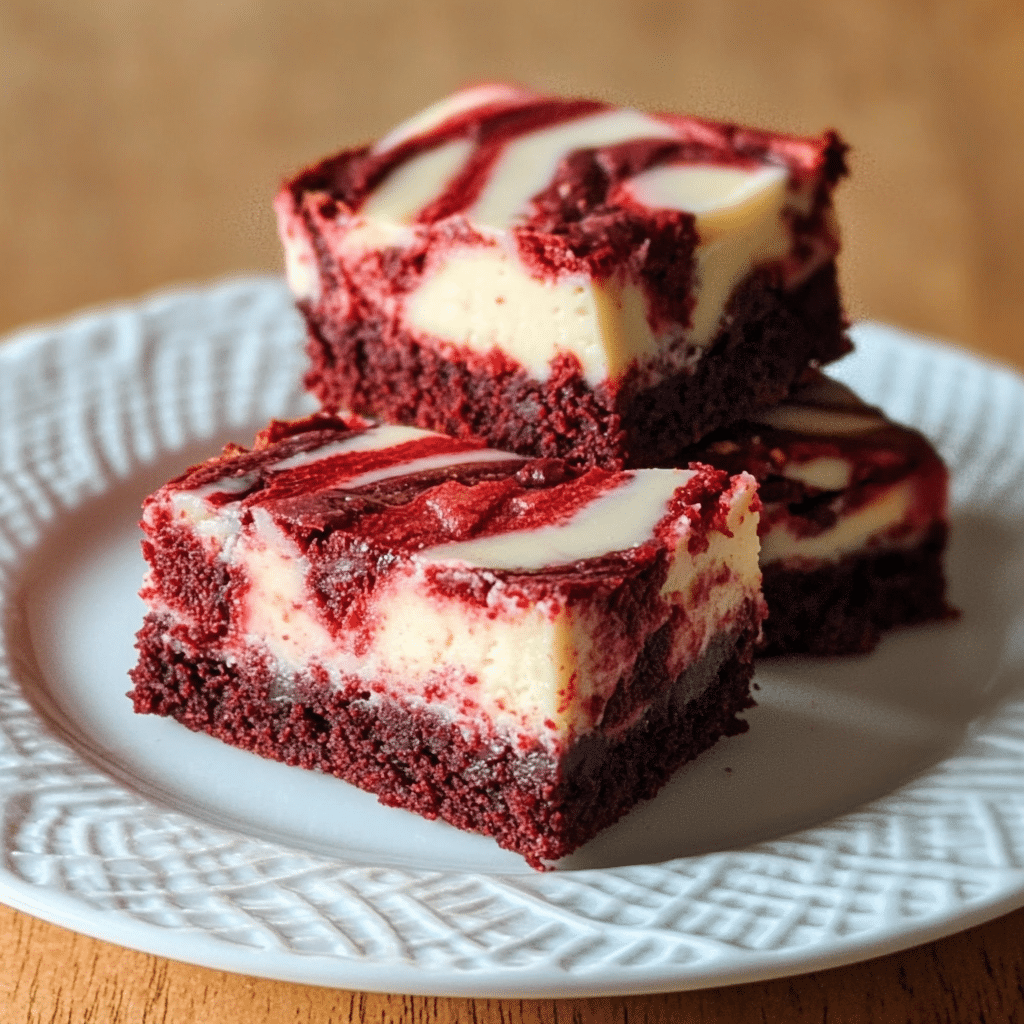
Red Velvet Cheesecake Brownies are an indulgent dessert that brings together two of the most beloved treats: red velvet cake and creamy cheesecake. These brownies feature a rich, velvety red velvet base topped with a swirl of smooth, tangy cheesecake, creating a decadent treat that’s perfect for any occasion. The contrasting textures, with the fudgy brownie and velvety cheesecake layers, are sure to delight your taste buds and make for an unforgettable dessert experience.
Whether you’re preparing them for a special celebration, holiday, or simply for a sweet craving, Red Velvet Cheesecake Brownies are guaranteed to impress. This guide takes you through each step of the process, shares helpful tips for achieving perfection, and suggests variations to make your brownies even more delightful.
Why You’ll Love Red Velvet Cheesecake Brownies
- Two Favorite Desserts in One: If you love both red velvet cake and cheesecake, these brownies are the perfect combination of both. The red velvet base is soft and fudgy, while the cheesecake layer adds a creamy richness that balances the flavors.
- Perfect Texture: The brownies have a dense and fudgy texture, while the cheesecake layer is smooth and silky. The contrast between the two is mouthwatering, making each bite a harmonious blend of flavors and textures.
- Visually Striking: The deep red velvet color, with the swirls of white cheesecake, creates a stunning visual that makes these brownies stand out on any dessert table. They’re not just delicious—they’re also a feast for the eyes.
- Simple Ingredients: Red Velvet Cheesecake Brownies use basic pantry staples, meaning you don’t need to buy any fancy ingredients. The combination of cocoa powder, cream cheese, and butter makes these brownies rich without being overly complicated.
- Versatile for Any Occasion: Whether you’re celebrating Valentine’s Day, a birthday, a holiday, or simply enjoying a sweet treat, these brownies are perfect for any event. Their deep red color also makes them ideal for holiday gatherings and themed parties.
Preparation and Cooking Time
- Total Time: 1 hour 15 minutes
- Preparation Time: 20 minutes
- Cooking Time: 30-35 minutes
- Servings: Approximately 16 brownies
- Calories per Serving: Around 250-300 calories per brownie, depending on ingredients and portion sizes.
Nutrition Facts (Per Serving)
- Calories: 250-300 kcal
- Fat: 18-22g
- Carbohydrates: 25-30g
- Protein: 4g
- Fiber: 1g
- Sugar: 18-22g
Ingredients
For the Red Velvet Brownie Base:
- ½ cup unsalted butter, melted
- 1 cup granulated sugar
- 2 large eggs
- 1 teaspoon vanilla extract
- 1 tablespoon red food coloring
- 1 tablespoon cocoa powder
- 1 ¼ cups all-purpose flour
- ½ teaspoon baking powder
- ½ teaspoon salt
For the Cheesecake Swirl:
- 8 oz cream cheese, softened
- ½ cup granulated sugar
- 1 large egg
- 1 teaspoon vanilla extract
Step-by-Step Instructions
1. Prepare the Brownie Batter
Start by preheating your oven to 350°F (175°C). Grease an 8×8-inch baking pan with butter or line it with parchment paper to prevent the brownies from sticking.
In a medium-sized mixing bowl, combine the melted butter and granulated sugar. Stir the mixture well until the sugar is fully incorporated and the butter is smooth.
Add the eggs, one at a time, mixing well after each addition. This ensures that the eggs are fully incorporated into the batter, contributing to a smooth and fudgy texture. Stir in the vanilla extract and red food coloring until the mixture takes on a vibrant red hue.
In a separate bowl, whisk together the flour, cocoa powder, baking powder, and salt. Slowly add the dry ingredients to the wet ingredients, stirring until just combined. The batter will be thick and fudgy—this is exactly what you want for a rich, dense base.
2. Prepare the Cheesecake Swirl
In a separate bowl, beat the softened cream cheese with the granulated sugar until smooth and creamy. You can use a hand mixer or stand mixer for this step to ensure the cream cheese is well-mixed and free of lumps.
Add the egg and vanilla extract to the cream cheese mixture, and continue to mix until everything is fully combined. The cheesecake filling should be smooth and creamy, with no lumps.
3. Assemble the Brownies
Once both the brownie batter and cheesecake mixture are ready, it’s time to assemble the layers. Pour the red velvet brownie batter into the prepared baking pan, spreading it out evenly with a spatula.
Next, drop spoonfuls of the cheesecake mixture on top of the brownie batter. Don’t worry about spreading it evenly just yet; the idea is to create a beautiful swirl effect once the two batters are combined.
Using a knife or toothpick, gently swirl the cheesecake mixture into the brownie batter. Be careful not to overmix; the goal is to create a marbled effect where the red velvet and cheesecake layers are intertwined.
4. Bake the Brownies
Place the pan in the preheated oven and bake for 30-35 minutes, or until a toothpick inserted into the center comes out with a few moist crumbs (not wet batter). Keep in mind that the cheesecake layer may remain a little soft, so check the edges to ensure the brownies are set. If the edges are firm, they’re ready to come out of the oven.
Once baked, allow the brownies to cool in the pan for about 10-15 minutes. After that, you can transfer them to a wire rack to cool completely.
5. Cut and Serve the Brownies
Once the brownies have cooled completely, cut them into squares. Depending on your desired portion size, you should be able to cut about 16 pieces from an 8×8-inch pan.
Serve the brownies as they are, or add a scoop of vanilla ice cream or a drizzle of chocolate syrup for extra decadence. Enjoy the creamy and fudgy goodness of the Red Velvet Cheesecake Brownies!
Tips for Perfect Red Velvet Cheesecake Brownies
- Don’t Overmix the Batter: Overmixing the brownie batter can lead to dense brownies. Stir the ingredients just until everything is combined to ensure a fudgy, soft texture.
- Use Room Temperature Cream Cheese: For the cheesecake layer to be smooth, make sure the cream cheese is softened to room temperature. Cold cream cheese will result in lumps in the cheesecake mixture.
- Bake Until the Edges Are Set: Red velvet cheesecake brownies should have slightly soft centers but firm edges. If you see that the edges are set and the top is firm to the touch, they’re ready to come out of the oven.
- Chill Before Cutting: If you want clean, neat cuts, allow the brownies to cool completely and refrigerate them for about 1-2 hours before cutting. This will help them firm up and make slicing easier.
- Avoid Overbaking: These brownies should be soft in the center. Keep a close eye on them as they bake to avoid overcooking, which could result in dry brownies.
Variations of Red Velvet Cheesecake Brownies
- Chocolate Swirl Red Velvet Brownies: For an extra chocolatey twist, add chocolate chips to the brownie batter or use a chocolate ganache topping after baking. This combination of red velvet, cheesecake, and chocolate will be even more decadent!
- Mini Red Velvet Cheesecake Brownies: For bite-sized treats, use a mini muffin tin to bake these brownies as individual servings. This is a great option for parties or holiday gatherings.
- Lemon Swirl Red Velvet Cheesecake Brownies: For a zesty flavor, add a teaspoon of lemon zest to the cheesecake filling. This will add a refreshing contrast to the richness of the red velvet brownies.
- Nutty Red Velvet Cheesecake Brownies: Add chopped pecans or walnuts to the red velvet batter for a bit of crunch. The nuts will pair perfectly with the creamy cheesecake swirl and give the brownies extra texture.
- Peanut Butter Red Velvet Cheesecake Brownies: Add a swirl of peanut butter to the cheesecake filling for a sweet and salty flavor combination. This variation is perfect for peanut butter lovers.
Storage and Shelf Life
Red Velvet Cheesecake Brownies are best enjoyed fresh, but they can be stored for later if needed. To store them, place the brownies in an airtight container at room temperature for up to 3 days. The brownies will stay soft and fudgy, thanks to the creamy cheesecake layer.
For longer storage, you can freeze the brownies. Cut them into squares, then wrap each piece individually in plastic wrap and place them in a freezer-safe bag or container. Frozen brownies can last for up to 2-3 months. To thaw, simply let them sit at room temperature for about 30 minutes, or microwave them for a few seconds for a quick treat.
Side Dishes and Pairings for Red Velvet Cheesecake Brownies
Pair these decadent brownies with complementary treats to elevate your dessert experience:
- Coffee or Espresso: A strong cup of coffee or espresso pairs wonderfully with the richness of these brownies, balancing their sweetness and enhancing the flavors.
- Vanilla Ice Cream: A scoop of creamy vanilla ice cream makes the perfect accompaniment to these warm, fudgy brownies. The cold ice cream pairs beautifully with the rich, warm brownies.
- Whipped Cream: For a lighter topping, serve the brownies with a dollop of freshly whipped cream. This adds a touch of creaminess that complements the cheesecake layer.
- Fresh Berries: A handful of fresh raspberries or strawberries makes a great pairing with the rich flavors of the brownies. The tartness of the berries contrasts nicely with the sweet and creamy layers.
Red Velvet Cheesecake Brownies Recipe
- Total Time: 1 hour and 15 minutes
Description
These indulgent brownies combine the rich, velvety flavor of red velvet with a creamy cheesecake swirl. The result is a decadent dessert that’s both beautiful and irresistible—perfect for any special occasion.
Ingredients
For the Red Velvet Brownie Base:
- ½ cup unsalted butter, melted
- 1 cup granulated sugar
- 2 large eggs
- 1 teaspoon vanilla extract
- 1 tablespoon red food coloring
- 1 tablespoon cocoa powder
- 1 ¼ cups all-purpose flour
- ½ teaspoon baking powder
- ½ teaspoon salt
For the Cheesecake Swirl:
- 8 oz cream cheese, softened
- ½ cup granulated sugar
- 1 large egg
- 1 teaspoon vanilla extract
Instructions
1. Prepare the Brownie Batter
Start by preheating your oven to 350°F (175°C). Grease an 8×8-inch baking pan with butter or line it with parchment paper to prevent the brownies from sticking.
In a medium-sized mixing bowl, combine the melted butter and granulated sugar. Stir the mixture well until the sugar is fully incorporated and the butter is smooth.
Add the eggs, one at a time, mixing well after each addition. This ensures that the eggs are fully incorporated into the batter, contributing to a smooth and fudgy texture. Stir in the vanilla extract and red food coloring until the mixture takes on a vibrant red hue.
In a separate bowl, whisk together the flour, cocoa powder, baking powder, and salt. Slowly add the dry ingredients to the wet ingredients, stirring until just combined. The batter will be thick and fudgy—this is exactly what you want for a rich, dense base.
2. Prepare the Cheesecake Swirl
In a separate bowl, beat the softened cream cheese with the granulated sugar until smooth and creamy. You can use a hand mixer or stand mixer for this step to ensure the cream cheese is well-mixed and free of lumps.
Add the egg and vanilla extract to the cream cheese mixture, and continue to mix until everything is fully combined. The cheesecake filling should be smooth and creamy, with no lumps.
3. Assemble the Brownies
Once both the brownie batter and cheesecake mixture are ready, it’s time to assemble the layers. Pour the red velvet brownie batter into the prepared baking pan, spreading it out evenly with a spatula.
Next, drop spoonfuls of the cheesecake mixture on top of the brownie batter. Don’t worry about spreading it evenly just yet; the idea is to create a beautiful swirl effect once the two batters are combined.
Using a knife or toothpick, gently swirl the cheesecake mixture into the brownie batter. Be careful not to overmix; the goal is to create a marbled effect where the red velvet and cheesecake layers are intertwined.
4. Bake the Brownies
Place the pan in the preheated oven and bake for 30-35 minutes, or until a toothpick inserted into the center comes out with a few moist crumbs (not wet batter). Keep in mind that the cheesecake layer may remain a little soft, so check the edges to ensure the brownies are set. If the edges are firm, they’re ready to come out of the oven.
Once baked, allow the brownies to cool in the pan for about 10-15 minutes. After that, you can transfer them to a wire rack to cool completely.
5. Cut and Serve the Brownies
Once the brownies have cooled completely, cut them into squares. Depending on your desired portion size, you should be able to cut about 16 pieces from an 8×8-inch pan.
Serve the brownies as they are, or add a scoop of vanilla ice cream or a drizzle of chocolate syrup for extra decadence. Enjoy the creamy and fudgy goodness of the Red Velvet Cheesecake Brownies!
- Prep Time: 20 minutes
- Cook Time: 30-35 minutes
Nutrition
- Calories: 250-300 kcal
- Fat: 18-22g
- Carbohydrates: 25-30g
- Protein: 4g
Conclusion
Red Velvet Cheesecake Brownies are a decadent treat that combines the richness of red velvet cake with the smoothness of cheesecake in a fudgy brownie base. Whether you’re making them for a holiday, birthday, or just because, these brownies are sure to wow your guests. With simple ingredients, straightforward instructions, and plenty of opportunities for creative variations, Red Velvet Cheesecake Brownies will quickly become a favorite in your baking repertoire. So go ahead, indulge in this deliciously creamy, velvety dessert—each bite is sure to be a heavenly experience!


