
Introduction
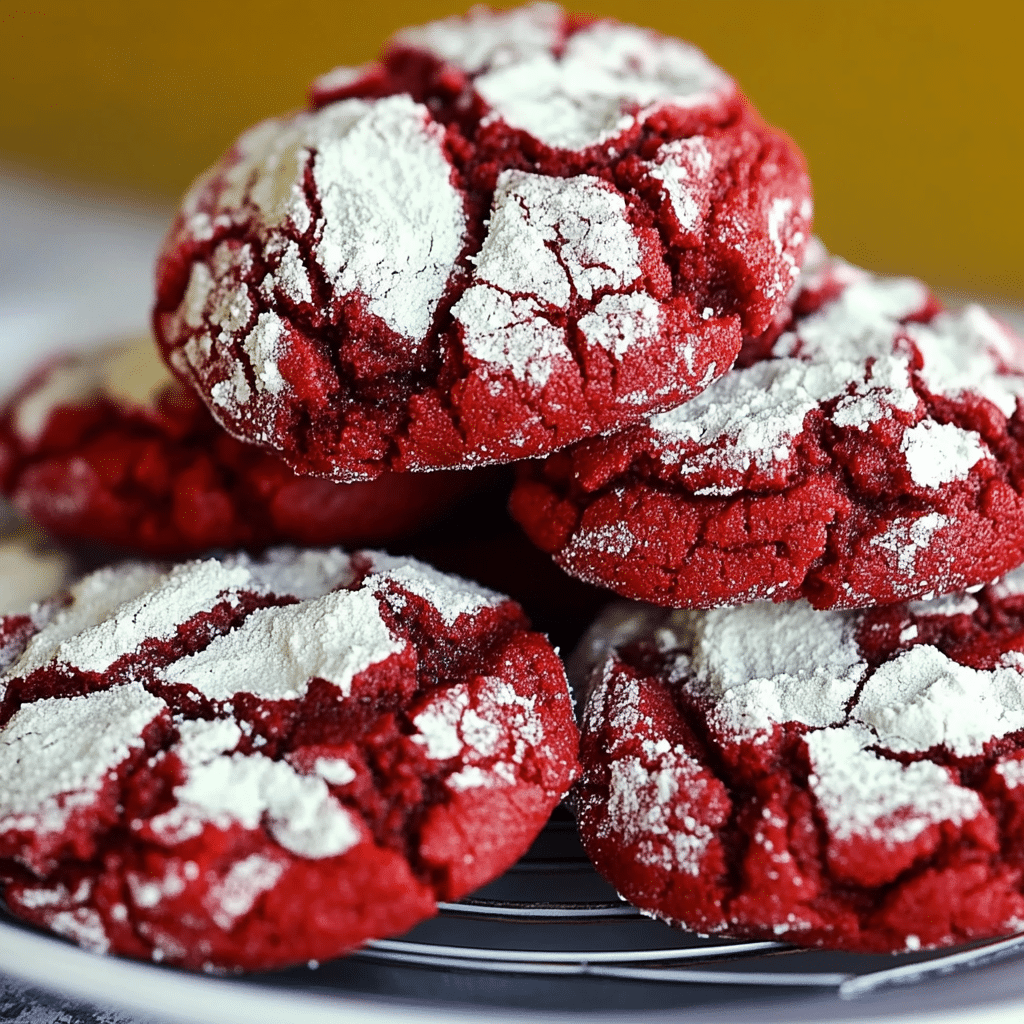
When you think of holiday cookies, certain classics come to mind: sugar cookies, gingerbread, and chocolate chip, just to name a few. But if you’re looking for something that screams festive cheer and indulgent flavor, look no further than red velvet crinkle cookies. These cookies are the perfect combination of a soft, cake-like texture with the signature deep red color of red velvet, all dusted with a powdered sugar “crinkle” for a visually striking and utterly delicious treat.
What makes red velvet crinkle cookies even more special is their rich, slightly tangy flavor, which comes from the subtle addition of cocoa powder and buttermilk (or a substitute). Their melt-in-your-mouth texture, paired with the sweet, slightly crunchy exterior, makes them a standout on any cookie tray. Whether you’re baking for Christmas, Valentine’s Day, or a special gathering, these red velvet crinkle cookies are sure to impress both in flavor and appearance.
I discovered these red velvet crinkle cookies one holiday season and quickly became enamored with their beauty and taste. Not only do they deliver in the flavor department, but their bold red color is a fantastic way to add a festive touch to any celebration. Plus, the recipe is easy to follow and doesn’t require any special skills, making it accessible for both beginners and seasoned bakers alike. If you’re ready to elevate your cookie game, let’s dive into why you’ll love this recipe and how to make it flawlessly!
Why You’ll Love This Recipe
Visually Stunning: The crinkle effect, with its powdery finish and vibrant red hue, makes these cookies as pleasing to the eye as they are to the taste buds. They’re perfect for impressing guests and making a festive statement.
Soft, Chewy Texture: These cookies have a soft, chewy interior that melts in your mouth, thanks to the addition of cream cheese and the slightly tangy flavor of buttermilk (or its substitute).
Simple to Make: Despite their showstopper appearance, these cookies are straightforward and easy to prepare. A few simple steps lead to a batch of stunning cookies that look and taste like they came from a professional bakery.
Perfect for the Holidays: With their bold red color and classic crinkle effect, these cookies are perfect for Christmas, Valentine’s Day, or any holiday celebration. They can be enjoyed with a cup of tea, shared with loved ones, or packaged up for homemade gifts.
Freezes Well: These cookies freeze wonderfully, meaning you can bake ahead of time and store a batch for later or freeze the dough and bake fresh cookies when needed.
Preparation Time and Servings
- Total Time: 1 hour 20 minutes (25 minutes prep, 15 minutes baking, 30 minutes chilling)
- Servings: This recipe yields about 24 cookies.
- Nutrition Facts:
- Calories per serving: 180
- Protein: 2g
- Carbs: 25g
- Fat: 9g
- Fiber: 1g
Ingredients
- 2 1/2 cups all-purpose flour: The main dry ingredient that gives structure to the cookies.
- 1 tablespoon cocoa powder: Provides the classic red velvet flavor with a subtle chocolate taste.
- 1/2 teaspoon baking powder: Helps the cookies rise, making them light and chewy.
- 1/2 teaspoon baking soda: Works in combination with the buttermilk to help the cookies spread and rise.
- 1/2 teaspoon salt: Balances the sweetness and enhances the flavor.
- 1 cup unsalted butter, softened: Adds richness and ensures a smooth dough.
- 1 cup granulated sugar: Sweetens the dough and contributes to the crisp crinkle effect.
- 1/2 cup cream cheese, softened: Gives the cookies their soft, chewy texture.
- 2 large eggs: Provide structure to the dough and help bind the ingredients together.
- 1 tablespoon red food coloring: The star ingredient that gives the cookies their bold red color.
- 1 teaspoon vanilla extract: Adds warmth and depth of flavor.
- 1/4 cup buttermilk (or milk with a splash of vinegar): Adds a slight tang and helps the cookies stay soft.
- 1/2 cup powdered sugar: Used for rolling the dough balls to create the signature crinkle effect.
Step-by-Step Instructions
STEP 1: PREPARE THE OVEN AND COOKIE SHEET
Start by preheating your oven to 350°F (175°C). Line a baking sheet with parchment paper or a silicone baking mat to prevent the cookies from sticking and to help them bake evenly.
STEP 2: COMBINE THE DRY INGREDIENTS
In a medium bowl, whisk together the flour, cocoa powder, baking powder, baking soda, and salt. This ensures that all the dry ingredients are well mixed and that the baking powder and baking soda are evenly distributed throughout the flour. Set this mixture aside.
STEP 3: CREAM TOGETHER THE BUTTER AND CREAM CHEESE
In a large mixing bowl, beat the softened butter and cream cheese together using an electric mixer or stand mixer on medium speed until the mixture is light and fluffy. This usually takes about 2-3 minutes. The cream cheese adds a creamy texture to the cookies, making them soft and melt-in-your-mouth delicious.
STEP 4: ADD SUGAR, EGGS, AND FOOD COLORING
Add the granulated sugar to the butter-cream cheese mixture and beat until it’s fully combined and fluffy. Then, add the eggs one at a time, mixing well after each addition. Add the red food coloring and vanilla extract, and mix until the dough is a uniform red color. The amount of food coloring can be adjusted to achieve the intensity of red you desire.
STEP 5: COMBINE THE DRY AND WET INGREDIENTS
Gradually add the dry ingredient mixture to the wet ingredients, mixing on low speed until the dough comes together. The dough should be thick and slightly sticky. If it’s too soft to handle, you can chill it in the refrigerator for about 30 minutes to firm it up before proceeding.
STEP 6: ROLL THE DOUGH INTO BALLS
Once the dough has chilled (if necessary), scoop tablespoon-sized portions of dough and roll them into balls using your hands. Roll each dough ball in powdered sugar until it’s generously coated. This powdered sugar coating is what gives the cookies their signature crinkle effect when they bake.
STEP 7: BAKE
Place the sugar-coated dough balls on the prepared baking sheet, spacing them about 2 inches apart to allow room for the cookies to spread while baking. Bake in the preheated oven for 10-12 minutes, or until the edges are set but the centers are still soft. Be careful not to overbake, as the cookies should remain soft and chewy in the middle.
STEP 8: COOL AND SERVE
Let the cookies cool on the baking sheet for 5 minutes before transferring them to a wire rack to cool completely. This helps the cookies set and prevents them from breaking apart while still warm. Once they have cooled completely, they’re ready to enjoy!
How to Serve
- Perfect for a Cookie Platter: These red velvet crinkle cookies are beautiful on any cookie tray and perfect for holiday gatherings, parties, or dessert buffets.
- Pair with Milk or Hot Cocoa: The rich flavor and soft texture make these cookies a perfect companion to a cold glass of milk or a warm cup of hot cocoa.
- Gift Idea: Package these cookies in a decorative tin or box for a thoughtful, homemade gift for friends and family during the holiday season.
Additional Tips
- Don’t Skip the Chilling Step: If your dough is too soft, chilling it will make it easier to handle and prevent the cookies from spreading too much while baking.
- Customize the Crinkle: For a more dramatic crinkle effect, roll the dough balls in powdered sugar a second time before baking.
- Check for Doneness: The cookies should look slightly puffed and cracked on top but still soft in the center. They will firm up as they cool.
- Use Gel Food Coloring: If you want a more vibrant red color, consider using gel food coloring instead of liquid food coloring for a richer hue.
- Store Properly: These cookies stay fresh for up to 5 days when stored in an airtight container at room temperature. If you want to keep them longer, you can freeze them for up to 3 months.
Recipe Variations
- Add White Chocolate Chips: For a bit of sweetness and extra texture, fold in white chocolate chips or chunks of white chocolate.
- Pecan Red Velvet Crinkles: Add chopped pecans or walnuts to the dough for a crunchy contrast to the soft texture of the cookie.
- Cream Cheese Frosting: Add a swirl of cream cheese frosting to the top of each cookie for an extra indulgent treat.
- Red Velvet Brownie Crinkles: Make a red velvet brownie batter and follow the same method for crinkle cookies to achieve a fudgy center with a rich red velvet flavor.
Serving Suggestions
- Side Dishes: These cookies pair well with savory holiday meals or can serve as a sweet ending to a dinner party.
- Beverage Pairing: A glass of red wine or a festive sparkling beverage complements the rich, sweet flavor of the red velvet cookies beautifully.
- For Kids: These cookies are fun for kids to decorate or gift to friends and family. They can also be served as part of a holiday cookie decorating party.
Freezing and Storage
- Storage: Store leftover cookies in an airtight container at room temperature for up to 5 days.
- Freezing: These cookies freeze exceptionally well. Place them in an airtight container or freezer-safe bag and freeze for up to 3 months. To enjoy them later, thaw at room temperature or warm them in the microwave for a few seconds.
- Freezing Dough: You can also freeze the dough. Roll it into balls, coat with powdered sugar, and freeze the dough balls on a baking sheet before transferring them to a storage bag or container. When you’re ready to bake, place the dough balls on a baking sheet and bake as usual—no need to thaw!
FAQ Section
Can I use a different type of food coloring?
Yes, you can use any food coloring you like, but gel food coloring tends to provide the most vibrant color without changing the texture of the dough.
Can I make these cookies without cream cheese?
Cream cheese is key to the texture of these cookies, but if you prefer, you can substitute it with an equal amount of unsalted butter for a slightly different texture.
How can I prevent the cookies from overbaking?
Keep an eye on the cookies during the last few minutes of baking, as oven times can vary. They should look slightly puffed and cracked but remain soft in the center.
Can I make these cookies ahead of time?
Yes, you can prepare the dough and store it in the fridge for up to 3 days before baking. You can also freeze the dough balls or fully baked cookies for later.
Conclusion
Red velvet crinkle cookies are a delightful addition to any holiday cookie tray. Their rich red color, soft texture, and festive appearance make them a standout treat for any occasion. Easy to make, customizable, and utterly delicious, these cookies will surely become a favorite in your holiday baking rotation.
Don’t forget to share your results! I’d love to see your beautifully crinkled red velvet cookies—tag me on social media or leave a comment to share your thoughts. Happy baking and enjoy your festive treats!
Print
Red Velvet Crinkle Cookies: A Festive Twist on a Classic Treat
- Total Time: 1 hour 20 minutes
Description
Red Velvet Crinkle Cookies are a stunning and indulgent dessert with a rich, velvety texture and a vibrant red color. These cookies have a soft, cake-like interior that melts in your mouth, and a crackly, powdered sugar-coated exterior. The subtle cocoa flavor paired with the tangy cream cheese undertones gives these cookies a distinct red velvet taste, while the crinkled surface adds to their visual appeal. Perfect for any special occasion or holiday, these cookies combine the beauty and deliciousness of red velvet cake in a bite-sized treat.
Ingredients
- 2 1/2 cups all-purpose flour: The main dry ingredient that gives structure to the cookies.
- 1 tablespoon cocoa powder: Provides the classic red velvet flavor with a subtle chocolate taste.
- 1/2 teaspoon baking powder: Helps the cookies rise, making them light and chewy.
- 1/2 teaspoon baking soda: Works in combination with the buttermilk to help the cookies spread and rise.
- 1/2 teaspoon salt: Balances the sweetness and enhances the flavor.
- 1 cup unsalted butter, softened: Adds richness and ensures a smooth dough.
- 1 cup granulated sugar: Sweetens the dough and contributes to the crisp crinkle effect.
- 1/2 cup cream cheese, softened: Gives the cookies their soft, chewy texture.
- 2 large eggs: Provide structure to the dough and help bind the ingredients together.
- 1 tablespoon red food coloring: The star ingredient that gives the cookies their bold red color.
- 1 teaspoon vanilla extract: Adds warmth and depth of flavor.
- 1/4 cup buttermilk (or milk with a splash of vinegar): Adds a slight tang and helps the cookies stay soft.
- 1/2 cup powdered sugar: Used for rolling the dough balls to create the signature crinkle effect.
Instructions
STEP 1: PREPARE THE OVEN AND COOKIE SHEET
Start by preheating your oven to 350°F (175°C). Line a baking sheet with parchment paper or a silicone baking mat to prevent the cookies from sticking and to help them bake evenly.
STEP 2: COMBINE THE DRY INGREDIENTS
In a medium bowl, whisk together the flour, cocoa powder, baking powder, baking soda, and salt. This ensures that all the dry ingredients are well mixed and that the baking powder and baking soda are evenly distributed throughout the flour. Set this mixture aside.
STEP 3: CREAM TOGETHER THE BUTTER AND CREAM CHEESE
In a large mixing bowl, beat the softened butter and cream cheese together using an electric mixer or stand mixer on medium speed until the mixture is light and fluffy. This usually takes about 2-3 minutes. The cream cheese adds a creamy texture to the cookies, making them soft and melt-in-your-mouth delicious.
STEP 4: ADD SUGAR, EGGS, AND FOOD COLORING
Add the granulated sugar to the butter-cream cheese mixture and beat until it’s fully combined and fluffy. Then, add the eggs one at a time, mixing well after each addition. Add the red food coloring and vanilla extract, and mix until the dough is a uniform red color. The amount of food coloring can be adjusted to achieve the intensity of red you desire.
STEP 5: COMBINE THE DRY AND WET INGREDIENTS
Gradually add the dry ingredient mixture to the wet ingredients, mixing on low speed until the dough comes together. The dough should be thick and slightly sticky. If it’s too soft to handle, you can chill it in the refrigerator for about 30 minutes to firm it up before proceeding.
STEP 6: ROLL THE DOUGH INTO BALLS
Once the dough has chilled (if necessary), scoop tablespoon-sized portions of dough and roll them into balls using your hands. Roll each dough ball in powdered sugar until it’s generously coated. This powdered sugar coating is what gives the cookies their signature crinkle effect when they bake.
STEP 7: BAKE
Place the sugar-coated dough balls on the prepared baking sheet, spacing them about 2 inches apart to allow room for the cookies to spread while baking. Bake in the preheated oven for 10-12 minutes, or until the edges are set but the centers are still soft. Be careful not to overbake, as the cookies should remain soft and chewy in the middle.
STEP 8: COOL AND SERVE
Let the cookies cool on the baking sheet for 5 minutes before transferring them to a wire rack to cool completely. This helps the cookies set and prevents them from breaking apart while still warm. Once they have cooled completely, they’re ready to enjoy!
- Prep Time: 25 minutes
- Baking and Chilling Time: 15 minutes baking, 30 minutes chilling
Nutrition
- Calories: 180 kcal
- Fat: 9g
- Carbohydrates: 25g
- Protein: 2g


