
Introduction
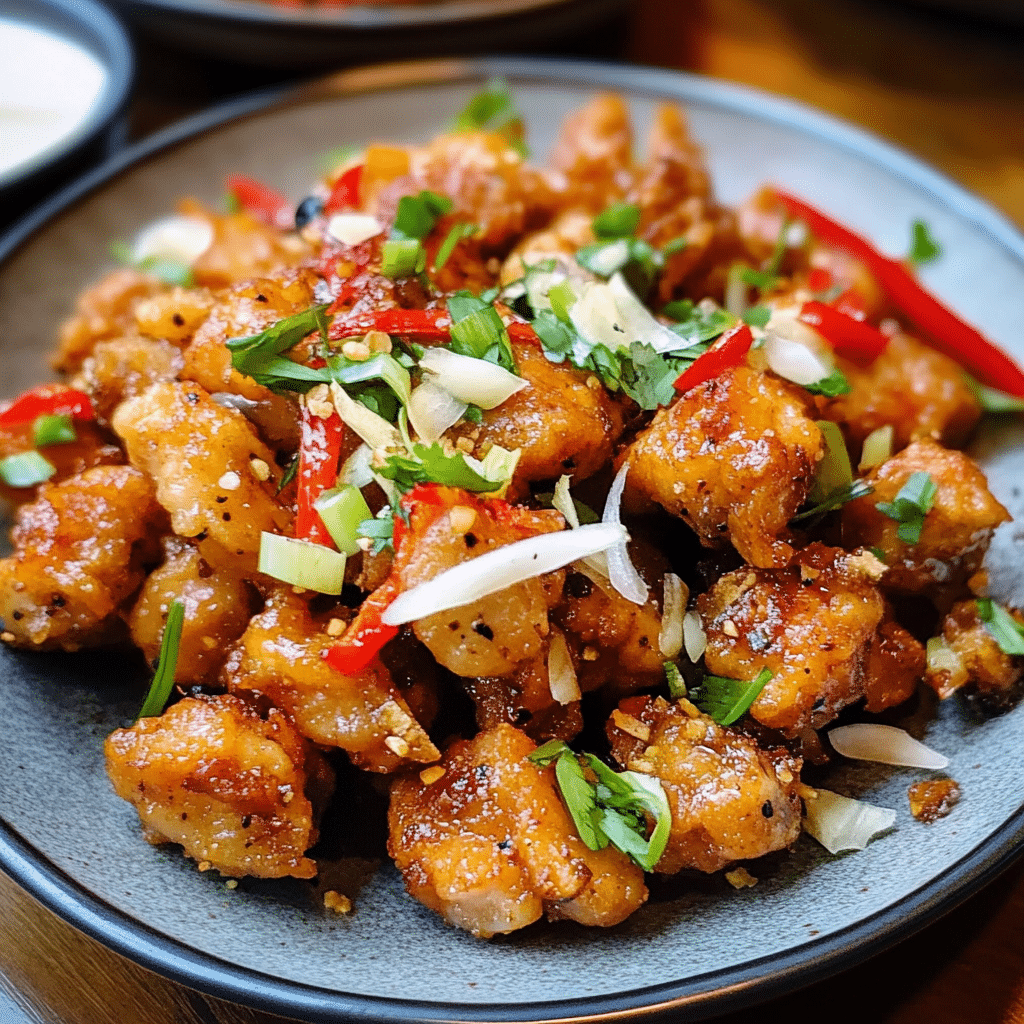
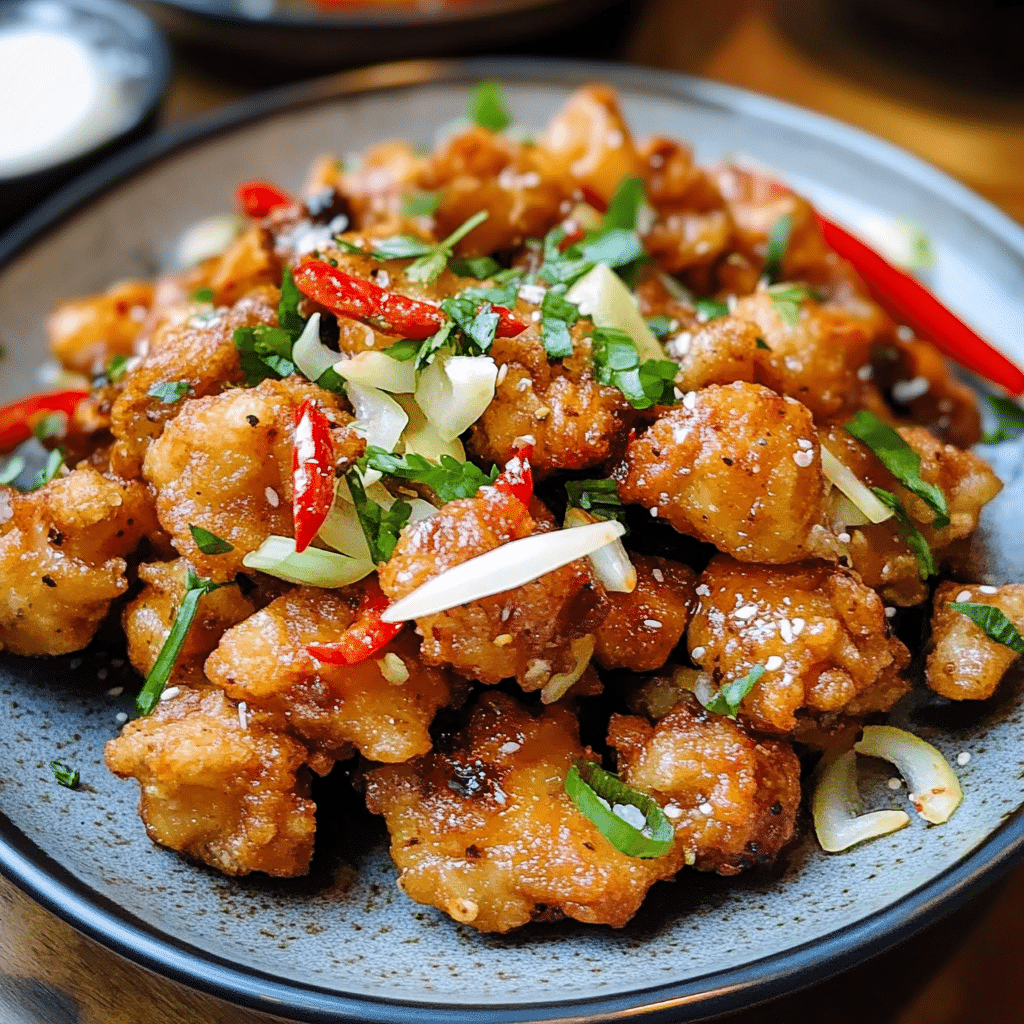
Salt and Pepper Crispy Chicken is a simple yet incredibly flavorful dish that combines crispy fried chicken with a tantalizing seasoning of salt, pepper, and other spices. This popular recipe is loved for its crunchy texture and savory flavor, making it the perfect comfort food for any occasion. Whether you enjoy it as a standalone meal or as part of a larger spread, the crispy, seasoned chicken is sure to please everyone.
This dish is an excellent choice for a weeknight dinner, a weekend get-together, or even for meal prepping. The crispy coating gives way to juicy, tender chicken on the inside, creating the perfect balance of textures. What sets this recipe apart is the simplicity of its ingredients and seasonings, yet the outcome is nothing short of impressive.
In this guide, you will find all the tips, tricks, and instructions you need to make the perfect Salt and Pepper Crispy Chicken at home. From the seasoning blend to frying techniques, we’ll walk you through the process step-by-step so you can recreate this delicious dish in your own kitchen.
Why You’ll Love Salt and Pepper Crispy Chicken
- Crispy Texture: The chicken is coated in a light, crunchy batter that adds the perfect amount of texture. It’s crispy on the outside, tender and juicy on the inside, making each bite satisfying.
- Simple Ingredients: Made with just a few pantry staples, this dish doesn’t require any exotic or hard-to-find ingredients. Salt, pepper, flour, and a few other basics come together to create an irresistible flavor profile.
- Versatile: You can serve this crispy chicken with a variety of sides, such as steamed vegetables, fries, rice, or even a simple salad. It also works well as an appetizer or finger food for parties and gatherings.
- Easy to Make: While frying may sound intimidating, this recipe breaks the process down into simple steps, so you can achieve restaurant-quality crispy chicken right at home.
- Flavorful and Addictive: The combination of salt, pepper, garlic, and other spices delivers a bold, savory flavor that will have you craving more with each bite.
Preparation and Cooking Time
- Total Time: 45 minutes
- Preparation Time: 15 minutes
- Cooking Time: 30 minutes
- Servings: Approximately 4 servings
- Calories per Serving: Around 400-450 calories per serving, depending on portion sizes and specific ingredients used.
Nutrition Facts (Per Serving)
- Calories: 400-450 kcal
- Fat: 25-30g
- Carbohydrates: 15-20g
- Protein: 30-35g
- Fiber: 1-2g
- Sugar: 1-2g
Ingredients
For the Salt and Pepper Crispy Chicken:
- 4 bone-in, skin-on chicken thighs (or chicken breasts, if preferred)
- 1 cup all-purpose flour
- 1 teaspoon salt
- 1 teaspoon freshly ground black pepper
- 1 teaspoon garlic powder
- 1 teaspoon onion powder
- 1 teaspoon cornstarch
- 1/2 teaspoon ground white pepper (optional for extra flavor)
- 1/4 teaspoon ground cumin (optional for a smoky twist)
- 2 large eggs, beaten
- 2 cups vegetable oil (for frying)
- Fresh cilantro or parsley (optional garnish)
Step-by-Step Instructions
1. Prepare the Chicken
Start by preparing your chicken. If you’re using chicken thighs, pat them dry with paper towels to remove any excess moisture. Dry chicken ensures that the seasoning and batter will stick better and fry up crispier. You can also use chicken breasts if you prefer, but thighs tend to be juicier and more flavorful.
Season the chicken with a pinch of salt and pepper, making sure the seasoning is evenly distributed. Set the chicken aside while you prepare the coating mixture.
2. Make the Seasoned Coating
In a shallow bowl or plate, combine the all-purpose flour, salt, black pepper, garlic powder, onion powder, cornstarch, white pepper (if using), and ground cumin (if using). The flour and cornstarch mixture will create the perfect crispy coating for the chicken, while the seasonings infuse the crust with flavor. Stir the ingredients together until they are evenly mixed.
3. Prepare the Egg Wash
In a separate shallow bowl, beat the eggs until they are smooth and slightly frothy. The egg wash helps the seasoned flour adhere to the chicken, creating that signature crispy coating.
4. Coat the Chicken
Now, it’s time to coat the chicken. First, dip each piece of chicken into the egg wash, making sure it is fully coated. Let any excess egg drip off before moving on to the flour mixture.
Next, dredge the egg-coated chicken in the seasoned flour mixture. Press down gently to make sure the flour sticks to the chicken. Be sure to coat each piece evenly. For an extra crispy coating, you can double dip the chicken: dip it back into the egg wash and then back into the flour mixture for a thicker coating. This will ensure an even crispier texture.
5. Heat the Oil
In a large, deep skillet or Dutch oven, heat the vegetable oil over medium-high heat. You’ll need enough oil to submerge at least half of the chicken. The oil should be hot, but not smoking. To test the oil, drop a small pinch of flour into it—if it sizzles immediately, the oil is ready for frying.
6. Fry the Chicken
Carefully place the coated chicken pieces into the hot oil. Do not overcrowd the pan—this will cause the temperature of the oil to drop, and the chicken won’t fry as crisply. Fry the chicken in batches if necessary.
Fry the chicken for 5-7 minutes per side, or until the chicken is golden brown and the internal temperature reaches 165°F (75°C). Use tongs or a slotted spoon to flip the chicken gently. Be mindful of the oil temperature, adjusting the heat as needed to prevent burning.
Once the chicken is fried to golden perfection, use tongs to remove it from the oil and place it on a paper towel-lined plate to drain any excess oil.
7. Serve and Garnish
After the chicken has rested for a few minutes, arrange it on a serving platter. If desired, garnish with freshly chopped cilantro or parsley for a pop of color and freshness. Serve immediately while the chicken is still crispy and hot.
Tips for Perfect Salt and Pepper Crispy Chicken
- Use Bone-In, Skin-On Chicken: The skin-on, bone-in chicken gives the dish more flavor and keeps the meat juicy. The skin crisps up beautifully when fried, adding that signature crunch.
- Don’t Skip the Cornstarch: Cornstarch is key to achieving an ultra-crispy coating. It helps to absorb moisture and makes the crust light and crunchy. Don’t omit it!
- Maintain the Oil Temperature: Make sure the oil stays at the right temperature while frying. If it’s too low, the chicken will absorb too much oil and become greasy. If it’s too high, the coating will burn before the chicken cooks through. A thermometer is a great tool to ensure the oil is at the right temperature (around 350°F or 175°C).
- Double Dip for Extra Crispiness: For an even crunchier coating, you can double dip the chicken—once in the egg wash, then in the seasoned flour, then again in the egg wash, and finally back in the flour. This extra layer will give you an even crispier texture.
- Rest After Frying: Let the chicken rest on a paper towel-lined plate to drain excess oil and help the coating stay crispy. Avoid placing the chicken directly on a regular plate, as it can cause the coating to become soggy.
- Serve Immediately: Crispy chicken is best served right away, so try to serve it as soon as it’s finished cooking. If you need to make it ahead of time, you can keep it in a warm oven (set to 200°F or 95°C) for up to 30 minutes, but it’s always best fresh.
Variations of Salt and Pepper Crispy Chicken
- Spicy Salt and Pepper Chicken: For a kick of heat, add some finely chopped fresh chili peppers or a pinch of cayenne pepper to the seasoning mix. You can also drizzle the finished chicken with a spicy sauce, like sriracha, for an extra layer of flavor.
- Lemon Salt and Pepper Chicken: Add a zest of lemon to the seasoning mix for a refreshing citrusy twist. After frying, squeeze fresh lemon juice over the chicken for a zesty finish.
- Garlic Salt and Pepper Chicken: For garlic lovers, increase the amount of garlic powder or add fresh minced garlic to the seasoning mix. Frying the garlic in the oil along with the chicken will create an aromatic, garlicky flavor that complements the salt and pepper.
- Herbed Salt and Pepper Chicken: Experiment with adding fresh or dried herbs like rosemary, thyme, or oregano to the flour mixture for an herbed twist. The herbs will add a fragrant, savory note to the chicken.
- Boneless Chicken: If you prefer boneless, skinless chicken breasts or thighs, simply follow the same instructions, reducing the frying time to 4-6 minutes per side, depending on the thickness of the meat.
Storage and Shelf Life
Salt and Pepper Crispy Chicken is best enjoyed fresh, but if you have leftovers, you can store them in an airtight container in the refrigerator for up to 3 days. To reheat, place the chicken in a preheated oven at 375°F (190°C) for about 10 minutes to restore the crispiness.
For longer storage, you can freeze the fried chicken. Place the chicken pieces on a baking sheet and freeze them for 1-2 hours until they are solid. Once frozen, transfer the chicken to a freezer-safe bag or container. To reheat, bake the chicken at 375°F (190°C) for 15-20 minutes, or until heated through and crispy.
Side Dishes and Pairings for Salt and Pepper Crispy Chicken
- French Fries: Crispy fries are a classic pairing with fried chicken. They’re perfect for dipping in any sauces you like, from ketchup to aioli or spicy mayo.
- Coleslaw: A tangy, creamy coleslaw balances the richness of the crispy chicken and adds a refreshing crunch.
- Rice or Noodles: Serve the chicken over steamed white rice or noodles for a complete meal. You can drizzle a little soy sauce or sweet chili sauce over the rice for added flavor.
- Stir-Fried Vegetables: For a healthier side, serve the chicken with stir-fried vegetables like broccoli, bell peppers, and carrots. The sweetness of the vegetables complements the savory flavor of the chicken.
- Dipping Sauces: Add extra flavor with a variety of dipping sauces such as ranch, honey mustard, sriracha mayo, or garlic butter.

Salt and Pepper Crispy Chicken Recipe
- Total Time: 45 minutes
Description
Crispy, golden chicken pieces are seasoned with a simple yet bold combination of salt and pepper, creating a dish that’s full of flavor and crunch. It’s a quick and easy recipe that delivers a satisfying, savory bite every time.
Ingredients
For the Salt and Pepper Crispy Chicken:
- 4 bone-in, skin-on chicken thighs (or chicken breasts, if preferred)
- 1 cup all-purpose flour
- 1 teaspoon salt
- 1 teaspoon freshly ground black pepper
- 1 teaspoon garlic powder
- 1 teaspoon onion powder
- 1 teaspoon cornstarch
- 1/2 teaspoon ground white pepper (optional for extra flavor)
- 1/4 teaspoon ground cumin (optional for a smoky twist)
- 2 large eggs, beaten
- 2 cups vegetable oil (for frying)
- Fresh cilantro or parsley (optional garnish)
Instructions
1. Prepare the Chicken
Start by preparing your chicken. If you’re using chicken thighs, pat them dry with paper towels to remove any excess moisture. Dry chicken ensures that the seasoning and batter will stick better and fry up crispier. You can also use chicken breasts if you prefer, but thighs tend to be juicier and more flavorful.
Season the chicken with a pinch of salt and pepper, making sure the seasoning is evenly distributed. Set the chicken aside while you prepare the coating mixture.
2. Make the Seasoned Coating
In a shallow bowl or plate, combine the all-purpose flour, salt, black pepper, garlic powder, onion powder, cornstarch, white pepper (if using), and ground cumin (if using). The flour and cornstarch mixture will create the perfect crispy coating for the chicken, while the seasonings infuse the crust with flavor. Stir the ingredients together until they are evenly mixed.
3. Prepare the Egg Wash
In a separate shallow bowl, beat the eggs until they are smooth and slightly frothy. The egg wash helps the seasoned flour adhere to the chicken, creating that signature crispy coating.
4. Coat the Chicken
Now, it’s time to coat the chicken. First, dip each piece of chicken into the egg wash, making sure it is fully coated. Let any excess egg drip off before moving on to the flour mixture.
Next, dredge the egg-coated chicken in the seasoned flour mixture. Press down gently to make sure the flour sticks to the chicken. Be sure to coat each piece evenly. For an extra crispy coating, you can double dip the chicken: dip it back into the egg wash and then back into the flour mixture for a thicker coating. This will ensure an even crispier texture.
5. Heat the Oil
In a large, deep skillet or Dutch oven, heat the vegetable oil over medium-high heat. You’ll need enough oil to submerge at least half of the chicken. The oil should be hot, but not smoking. To test the oil, drop a small pinch of flour into it—if it sizzles immediately, the oil is ready for frying.
6. Fry the Chicken
Carefully place the coated chicken pieces into the hot oil. Do not overcrowd the pan—this will cause the temperature of the oil to drop, and the chicken won’t fry as crisply. Fry the chicken in batches if necessary.
Fry the chicken for 5-7 minutes per side, or until the chicken is golden brown and the internal temperature reaches 165°F (75°C). Use tongs or a slotted spoon to flip the chicken gently. Be mindful of the oil temperature, adjusting the heat as needed to prevent burning.
Once the chicken is fried to golden perfection, use tongs to remove it from the oil and place it on a paper towel-lined plate to drain any excess oil.
7. Serve and Garnish
After the chicken has rested for a few minutes, arrange it on a serving platter. If desired, garnish with freshly chopped cilantro or parsley for a pop of color and freshness. Serve immediately while the chicken is still crispy and hot.
- Prep Time: 15 minutes
- Cook Time: 30 minutes
Nutrition
- Calories: 400-450 kcal
- Fat: 25-30g
- Carbohydrates: 15-20g
- Protein: 30-35g
Conclusion
Salt and Pepper Crispy Chicken is a simple yet flavorful dish that brings crispy fried chicken to the next level. With its perfectly seasoned coating and juicy chicken, this recipe is sure to become a go-to in your cooking repertoire. Whether you’re serving it for a casual dinner or a special occasion, it’s guaranteed to be a hit. The combination of crispy texture and savory seasoning makes each bite irresistible, and with easy-to-follow instructions, you can create this delicious dish at home in no time. Enjoy!


