
Introduction
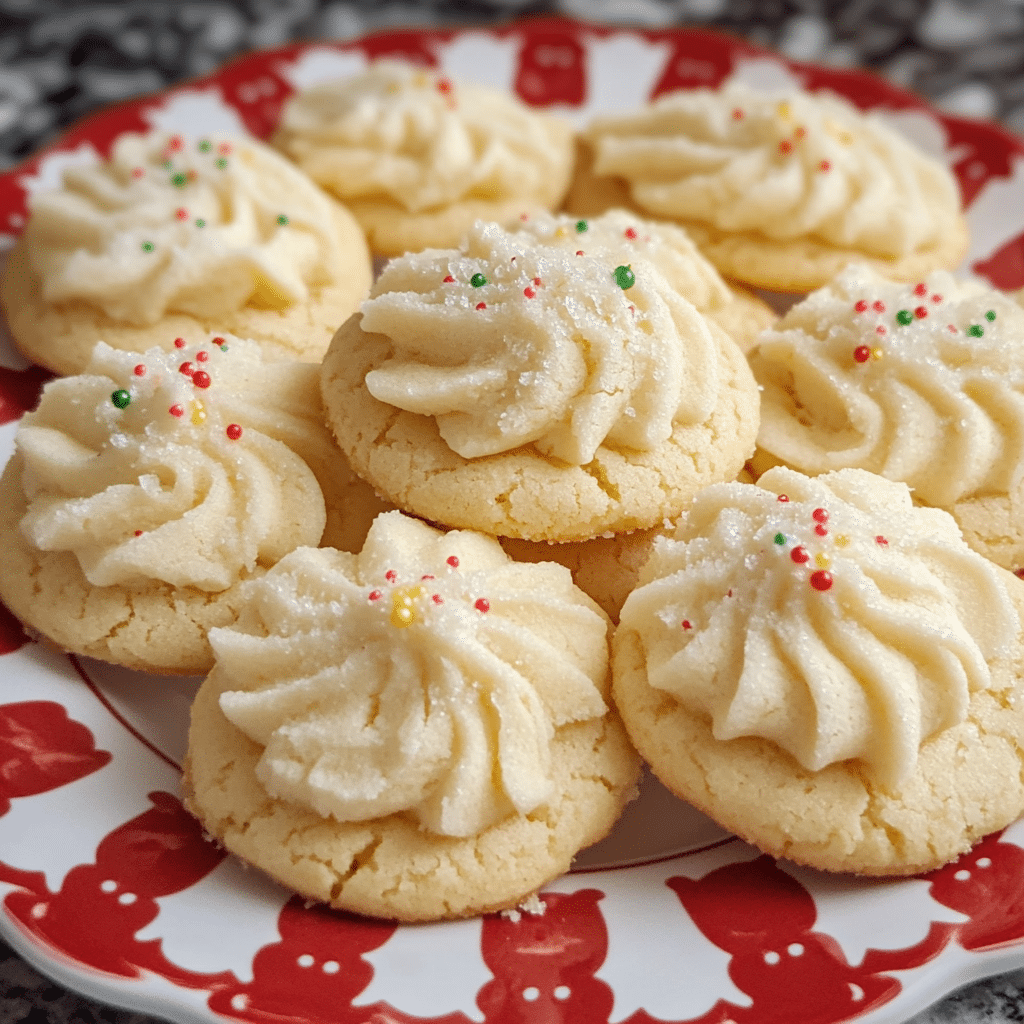
There’s something truly magical about Whipped Shortbread Cookies. These delicate, melt-in-your-mouth treats are a holiday classic, but they’re perfect for any time of year when you crave a simple, buttery cookie that’s both light and rich at the same time. With their tender texture and subtly sweet flavor, whipped shortbread cookies are a true crowd-pleaser that require only a few basic ingredients but yield incredible results.
The beauty of whipped shortbread lies in its simplicity. The dough is made from a handful of pantry staples—flour, butter, sugar, and cornstarch—which come together to create a cookie with a soft, crumbly texture and a delicate, meltaway finish. When whipped, the butter becomes light and airy, incorporating air into the dough and giving the cookies their signature, delicate crumb. It’s a straightforward recipe, but the results are both elegant and delicious.
In this article, we’ll dive into why Whipped Shortbread Cookies are a must-try, provide step-by-step instructions for making them, and share tips, tricks, and variations to elevate your cookie game. Let’s get started!
Why You’ll Love This Recipe
- Light and Buttery: These cookies are the perfect balance of light, melt-in-your-mouth texture and rich, buttery flavor. They practically dissolve on your tongue!
- Easy to Make: With only a few basic ingredients and minimal prep time, you can whip up a batch of these cookies in no time. The dough comes together easily and requires no chilling, making it a great option for quick baking.
- No Rolling or Cutting: Unlike traditional shortbread that requires rolling out dough and cutting it into shapes, whipped shortbread cookies can simply be piped or spooned onto the baking sheet, making the process even easier.
- Customizable: You can easily adapt these cookies to suit your tastes, whether by adding chocolate chips, sprinkles, or other flavorings. Their neutral flavor makes them versatile for a variety of creative twists.
- Perfect for Any Occasion: Whether you’re baking for the holidays, a special occasion, or just a cozy afternoon treat, whipped shortbread cookies always make a statement. Their light texture and elegant look make them ideal for gift-giving, holiday trays, or an afternoon tea.
Preparation Time and Servings
- Total Time: 30 minutes (10 minutes for prep, 20 minutes for baking)
- Servings: This recipe makes about 24 cookies, depending on the size.
- Nutrition Facts (per cookie): Calories: 120, Protein: 1g, Carbs: 13g, Fat: 7g.
Ingredients
- 1 cup (227g) unsalted butter: The star ingredient of any shortbread recipe! Softened butter creates a rich, smooth dough with that melt-in-your-mouth texture. Be sure to use unsalted butter so you can control the amount of salt in the cookies.
- 1/2 cup (60g) powdered sugar: Powdered sugar (also known as icing sugar) gives these cookies a smooth, velvety texture. It’s key to getting the light, airy consistency that whipped shortbread is known for.
- 1 1/2 cups (180g) all-purpose flour: This is the base of the dough. The flour provides structure, while the cornstarch helps to give the cookies their soft, crumbly texture.
- 1/4 cup (30g) cornstarch: Cornstarch helps lighten the dough and contributes to the tender, melt-in-your-mouth texture that shortbread cookies are known for.
- 1/2 teaspoon vanilla extract: Adds a warm, aromatic flavor that perfectly complements the buttery richness of the cookies.
- Pinch of salt: A small amount of salt balances out the sweetness and enhances the other flavors in the cookies.
- Optional: Sprinkles, colored sugar, or a few chocolate chips for decoration or added flavor.
First Step: PREPARE YOUR INGREDIENTS
Before you start mixing the dough, make sure all of your ingredients are prepared and ready to go. Since whipped shortbread cookies come together quickly, it’s helpful to have everything measured out and at room temperature.
- Soften the Butter: Start by bringing your butter to room temperature. It should be soft enough to easily whip but not melted. This ensures that it will blend smoothly with the other ingredients and incorporate air into the dough.
- Measure the Ingredients: Measure out the powdered sugar, flour, cornstarch, and salt. Having everything ready will help streamline the process and ensure the dough comes together easily.
Second Step: CREAM THE BUTTER AND SUGAR
The first step in making whipped shortbread cookies is to create a smooth, light base for the dough by creaming together the butter and powdered sugar. This process is key to creating the airy texture that defines whipped shortbread.
- Cream the Butter and Sugar: Using a hand mixer or stand mixer, beat the softened butter and powdered sugar together on medium speed. Beat for 3-4 minutes, or until the mixture is light and fluffy. This step incorporates air into the butter, which is what gives the cookies their light, melt-in-your-mouth texture. Be sure to scrape down the sides of the bowl a few times to ensure even mixing.
- Add the Vanilla: Once the butter and sugar mixture is fluffy, add the vanilla extract and a pinch of salt. Beat for another 30 seconds until fully incorporated.
Third Step: ADD THE DRY INGREDIENTS
Now it’s time to incorporate the dry ingredients. You want to add the flour and cornstarch gradually to prevent the mixture from becoming too dense or lumpy.
- Sift the Dry Ingredients: Sift the all-purpose flour and cornstarch together to ensure there are no lumps. Sifting also helps to incorporate air into the dough, which contributes to the lightness of the cookies.
- Add the Dry Ingredients to the Wet Ingredients: Gradually add the sifted dry ingredients to the butter-sugar mixture. Mix on low speed until the dough begins to come together. Once it forms a dough, increase the speed slightly and mix for an additional 1-2 minutes until fully combined. The dough should be soft, smooth, and slightly fluffy.
Fourth Step: PIPE OR SCOOP THE DOUGH
Once your dough is ready, it’s time to shape the cookies. You can either pipe the dough onto the baking sheet for a more uniform look or simply scoop spoonfuls of dough for a rustic, homemade appearance.
- Prepare the Baking Sheet: Line a baking sheet with parchment paper or a silicone baking mat to prevent the cookies from sticking and to make cleanup easier.
- Pipe the Dough: If you’re piping the dough, use a large star tip or any piping tip of your choice. Place the dough into a piping bag and pipe small rosettes or swirls onto the baking sheet. You can make them as big or as small as you like, but about 1-inch wide is ideal for bite-sized cookies. If you don’t have a piping bag, you can also use a zip-top plastic bag with the corner cut off.
- Scoop the Dough: If you prefer a simpler method, use a spoon or cookie scoop to portion out dough. Roll the dough into balls and place them on the baking sheet, flattening them slightly with the back of the spoon or your fingers.
Fifth Step: BAKE THE COOKIES
Whipped shortbread cookies bake quickly, so keep an eye on them to avoid overbaking. The goal is to achieve a pale golden color, not a dark, browned one, so the texture remains light and tender.
- Preheat the Oven: Preheat your oven to 325°F (165°C). This lower temperature helps ensure the cookies bake evenly and don’t brown too much.
- Bake the Cookies: Place the baking sheet in the preheated oven and bake for 12-15 minutes, or until the cookies are just beginning to turn golden around the edges. The cookies should still look pale in the center. Be careful not to overbake them, as they can become dry.
- Cool on a Wire Rack: Once baked, remove the cookies from the oven and let them cool on the baking sheet for a few minutes before transferring them to a wire rack to cool completely.
Final Step: DECORATE AND ENJOY
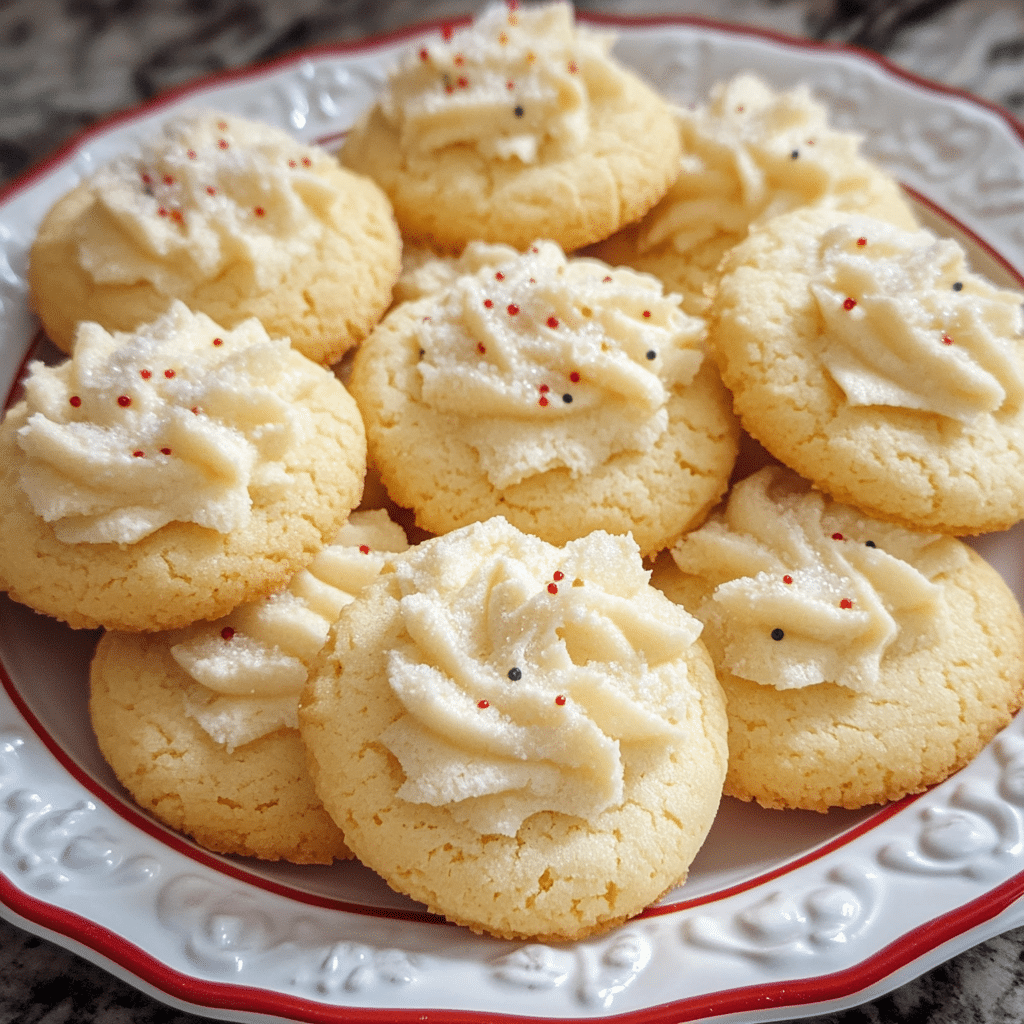
Once the cookies have cooled, you can decorate them with sprinkles, colored sugar, or even a dusting of powdered sugar for a festive touch. Whipped shortbread cookies are incredibly versatile, so feel free to get creative with your toppings.
- Decorate the Cookies: If you like, sprinkle a little colored sugar or regular granulated sugar on top of each cookie before baking, or add sprinkles after baking while the cookies are still slightly warm. You can also dip the cookies in melted chocolate for an extra indulgent treat.
- Serve and Store: Serve your freshly baked Whipped Shortbread Cookies at a holiday gathering, with tea, or as a sweet snack for yourself. Store any leftovers in an airtight container at room temperature for up to a week. These cookies also freeze well, so you can make them ahead of time and store them in the freezer for up to 3 months.
How to Serve Whipped Shortbread Cookies
Whipped Shortbread Cookies are perfect for a variety of occasions, from cozy tea parties to festive holiday gatherings. Here are some great ways to serve them:
1. With Tea or Coffee
Whipped shortbread cookies
pair beautifully with a cup of tea or coffee. Their light, buttery texture is the perfect complement to a warm beverage, making them a lovely snack for afternoon tea or coffee breaks.
2. As a Gift
Whipped shortbread cookies make a beautiful gift when packaged in a decorative tin or box. Their elegant appearance and melt-in-your-mouth texture will make anyone’s day a little sweeter.
3. On a Cookie Platter
Serve these cookies as part of a holiday cookie platter, alongside other festive treats like gingerbread, sugar cookies, or chocolate truffles. Their simple, buttery flavor will provide a nice balance to the richer cookies on the platter.
Recipe Variations
Although this classic recipe is simple and delicious on its own, there are plenty of ways to customize Whipped Shortbread Cookies to suit your taste.
1. Add Chocolate Chips
For a richer twist, try adding mini chocolate chips to the dough. This will add a sweet bite of chocolate to each cookie and create a lovely contrast with the buttery base.
2. Lemon or Almond Flavor
For a fresh twist on the traditional flavor, add lemon zest or almond extract to the dough. These flavors will complement the buttery shortbread and add a fragrant, aromatic element to the cookies.
3. Dipped in Chocolate
For an extra indulgence, dip the cooled cookies halfway into melted chocolate. Dark or milk chocolate works beautifully, and the addition of chocolate adds a luscious contrast to the buttery cookie.
Tips for Perfect Whipped Shortbread Cookies
- Use Room Temperature Butter: Softened butter is crucial for getting that light, airy texture. If your butter is too cold, the dough will be harder to mix, and the cookies won’t have that signature meltaway quality.
- Don’t Overmix: While it’s important to cream the butter and sugar until light and fluffy, be careful not to overmix the dough once the flour and cornstarch are added. Overmixing can make the cookies dense instead of light.
- Piping Tips: If you’re using a piping bag, opt for a large star tip or round tip for uniform cookies. If you’re new to piping, you can also simply spoon the dough onto the sheet and shape it with your hands.

Whipped Shortbread Cookies: Buttery, Melt-in-Your-Mouth Perfection
- Total Time: 30 minutes
Description
Whipped Shortbread Cookies are a melt-in-your-mouth treat that’s both delicate and buttery, with a crumbly texture that almost dissolves on your tongue. Unlike traditional shortbread, these cookies are made using a whipped method, where softened butter is creamed with sugar until light and airy, resulting in a texture that’s tender and airy rather than dense. A touch of vanilla extract enhances the buttery flavor, while the dough can be shaped into beautiful rounds, wedges, or even piped into intricate designs. These cookies are often topped with a sprinkle of colored sugar or a cherry for a festive touch, making them perfect for holiday cookie trays or tea parties. Simple yet elegant, Whipped Shortbread Cookies are a timeless favorite that showcases the magic of butter in its purest form.
Ingredients
- 4 bone-in, skin-on chicken thighs: Skin-on chicken thighs are perfect for this dish, as they develop a crispy, golden skin while remaining juicy and tender on the inside. You can use boneless thighs if preferred, though bone-in will provide more flavor.
- 1 lb (450g) fresh green beans: Trim the ends of the green beans and wash them thoroughly. Fresh green beans cook up perfectly in the skillet, becoming tender while retaining a bit of crispness.
- 4 tablespoons unsalted butter: Butter is the key to creating that rich, flavorful sauce that ties the whole dish together.
- 4 cloves garlic: Minced or finely chopped garlic adds depth and aromatic flavor to the butter sauce.
- 1 lemon: Both the zest and juice of the lemon are used in this dish to brighten up the flavors and provide a tangy contrast to the richness of the chicken and butter.
- Salt and pepper: To taste, salt and pepper are essential for seasoning both the chicken and green beans.
- 1 teaspoon dried thyme: Thyme works wonderfully with lemon and garlic, adding a fragrant, earthy note that complements the chicken.
- Fresh parsley: For garnish, fresh parsley adds a pop of color and a fresh herbal note to balance the richness of the dish.
- Optional: A pinch of red pepper flakes for a little heat, or a splash of chicken broth for extra sauce.
Instructions
First Step: PREPARE THE CHICKEN AND GREEN BEANS
Before you start cooking, it’s important to prepare your ingredients so everything comes together seamlessly.
- Prep the Chicken Thighs: Pat the chicken thighs dry with paper towels to remove any excess moisture. This helps the skin crisp up during cooking. Season both sides of the chicken with salt, pepper, and dried thyme. The seasoning adds flavor directly to the meat, and thyme complements the garlic and lemon beautifully.
- Trim the Green Beans: Trim the ends off the green beans and give them a quick rinse under cold water. If you have larger green beans, you may want to cut them into smaller pieces, but smaller, tender beans work best for this recipe.
Second Step: SEAR THE CHICKEN THIGHS
The next step is to sear the chicken thighs, which will lock in their juices and create a crispy, golden exterior.
- Heat the Skillet: Place a large, heavy-bottomed skillet (preferably cast-iron) over medium-high heat. Allow the skillet to get hot before adding any oil. This ensures the chicken will sear properly, giving it that beautiful golden-brown crust.
- Add Butter: Once the skillet is hot, add 2 tablespoons of butter. Let it melt, swirling it around the pan to coat the surface evenly. The butter adds flavor and richness to the chicken and creates a luscious base for the sauce.
- Sear the Chicken: Place the chicken thighs skin-side down in the skillet. Let them cook without moving them for about 6-7 minutes, or until the skin is golden brown and crispy. Once the skin is crisped up, flip the chicken and cook the other side for another 5-6 minutes, until the chicken is cooked through (internal temperature should reach 165°F or 75°C). Remove the chicken from the skillet and set aside.
Third Step: COOK THE GREEN BEANS
With the chicken cooked and resting, it’s time to cook the green beans in the same skillet, so they soak up all the delicious flavors left behind by the chicken.
- Sauté the Green Beans: In the same skillet, add a little more butter (about 1 tablespoon) and let it melt. Add the green beans and sauté them for about 5-7 minutes, or until they’re tender but still slightly crisp. Stir occasionally to ensure they cook evenly and don’t burn.
- Season the Green Beans: Season the green beans with salt, pepper, and a pinch of red pepper flakes (if using) for added flavor. The green beans will pick up all the savory bits of chicken and butter, giving them a rich, delicious flavor.
Fourth Step: MAKE THE LEMON GARLIC BUTTER SAUCE
Now, it’s time to make the lemon garlic butter sauce that will bring everything together. This sauce is the key to the dish’s bright, aromatic flavors.
- Add Garlic: Push the green beans to one side of the skillet, creating a space for the garlic. Add 2 tablespoons of butter to the empty side of the skillet, then add the minced garlic. Sauté the garlic for 1-2 minutes, stirring constantly, until fragrant but not browned. Be careful, as garlic can burn quickly.
- Add Lemon: Zest the lemon directly into the skillet and squeeze in the lemon juice. Stir to combine with the garlic and butter. The zest adds an aromatic, citrusy note, while the juice provides a fresh burst of acidity that balances the richness of the butter and chicken.
- Deglaze the Pan: If needed, add a splash of chicken broth to the skillet to deglaze the pan and lift any flavorful bits that may be stuck to the bottom. This will help create a flavorful sauce and keep everything from drying out.
Final Step: COMBINE AND SERVE
Now that everything is cooked, it’s time to bring it all together for the final presentation.
- Return the Chicken to the Skillet: Place the seared chicken thighs back into the skillet, skin-side up. Spoon some of the lemon garlic butter sauce over the chicken to coat it with the flavorful sauce.
- Garnish with Fresh Parsley: Sprinkle freshly chopped parsley over the dish for a pop of color and freshness. The parsley adds a herbaceous touch that complements the lemon and garlic perfectly.
- Serve Immediately: Serve the Lemon Garlic Butter Chicken Thighs and Green Beans Skillet hot, with the chicken thighs placed on top of the green beans, and extra sauce drizzled over everything. You can serve it as is, or pair it with mashed potatoes, rice, or a light salad.
- Prep Time: 5 minutes
- Cook Time: 25 minutes
Nutrition
- Calories: 350 kcal
- Fat: 22g
- Carbohydrates: 12g
- Protein: 28g
Conclusion
Whipped Shortbread Cookies are the perfect blend of simplicity, elegance, and deliciousness. With just a few ingredients, you can create a batch of buttery, melt-in-your-mouth treats that will be loved by everyone who tries them. Whether you’re serving them at a holiday gathering, as part of a tea party, or as a thoughtful homemade gift, these cookies are always a hit. Try this recipe today and discover just how easy and delightful homemade shortbread can be!


